INTRODUCTION
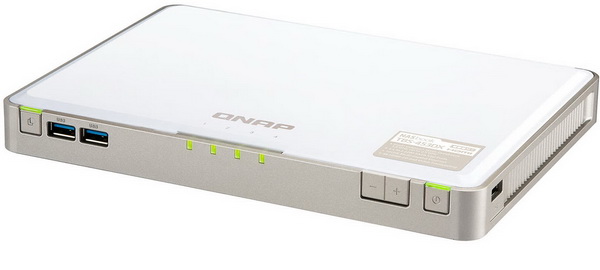
Even though centralized file sharing has always been of extreme importance for operations both in offices and businesses (small and large) it's very impressive to see that nowadays it's also something many home users have come to care much about. This is one of the reasons behind the why NAS (network attached storage) servers have found their way into countless homes all over the world. Still for home users NAS servers provide much more in terms of features than just file sharing since one can use them for a long list of things such as to host a website, download files (either directly or via torrent), record IP camera feeds (network video recording), playback media files, send/receive and filter emails, load different operating systems (virtualization) and much more. QNAP has been leading the NAS market for as far back as i can remember and today with us we have their second M.2 SATA based NAS to date, the TBS-453DX-8G.
QNAP Systems, Inc., headquartered in Taipei, Taiwan, provides a comprehensive range of cutting-edge Network-attached Storage (NAS) and video surveillance solutions based on the principles of usability, high security, and flexible scalability. QNAP offers quality NAS products for home and business users, providing solutions for storage, backup/snapshot, virtualization, teamwork, multimedia, and more. QNAP envisions NAS as being more than "simple storage", and has created many NAS-based innovations to encourage users to host and develop Internet of Things, artificial intelligence, and machine learning solutions on their QNAP NAS.
Thanks to its very compact size the original NASbook (TBS-453A) was an overall good concept by QNAP which didn't really take off mainly because of two things, first the factory mounted M.2 SATA drives only added up to 960GB (not nearly enough for serious use, plus cost) and it lacked 10G connectivity. For its successor QNAP replaced it's Intel Celeron N3150 quad-core 1.6GHz processor (2.08GHz boost) with the newer J4105 quad-core 1.5GHz model (2.5GHz boost) while its 4/8GB DDR3L 1600MHz SODIMM RAM was replaced with brand new 4/8GB DDR4L 2400MHz modules. Now even though the TBS-453DX also features four M.2 2280 SATA 6Gb/s slots, two 3.5mm microphone ports (dynamic microphones only) and a line out audio jack everything else has changed since this time over QNAP has equipped it with 4 USB 2.0 ports (instead of the single USB 2.0 one found in its predecessor), 3 USB 3.0 ports (4 USB 3.0 ports for its predecessor), single HDMI v2.0 port (2 ports in the previous model), single RJ45 Gigabit ethernet port (5 for its predecessor) and a single 10G BASE-T (10G/5G/2.5G/1G/100M) port. So, let's see if these changes are enough to place the TBS-453DX where its predecessor should had been, at least in terms of sales.
SPECIFICATIONS AND FEATURES

PACKAGING AND CONTENTS
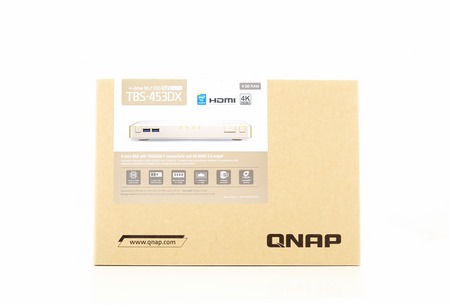
We received the TBS-453DX inside a plain cardboard box that has a sticker at the front/top which has a product picture on it along with its main specifications and features (even though QNAP did send us the 4G model they also send 8G (2x4GB) so we could do our tests more efficiently.
Several certification and warning logos are printed on the right side.
All of the barcodes are placed at the top of the box on several stickers.
A welcome/thank you message is the first thing you will see once you open the box.
The entire bundle is placed inside a second, thick cardboard box.
Along with the TBS-453DX and its power adapter and cord the bundle also contains two RJ45 cables, 4 black heatsinks, 12 thermal pads, bag with screws, warranty information paper and the quick installation guide.
THE TBS-453DX EXTERIOR
The 0.8Kg heavy TBS-453DX measures 230mm in width, 165mm in length/depth and 30mm in height.


 On the fascia we find the on-touch copy button, two USB 3.0 ports, M.2 SSD activity LEDs, decrease/increase volume buttons and the power on/off button and LED.

 The plastic enclosure seems to be perforated on both sides and on the right side we also find another USB 3.0 port.


 Moving at the rear of the enclosure we find a Kensington lock, reset button, 4 USB 2.0 ports, HDMI v2.0 output, 10G BASE-T port, Gigabit Ethernet port, audio line-out, two microphone ports and the DC-in.
The base is also partially perforated and has 4 round rubber feet.


Just like with its predecessor these cover the 4 screws holding the base onto the enclosure.
THE TBS-453DX INTERIOR
Here we see the interior of the TBS-453DX.
A large blower fan is located just over the Intel J4105 quad-core CPU.
As mentioned earlier even though our sample arrived with two 2GB DDR4L 2400MHz modules by ADATA we replaced those with two 4GB modules.


For this review we got a total of 4 UV500 120GB M.2 SATA 2280 drives by Kingston.
Mounting the black heatsinks by using the thermal pads is the last step.
SETUP
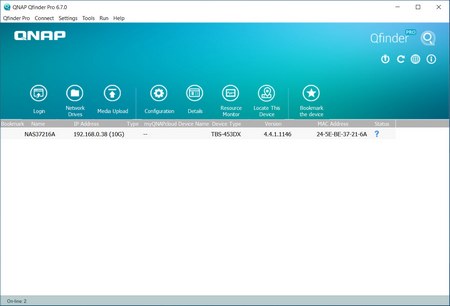
As always, we started setting up the NAS by using the QFinder Pro software which can be downloaded by the official QNAP support page.


Once the setup procedure starts you will need to enter a new name and password for the NAS, set the date and time, adjust the network settings and select whether or not the NAS will be connected to Linux and MAC systems (aside Windows).


The entire procedure shouldn't take but a few minutes to complete.
QTS 4.4.1 PART 1
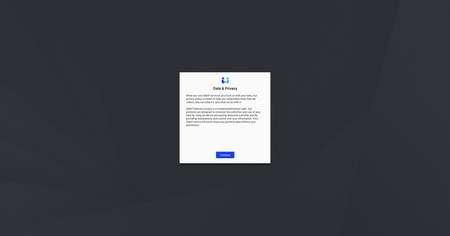
Due to the latest European directive manufacturers like QNAP have placed data and privacy disclaimers like the one seen above.
The typical license popup informs you that you can purchase extra software licenses.


As always you can access the dashboard along with several other drop down menus from the top left corner.
The Qboost resource monitor can be accessed by clicking on the robot located on the lower left corner.


Before we continue, we should create a volume from within the storage and snapshots tab and to do that we need to choose between static, thick and thin volumes.


For our tests we primarily used a static volume in RAID 0/5 mode for maximum possible performance.


From within the storage and snapshots tab you can also check the health of the M.2 SATA drives, use the cache acceleration feature (not much sense to use it with the TBS-453DX) and use the SSD profiling tool to improve the performance of the installed SSDs.
QTS 4.4.1 PART 2


Typically via the System Settings menu you can set the name for the server, adjust time, set a password, change the codepage, adjust the login screen, specify your location, adjust the network IP, adjust the power options, set notifications, enable/disable various security settings, configure the speed of the fan, audio alerts and LED intensity, backup and restore NAS data, configure external devices, check hardware information, access the detailed resource monitor, check logs, check the already installed and add more licenses and needless to say perform firmware updates.


Adding new users, assigning them to groups, setup shared folders, set specific quotas for each user and configure domain security and controller are all possible from within the Privilege tab.


From within the Network & Virtual Switch menu you will find network-related options including TCP-IP server settings, available ports and connections, Wireless USB settings, DDNS configuration and more.


From the applications tab you can install the HybridDesk Station apps (for HDMI access) and enable/disable most of the essential apps of the NAS such as Transcoding of media files, DLNA, iTunes and Web servers, Anti-Virus and much more.


You can also check the currently installed apps and install even more (there's a total of 113 apps currently for the TBS-453DX).
The File Station app (v5) allows you to access files in the NAS (still mapping network locations in Windows is a lot easier and faster).
The Video Station app allows playback of media files (unfortunately it doesn’t support some very popular media extensions like for example MKV).
The download station is a handy tool which you can use to download files either via Torrent or direct HTTP/FTP download.
SNAPSHOTS

Snapshots are a quick way to ensure that your entire system gets backed up at all times thus preventing data loss. In order to make use of the Snapshots system you first need to create a storage pool with the drives you have installed in the NAS (for this we used two M.2 SATA drives).


Of course, you can also choose to encrypt the storage pool to further protect your data against unauthorized access.
You also need to set an alert threshold or keep the recommended one (80% seems too low however).


After that you can create a thick volume which you can use for system snapshots.


Here you can also set an alert threshold and encrypt the volume if you want.
After that is over with you can take and manage snapshots either by clicking on the top right button seen above or by going into the snapshots overview.
You can put your very own tag/name on each snapshot and you can make sure it never gets deleted to make room for others by clicking on the required box.


As you can see from the above pictures in order to provide maximum protection for your sensitive data the snapshot function adapts to include new data as time goes by.
QVR PRO 1.3
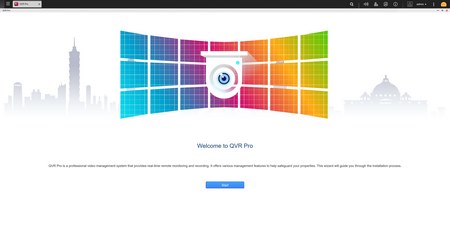
The QVR Pro app is probably the most advanced network video recording app out there at this time and so its setup/installation also requires a bit of input from us.
As you can see the app has some perquisites which it checks for prior to proceeding with the installation.
Now the SSD Raid group perquisite is not really needed (you can proceed with the installation) but using various RAID modes does provide better protection for your recordings.


The app also takes the date and time zone from QTS but if you want you can change that.
QVR Pro has a main screen that is very similar to that of the QTS.


Giving the app some space for recordings is the very first step and so head into the recording storage tab to set the desired amount and of course the desired overwrite trigger threshold.
In order to ensure that nothing happens to your recordings you can choose to also store them in a spare volume (even more space is required however).
After the space is configured you can still expand it from the actions area.
Adding a camera is the next obvious step and that can be done from the Camera Settings tab.
Unfortunately, since the TBS-453DX was connected to our local network via a 10G switch it was unable to detect any of the cameras automatically.


In such cases you need to manually enter the details of the camera such as manufacturer, model, IP address, user name and password.
Once you do that the app will ask you to modify the settings of the camera.


That includes enabling both normal and event recording on 1 or 2 streams and of course set the video codec, resolution, frame rate, bitrate and image quality.
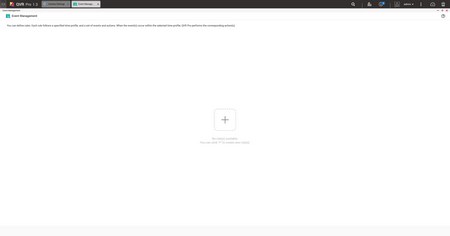
QVR Pro also gives you the ability to add various events for your cameras from the event manager.
To do that just add a new one, choose the days you want it to be active and press next.

You can start configuring the even rules from the edit button seen above.
There are many events one can add including motion detection, alarm input (if supported by your camera), audio detection (again if supported by your camera) and more (aside the motion detection event which can be used with every camera model almost every other event needs to be specifically supported by your camera).
You also need to link an action to the event so you can choose the camera to start recording and much more (again some actions like alarm output need to be supported by your camera).

 Once you've finished with the event (if) and the action (then) just press the next button to save it.
By default, QVR Pro has a licence for a total of 8 IP cameras (more than enough even for us) but if that number is not enough for you then you can purchase additional licence keys.
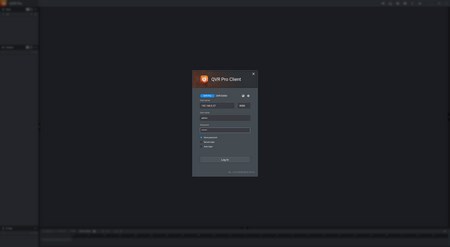
The QVR Pro client is a Windows/MAC/Ubuntu/Android/iOS software which allows you to access the QVR Pro feeds without accessing the NAS. To download it just click on (or scan) the preferred version seen above.
After that just enter IP address, port, user name and password of your IP camera to gain access.
You can check both live and recorded feeds from the QVR Pro client and of course split the screen to include all your cameras (if you have more than one that is).
TESTING METHODOLOGY
Originally, we had decided that since some of the NAS servers/devices we've tested in the past are no longer in our possession (naturally) we would keep performing the exact same testing methodology we did in the past for as long as possible in order to provide accurate comparison results. However, since our real-life tests are not enough for some people, we also decided to throw in ATTO V2.47 and Crystal Disk Mark V3.0.4 to cover the more demanding users. However as always we will be using a single Seagate Constellation ES.3 4TB SATA III and up to 10 Seagate IronWolf 12TB SATA III hard disk drives with 3.5” compatible units (we switched to 12TB models for RAID tests since August 2018 – due to high workloads the performance of previous drives had started to deteriorate) and up to two (for now) Enterprise Capacity 2.5 HDD V3 2TB SATA III HDDs with 2.5” compatible units to perform several upload/download tests with 10.9GB (Single) and 40,8GB (RAID) files. Tests are repeated a total of 4 times after which we record the average numbers (from the 4 peak ones) into our charts. The network device used for 1GbE tests is the same Netgear D7800 VDSL Modem/Router we’ve been using lately when performing tests on NAS servers.
* Since the 25th of June 2015 for 10GbE tests we’ll be using a Netgear ProSafe XS712T 10G Smart Switch and an Intel XT540-AT2 10GbE PCIe card (10GbE compatible NAS cards will be provided from each company and stated in each review).
** In May 2019 we also introduced TB3 (Thunderbolt 3) tests using our latest test rig (X299 AORUS GAMING 9 / INTEL CORE I9 7980XE / 64GB DDR4-3200 / GC-ALPINE RIDGE V2.0). For TB3 tests we'll be using ATTO V4.00.02F, Crystal Disk Mark V6.0.2 and Passmark Performance Test V9.1.
*** As of October 2019, we'll also be using the QNAP QSW-804-4C Ethernet Switch for 2.5/5G NAS reviews. The benchmarking programs used will be ATTO V4.01.0F1, Crystal Disk Mark V6.0.2 and several real-world upload/download tests with 30GB (Single Drive) and 60GB (Raid) files.
TEST RESULTS – 1GBE
SINGLE


 RAID
RAID


TEST RESULTS – 10GBE
SINGLE


 RAID
RAID


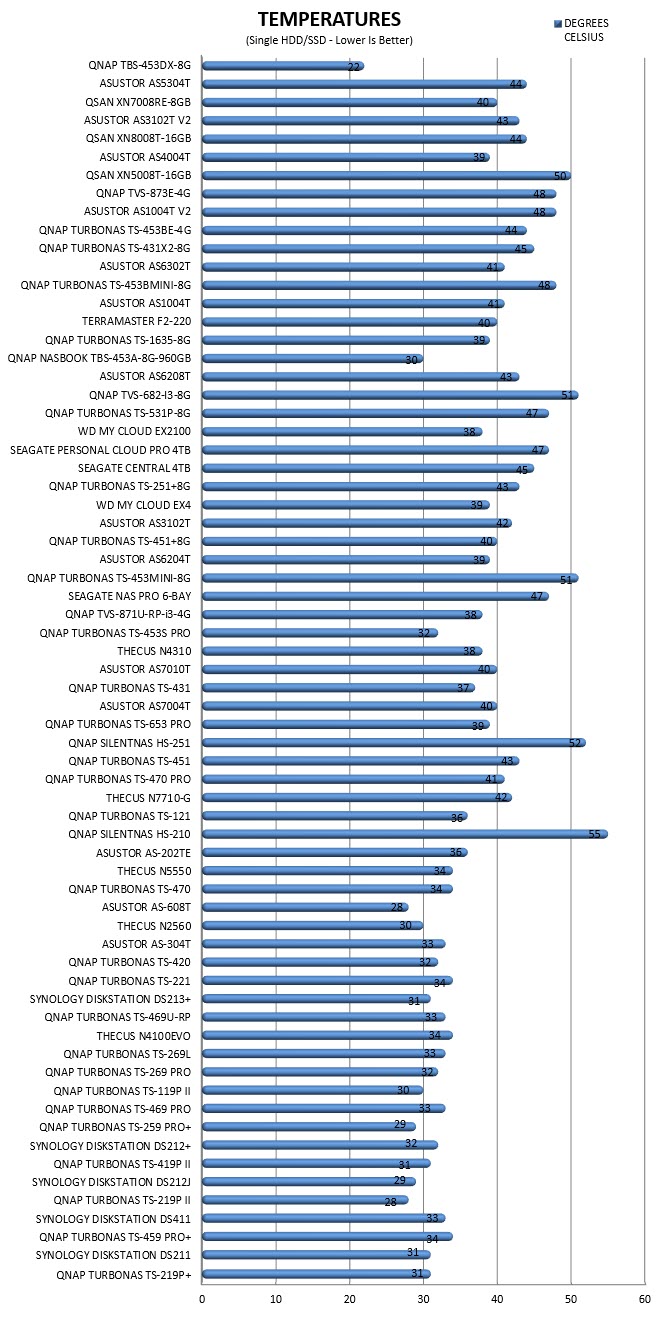
TEST RESULTS – TEMPERATURES / CONSUMPTION / NOISE


CONCLUSION

First of all, I need to point out that this review has taken a very, very long time to complete. Initially it was my mistake actually since I had gathered 4 PCIe M.2 SSDs only to find out when it arrived that this model was based on M.2 SATA ones just like its predecessor (so getting 4 M.2 SATA models did take some time). Afterwards we found out that 4GB or RAM just wasn’t enough for all of our tests so we had to wait for QNAP to send us an 8GB kit. Basically, this review took more months to complete than I care to even count and it’s certainly not something I’d like to repeat. With that out of the way just like with its predecessor the strongest selling point of the TBS-453DX NASbook is of course its compact size and I seriously doubt that anyone out there can say that there’s something better at that size and weight currently in the market. Still even though the TBS-453DX does offer improved performance levels compared to its predecessor (largely because of the new CPU, RAM and the addition of the 10GbE port - QNAP went with the cost effective AQC107 card by Aquantia) the M.2 SATA drives are clearly not as versatile as regular mechanical drives (price/capacity ratio and available capacities) and this narrows down QNAP’s targets audience by a lot. Overall however we were pleased with its performance levels (however we think that support for M.2 PCIe models would be a better match since they would max-out its 10GbE connectivity), power consumption, bundle and of course the available apps of the QTS OS (two of which we tried to cover extensively today).
Right now, the TBS-453DX-8G NASbook by QNAP retails for USD661.48 inside the USA (Amazon.com) and for 725.33Euros inside the EU (Amazon.de) a price tag which may reflect the size and technologies squeezed inside the enclosure of the TBS-453DX-8G. However, since at the same money or less you can easily find something just as good (or even better) but with regular 3.5” bays it all comes down to whether or not you need a very compact NAS which you can take along with you. So, if the answer to that question is yes then the TBS-453DX-8G comes highly recommended by us and for that it also gets our Golden Award.

PROS
- Build Quality
- Size / Weight
- Intel Celeron J4105 quad-core 1.5GHz processor (2.5GHz Boost)
- Very Good Performance
- Power Consumption / Noise Levels / Temperatures
- Available Features / Apps
- Up To 8GB DDR4L RAM 2400MHz
- 10GbE Ethernet Port (Aquantia AQC107)
- 4 M.2 SATA Slots
- 3 USB 3.0 Ports / 4 USB 2.0 Ports
- HDMI v2.0 Output
- Speaker (Audible Warnings) / Volume Buttons
- Dual 3.5mm Jacks (Karaoke Support)
- JBOD, Single, RAID 0/1/5/6/10/5 + Hot Spare & Global Hot Spare
- QNAP QTS
- Android / iOS Apps
CONS
- Price Including M.2 SATA SSDs (For Some)
- Limited Total Storage Capacity (Compared To HDD Based Models)

 O-Sense












.png)

