O-Sense

.jpg)


DISPLAY MENUS
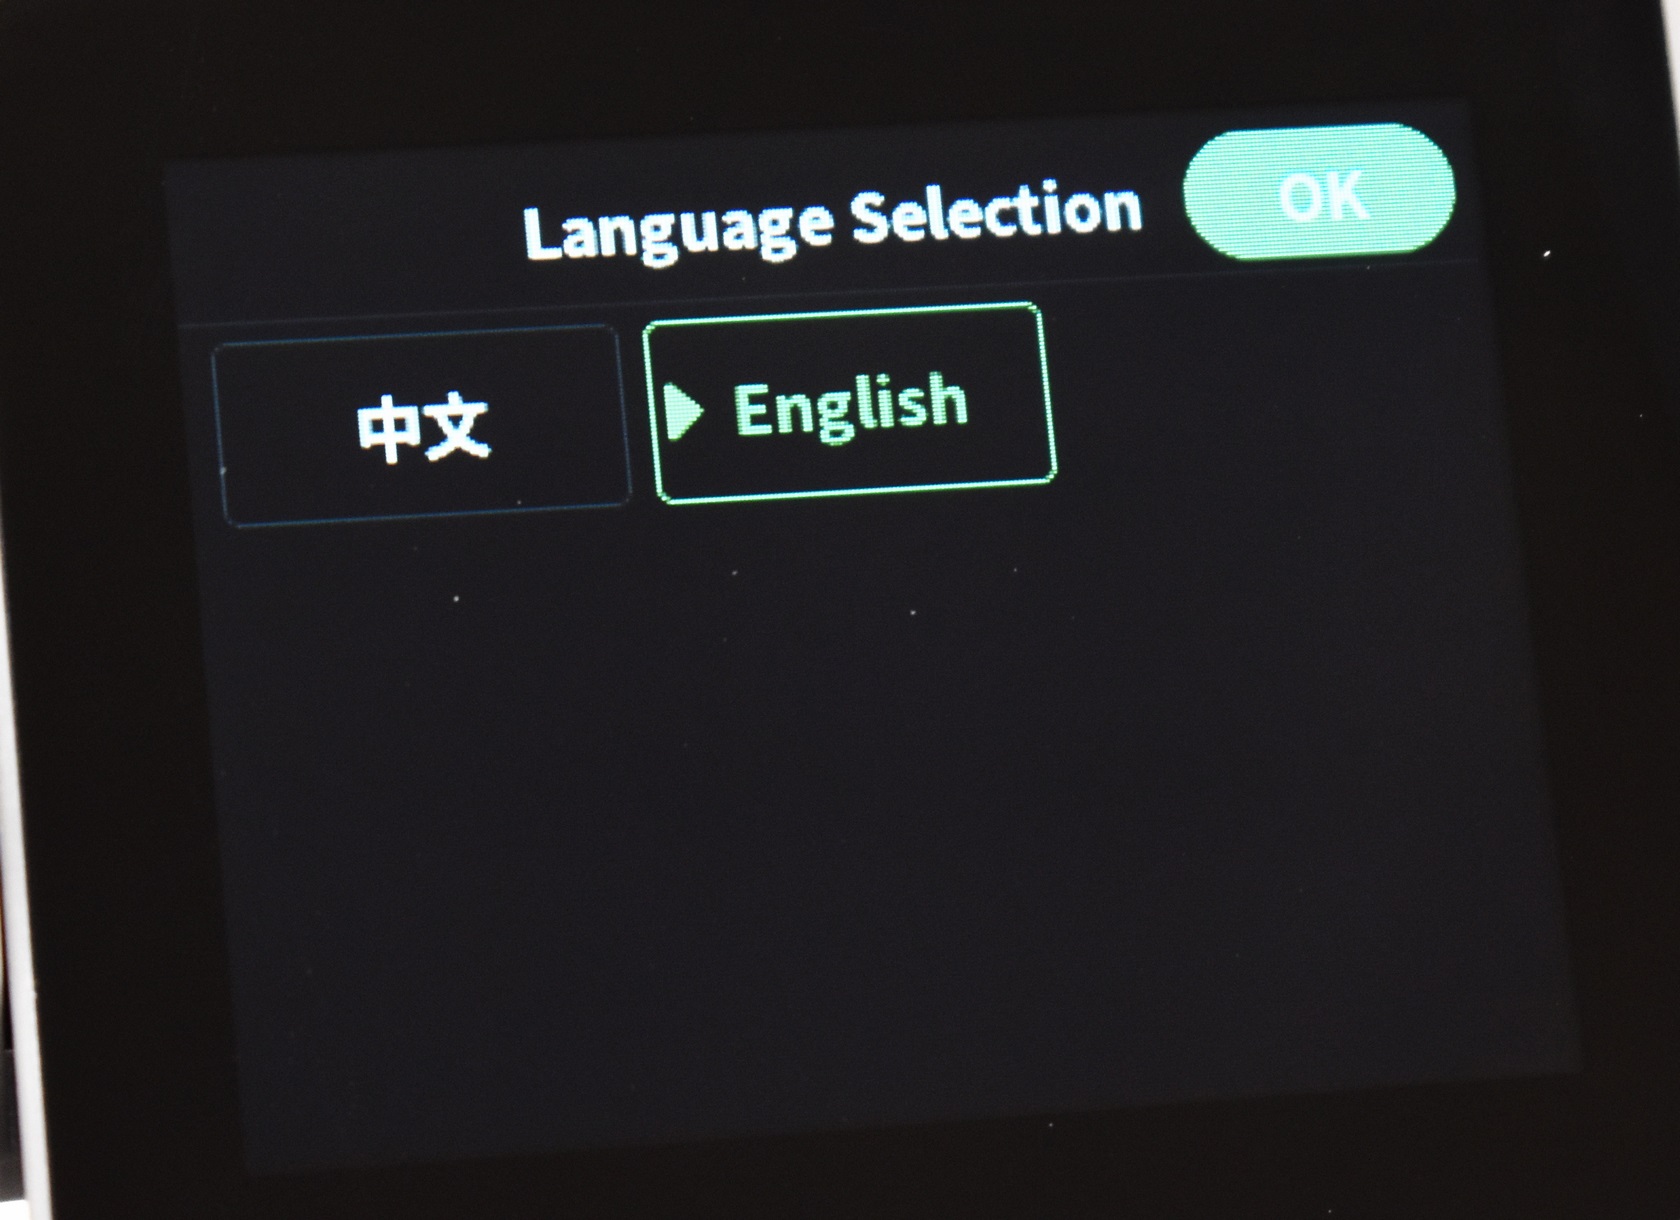
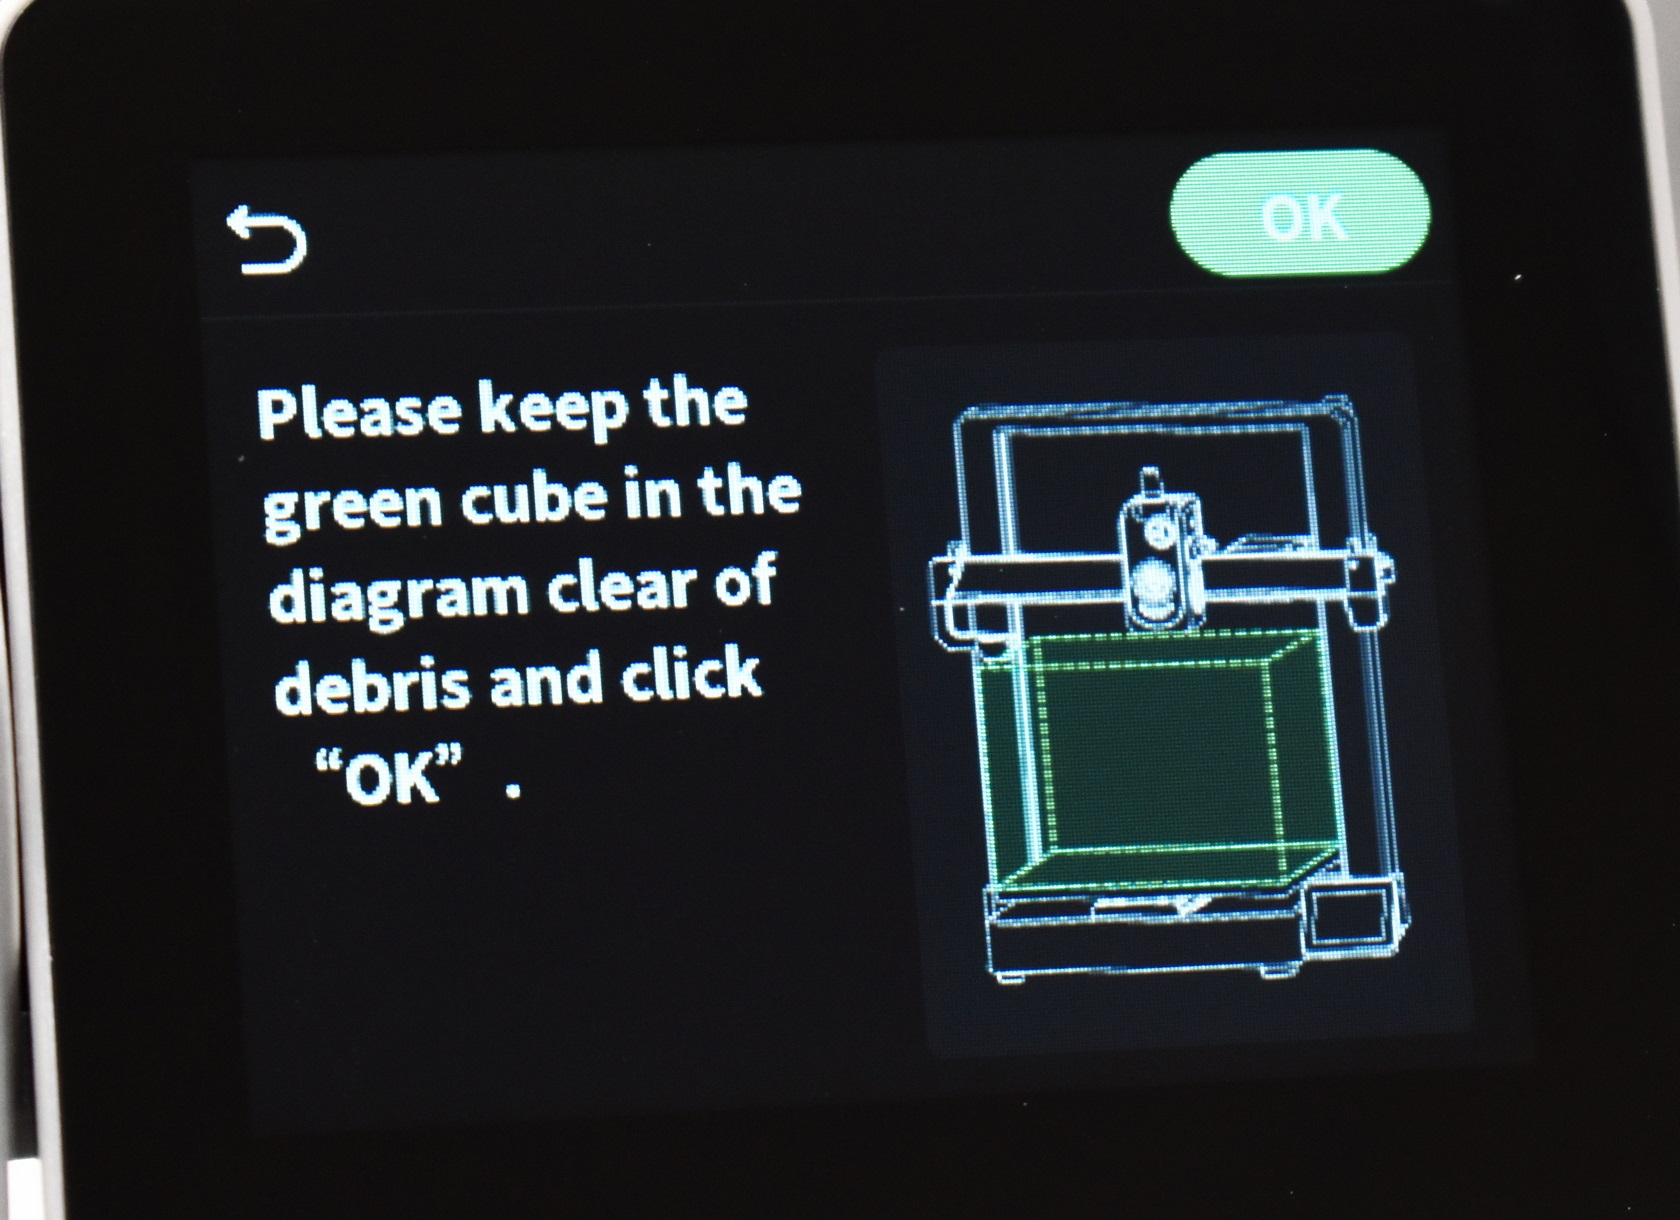
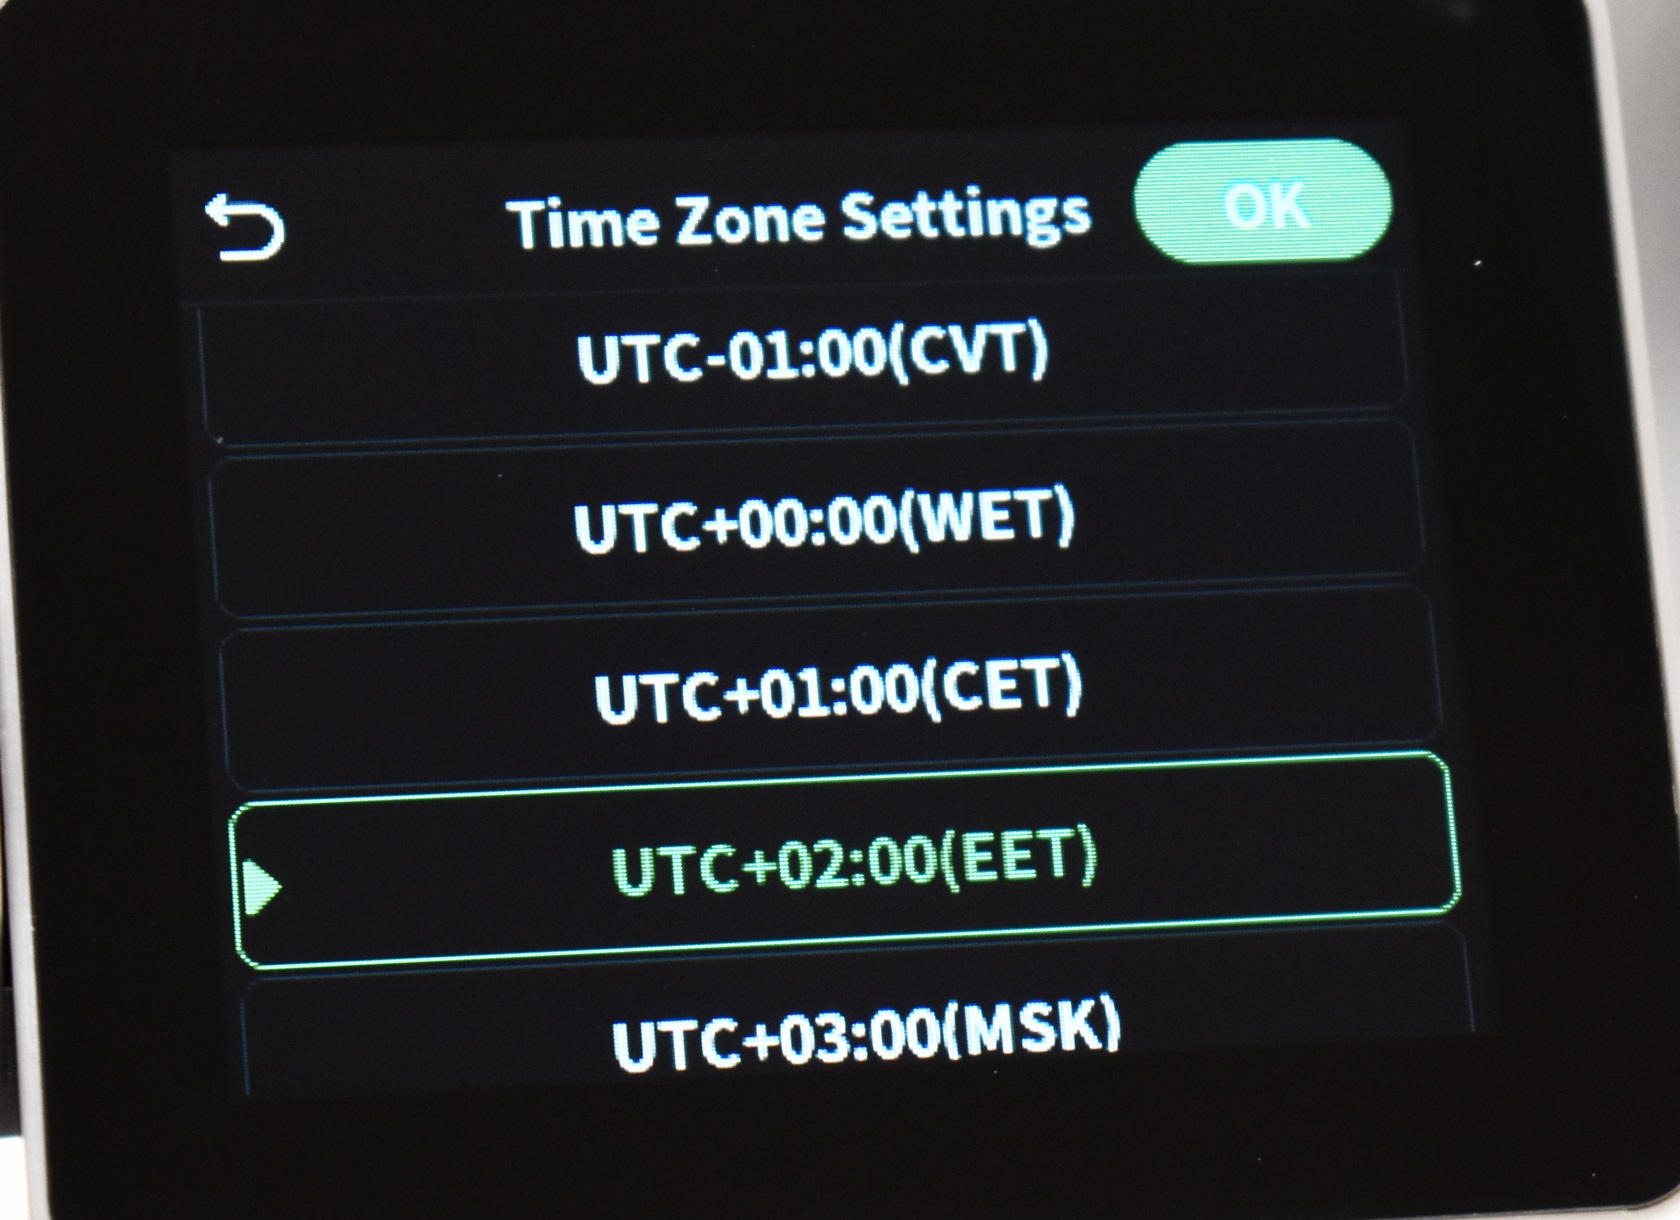
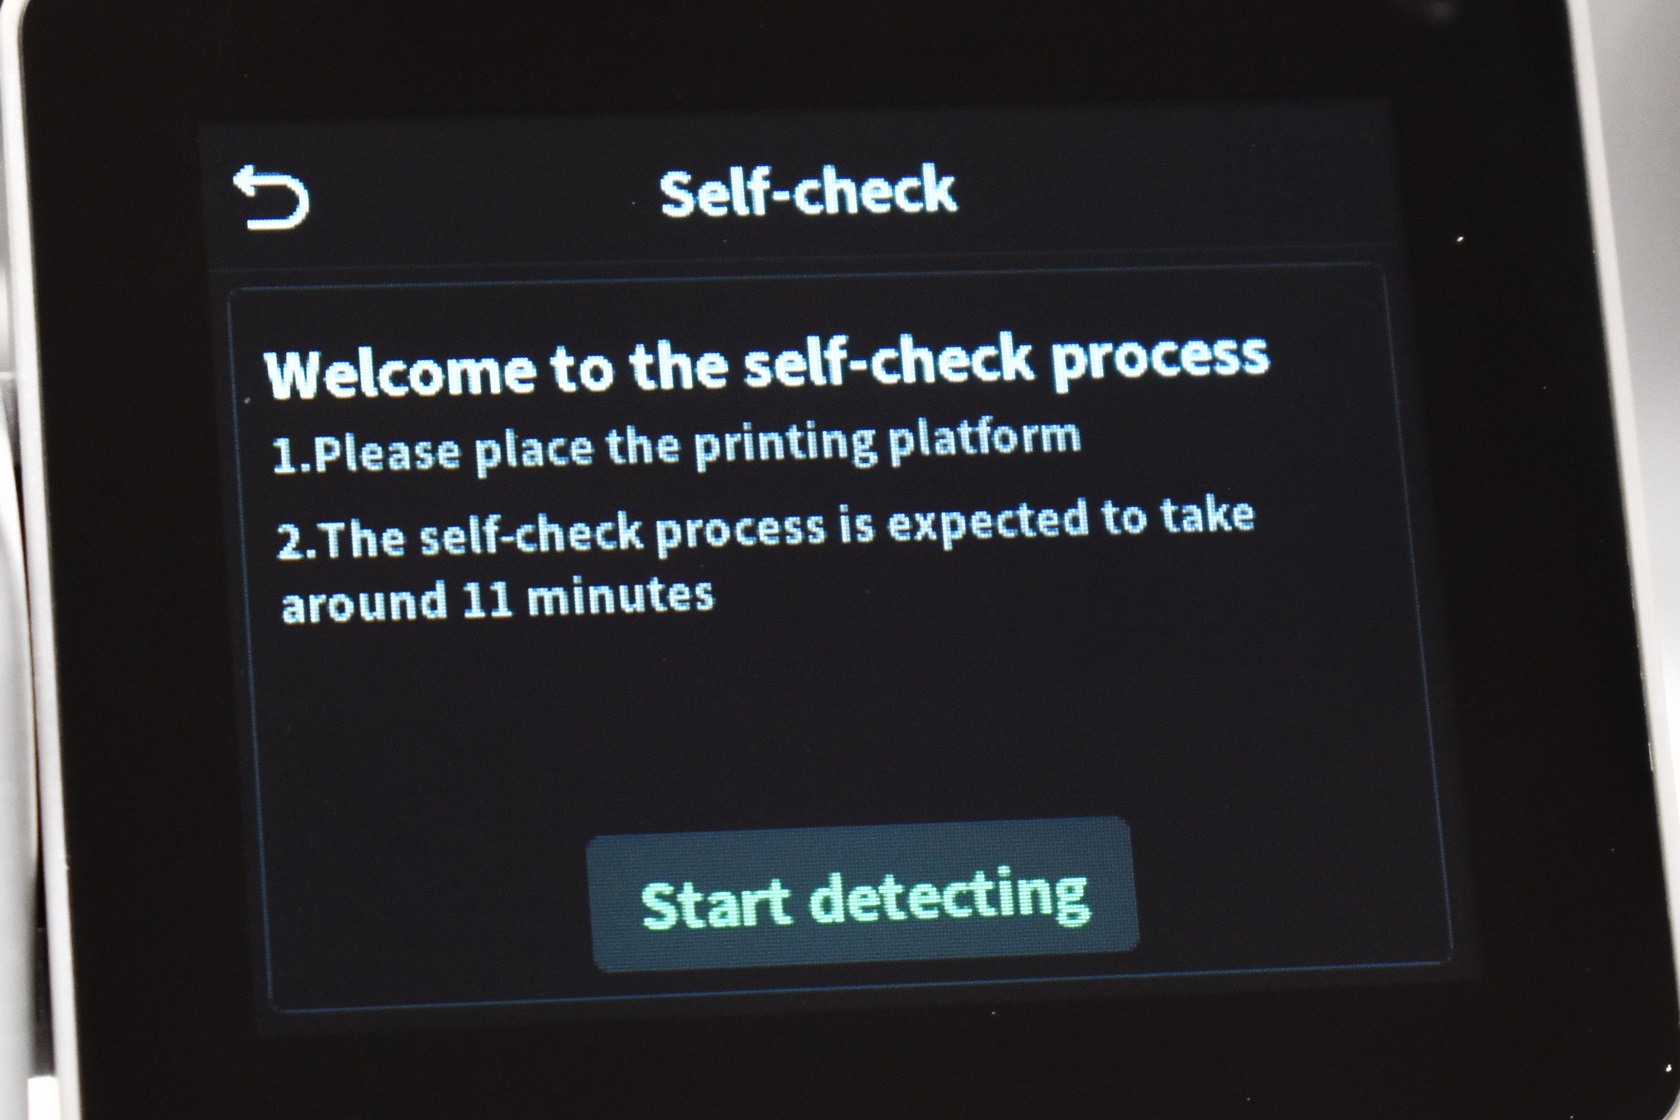
As with every 3D printer out there once you power the Hi model for the first time you will need to choose the language, connect it to the Internet via WiFi, set the time zone and wait for it to complete a self-check.
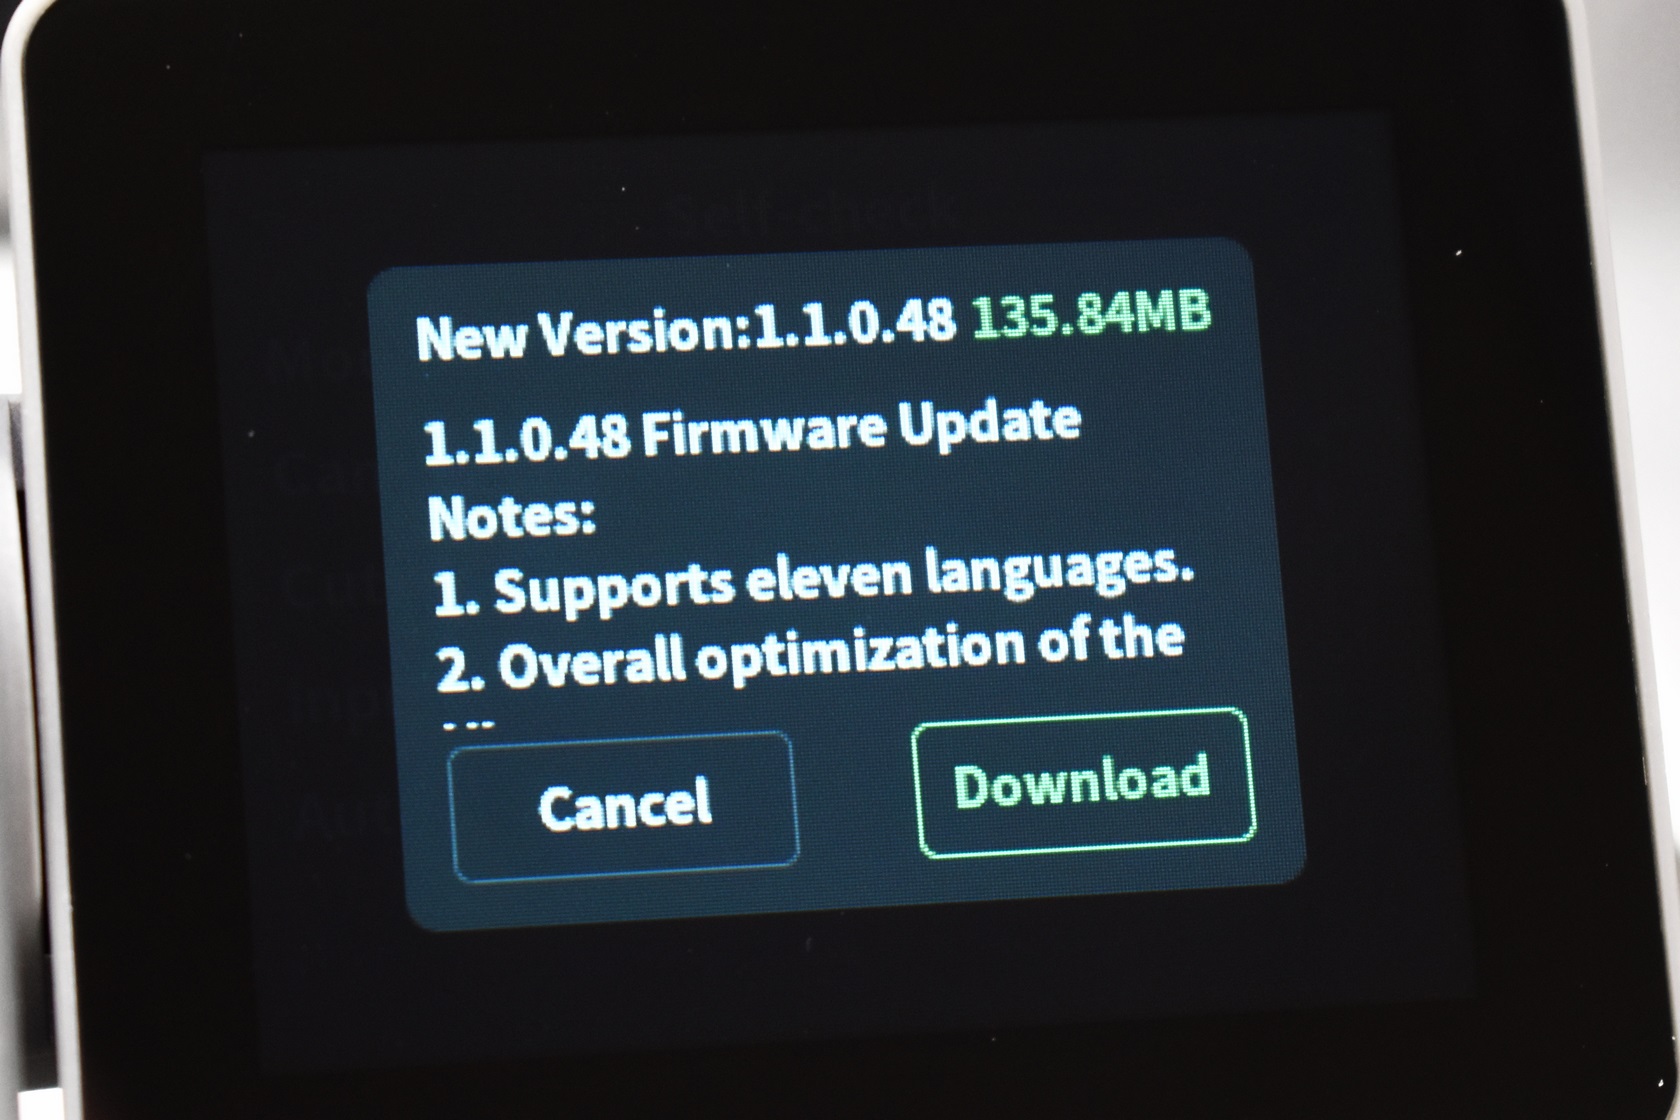
Needless to say, the printer will also check for firmware updates and in my case v1.1.0.48 was available.
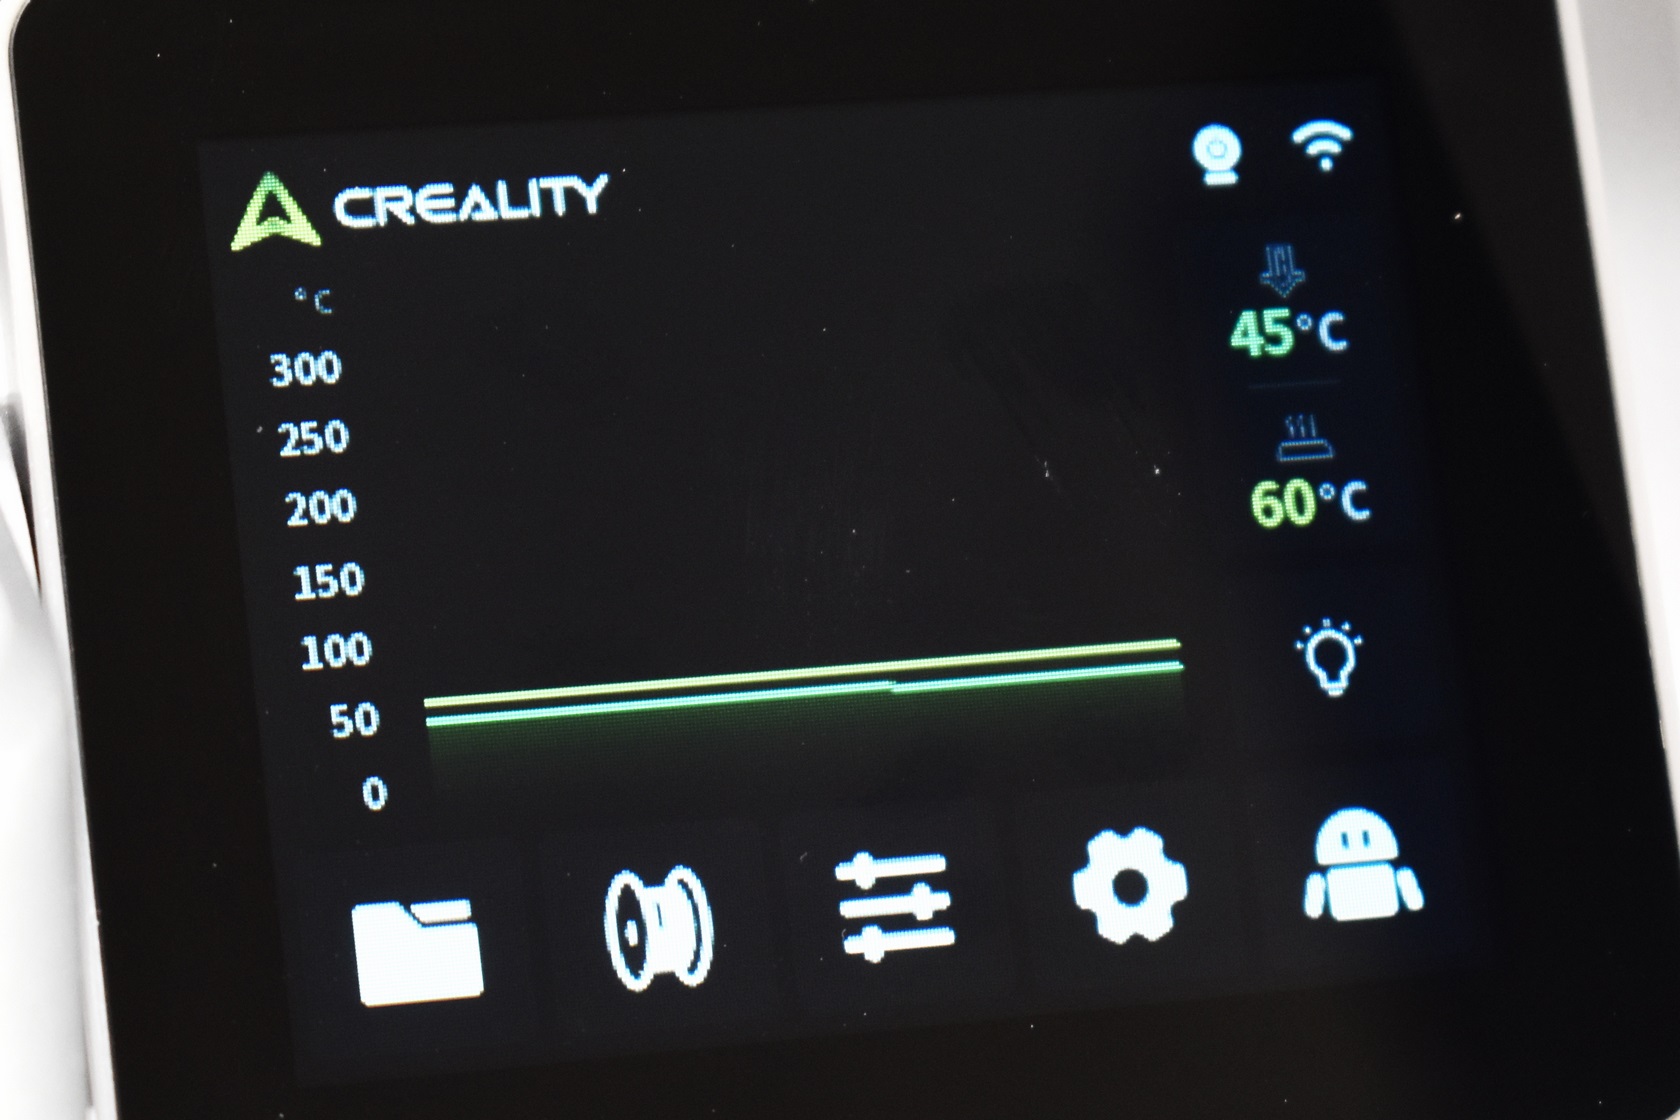
As with past models the main tab informs you of the current temperatures (printing platform and extruder) and whether or not the camera and WiFi are on.
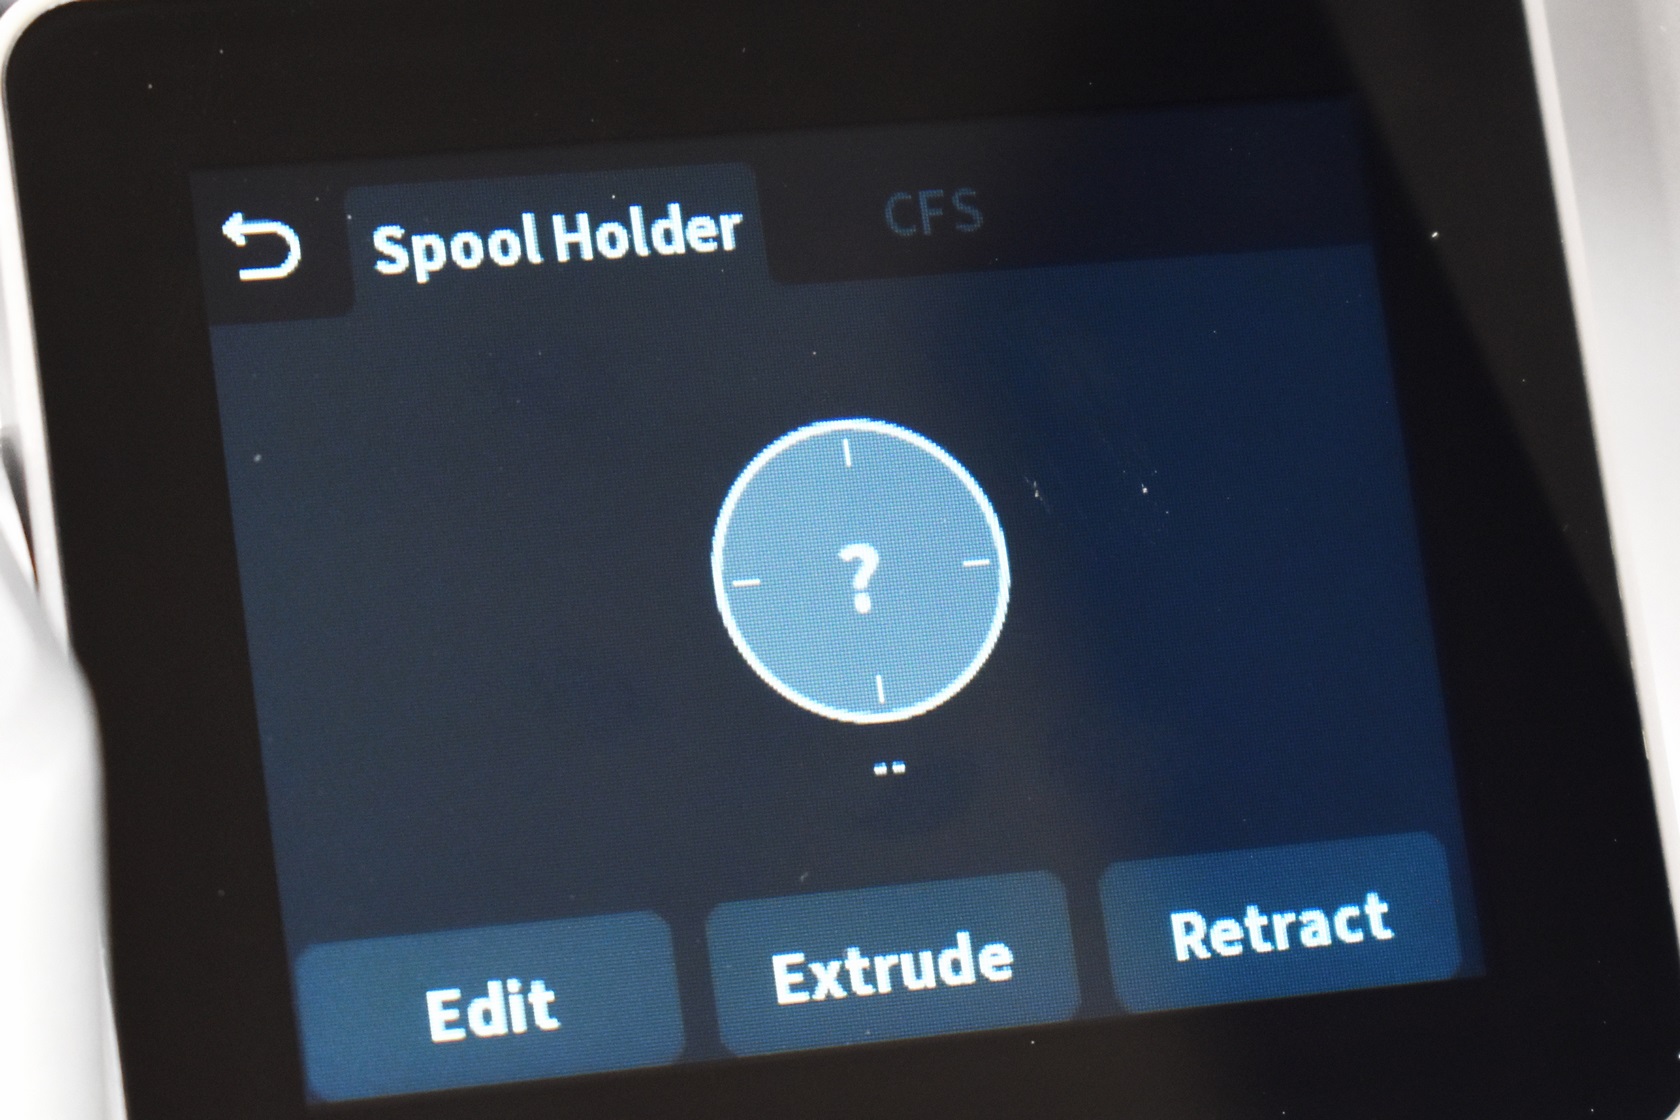
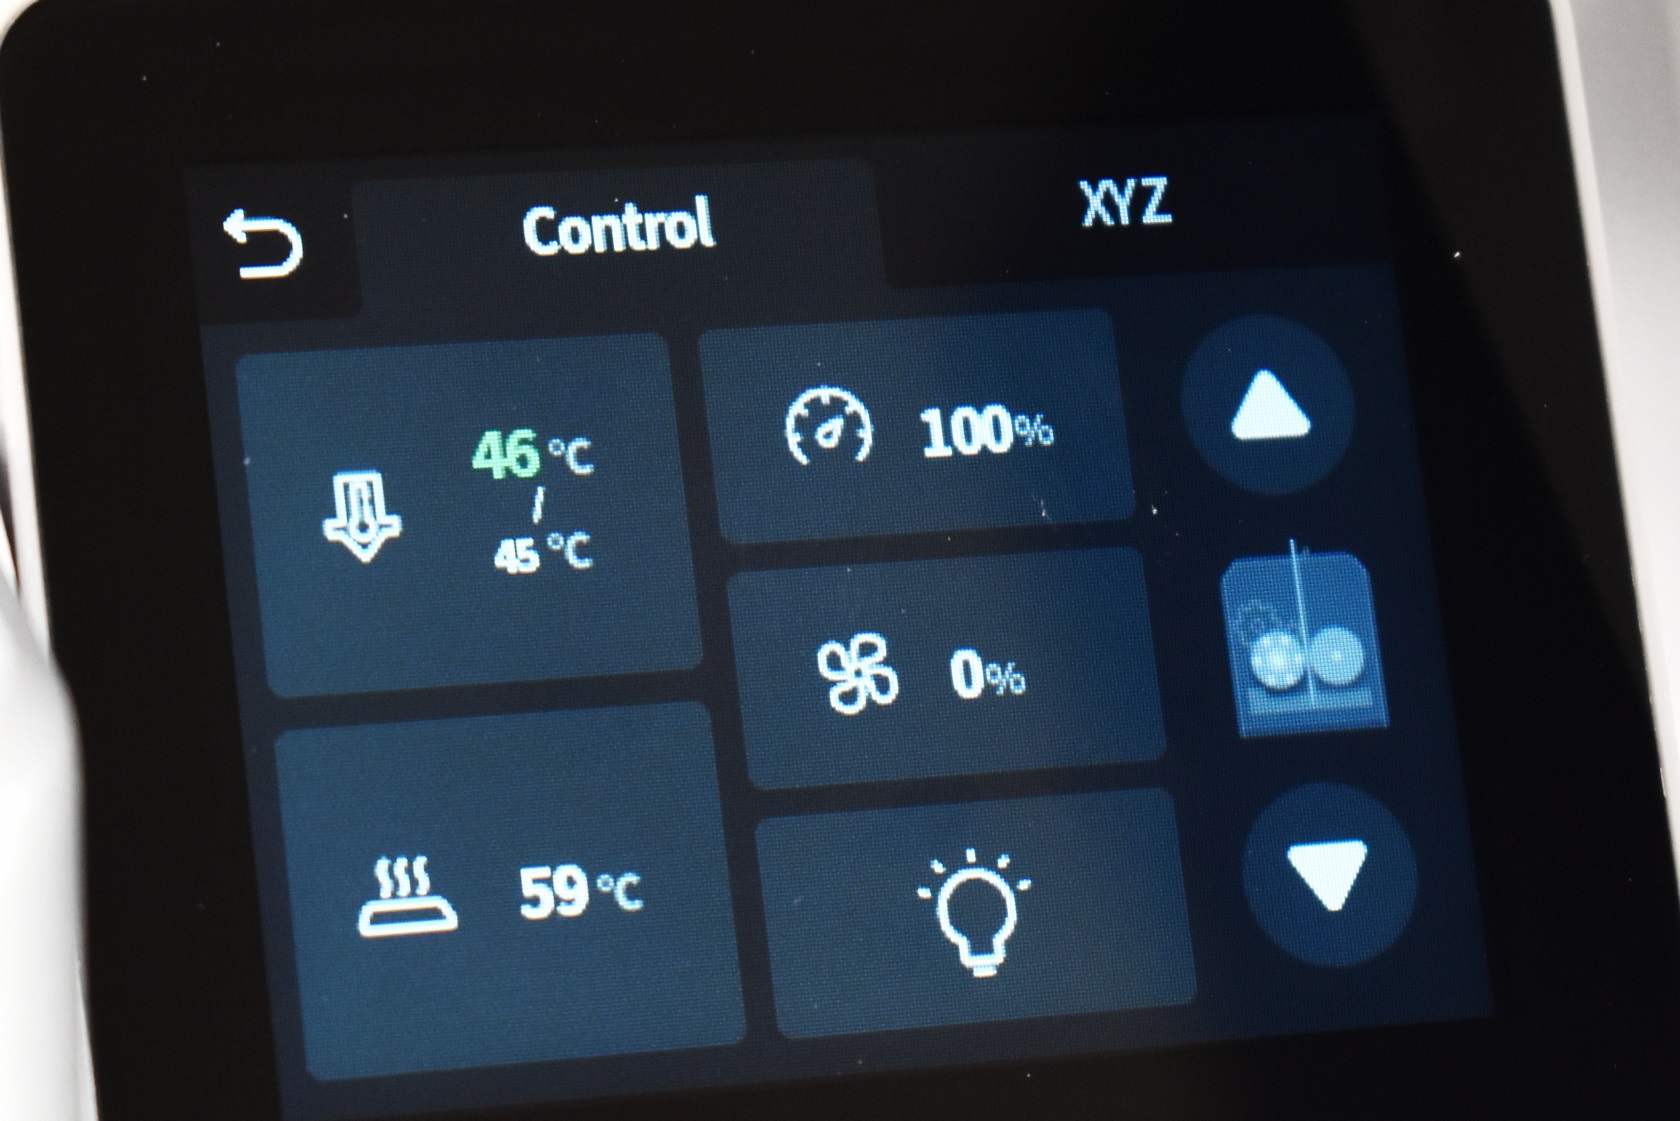
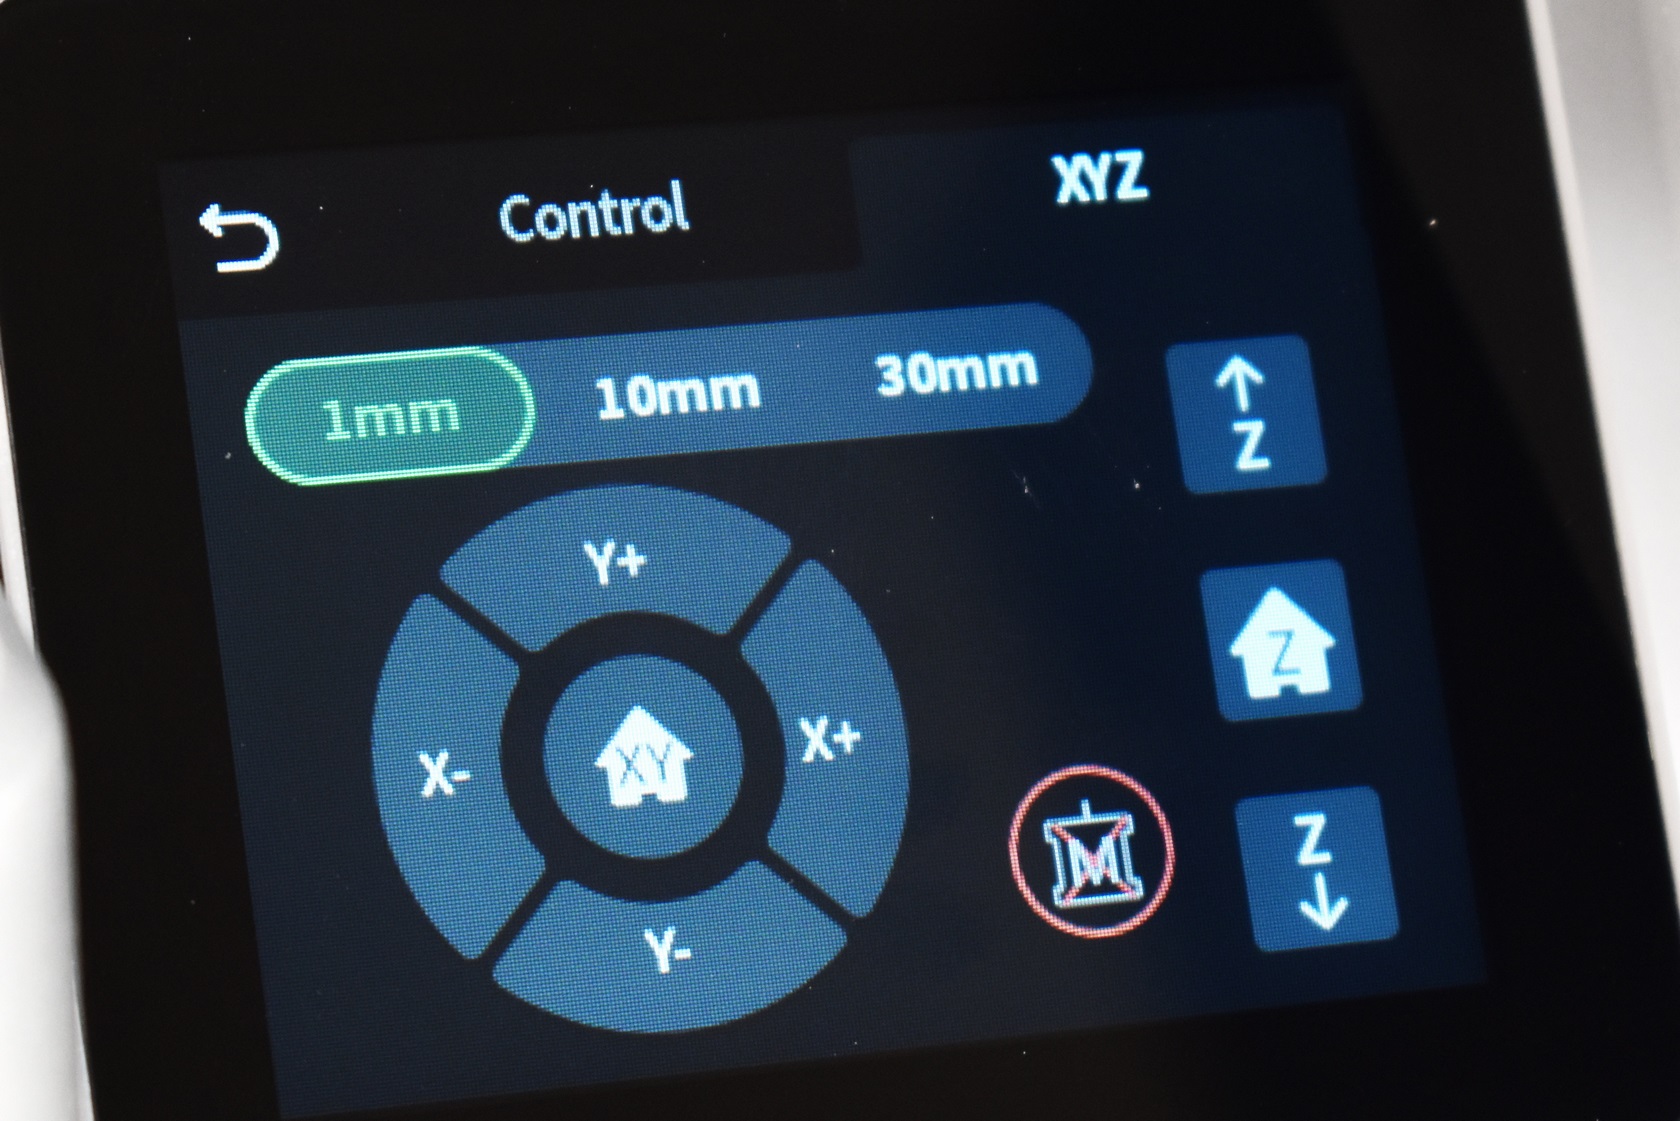
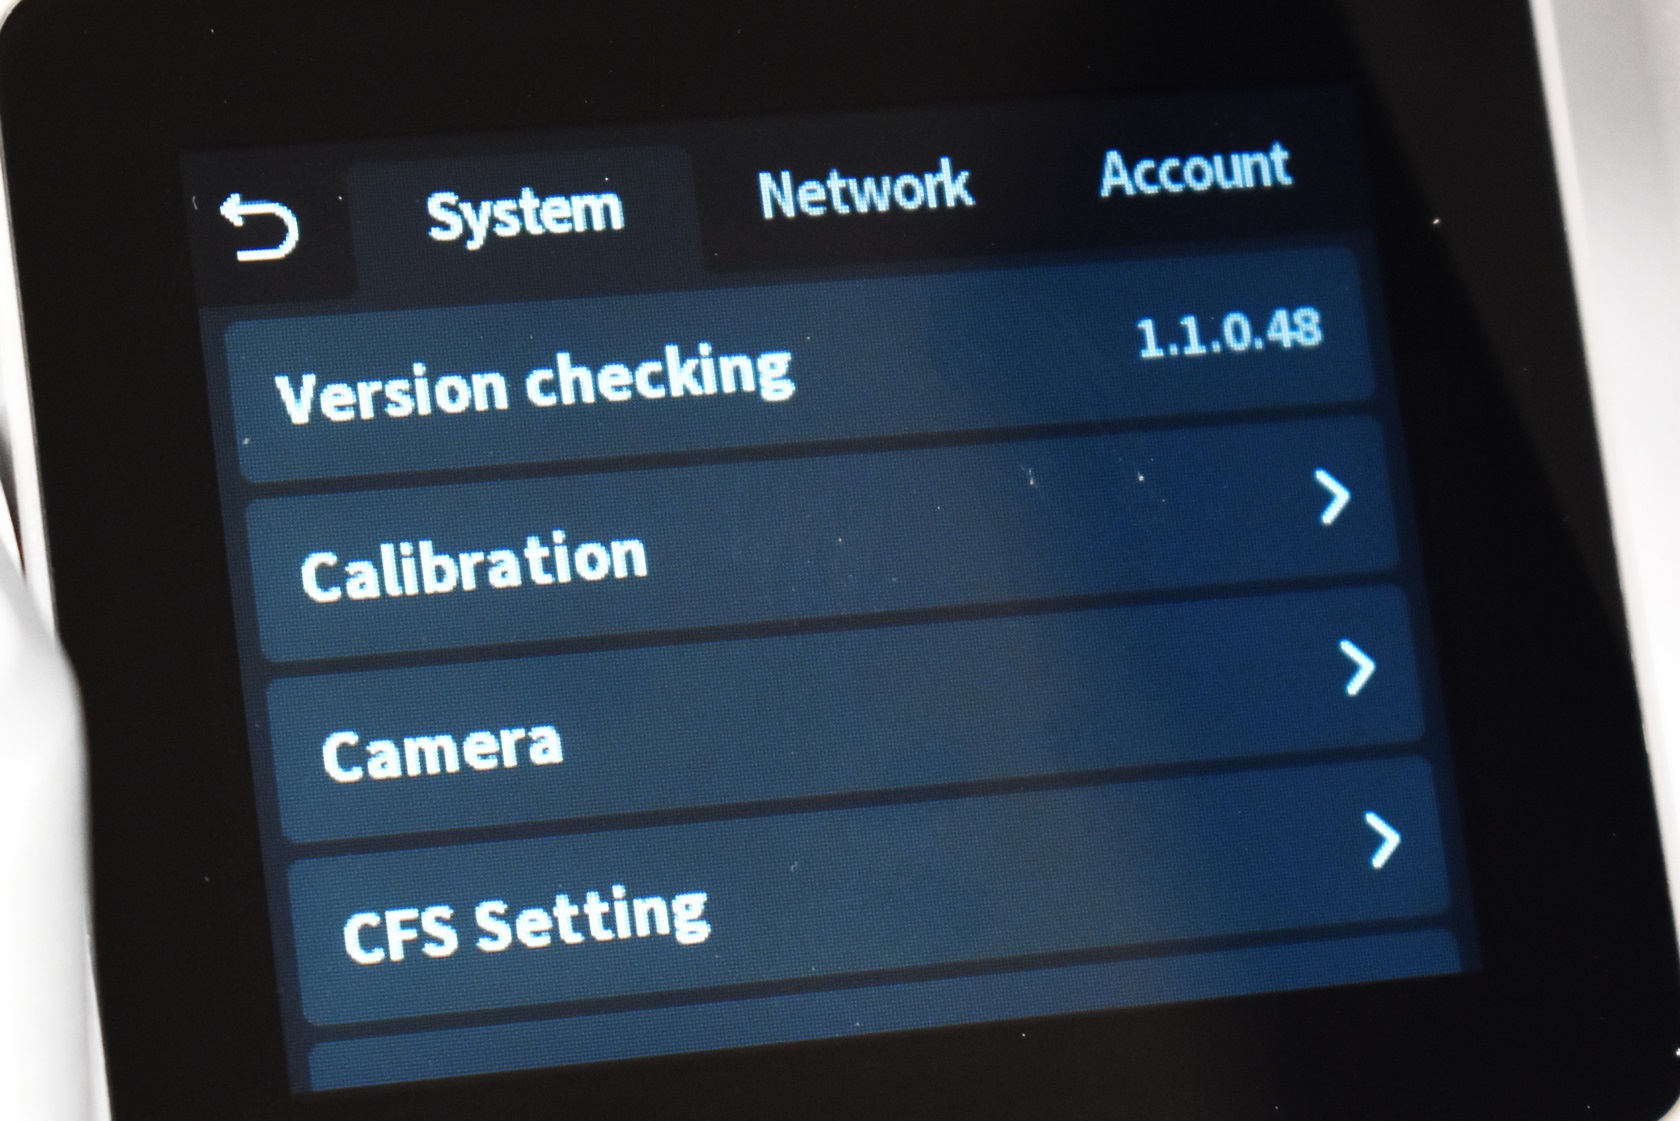
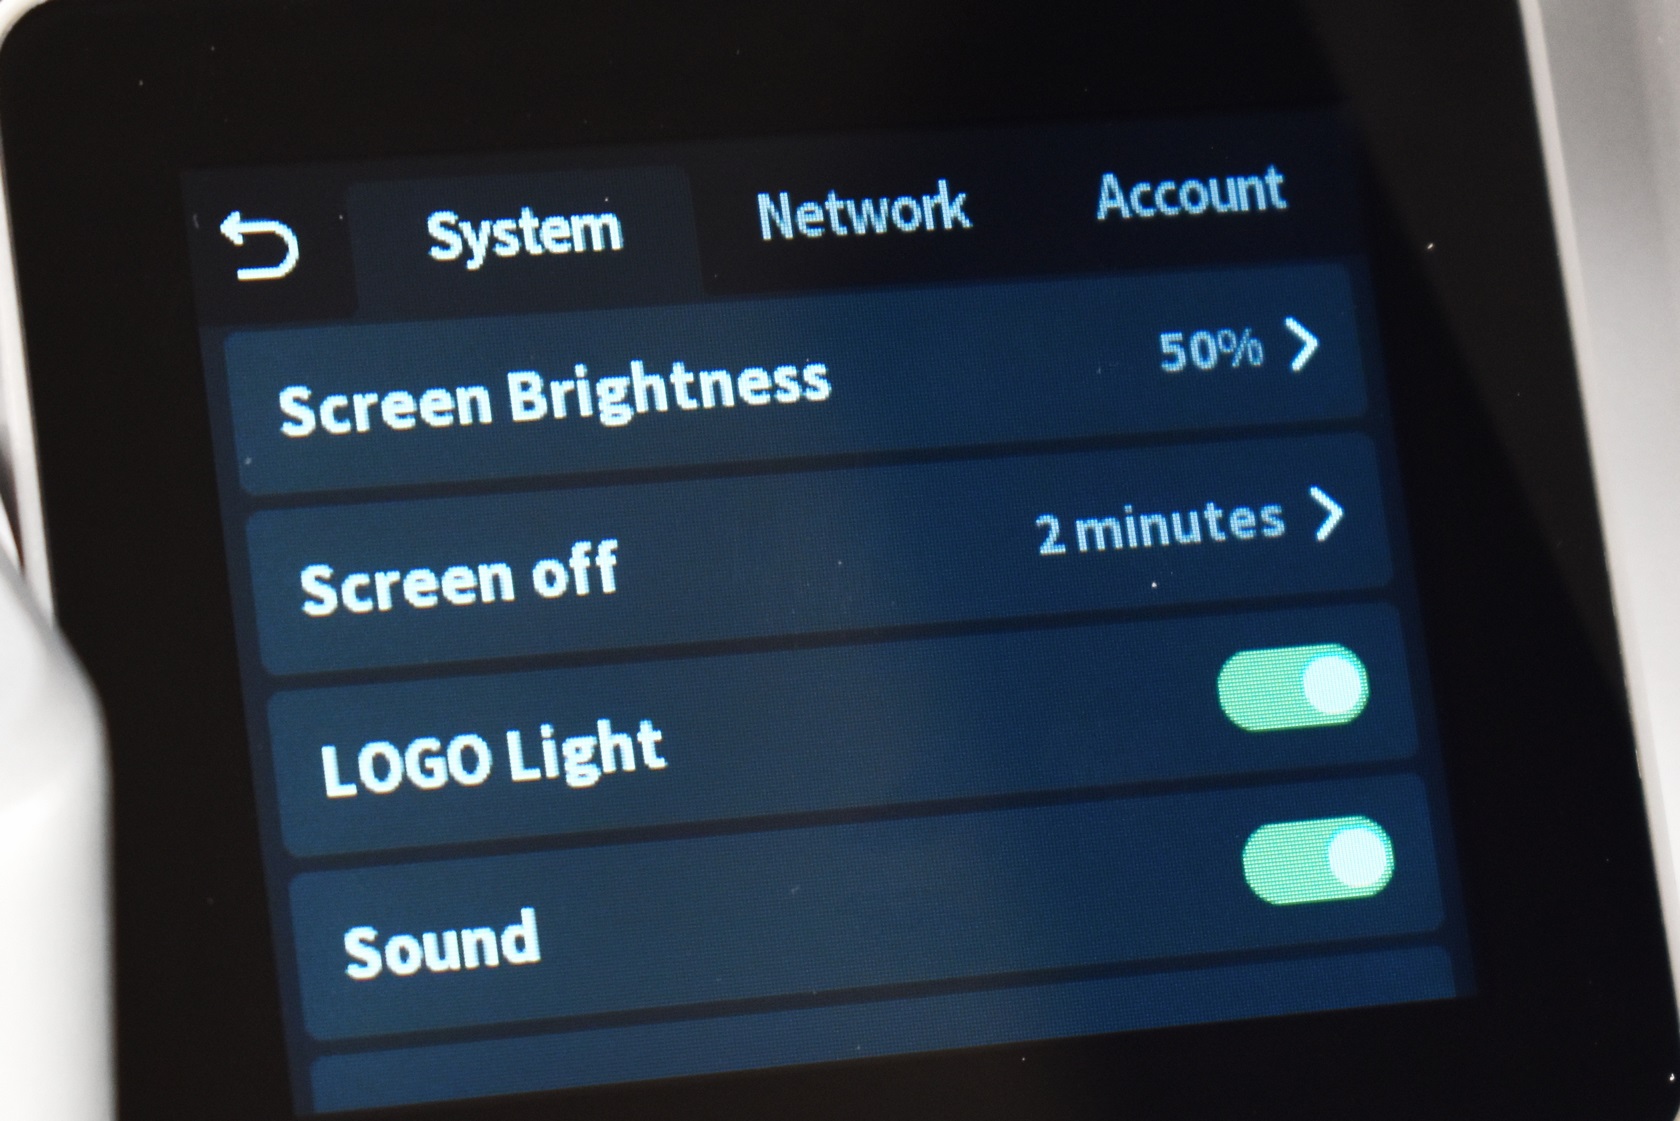
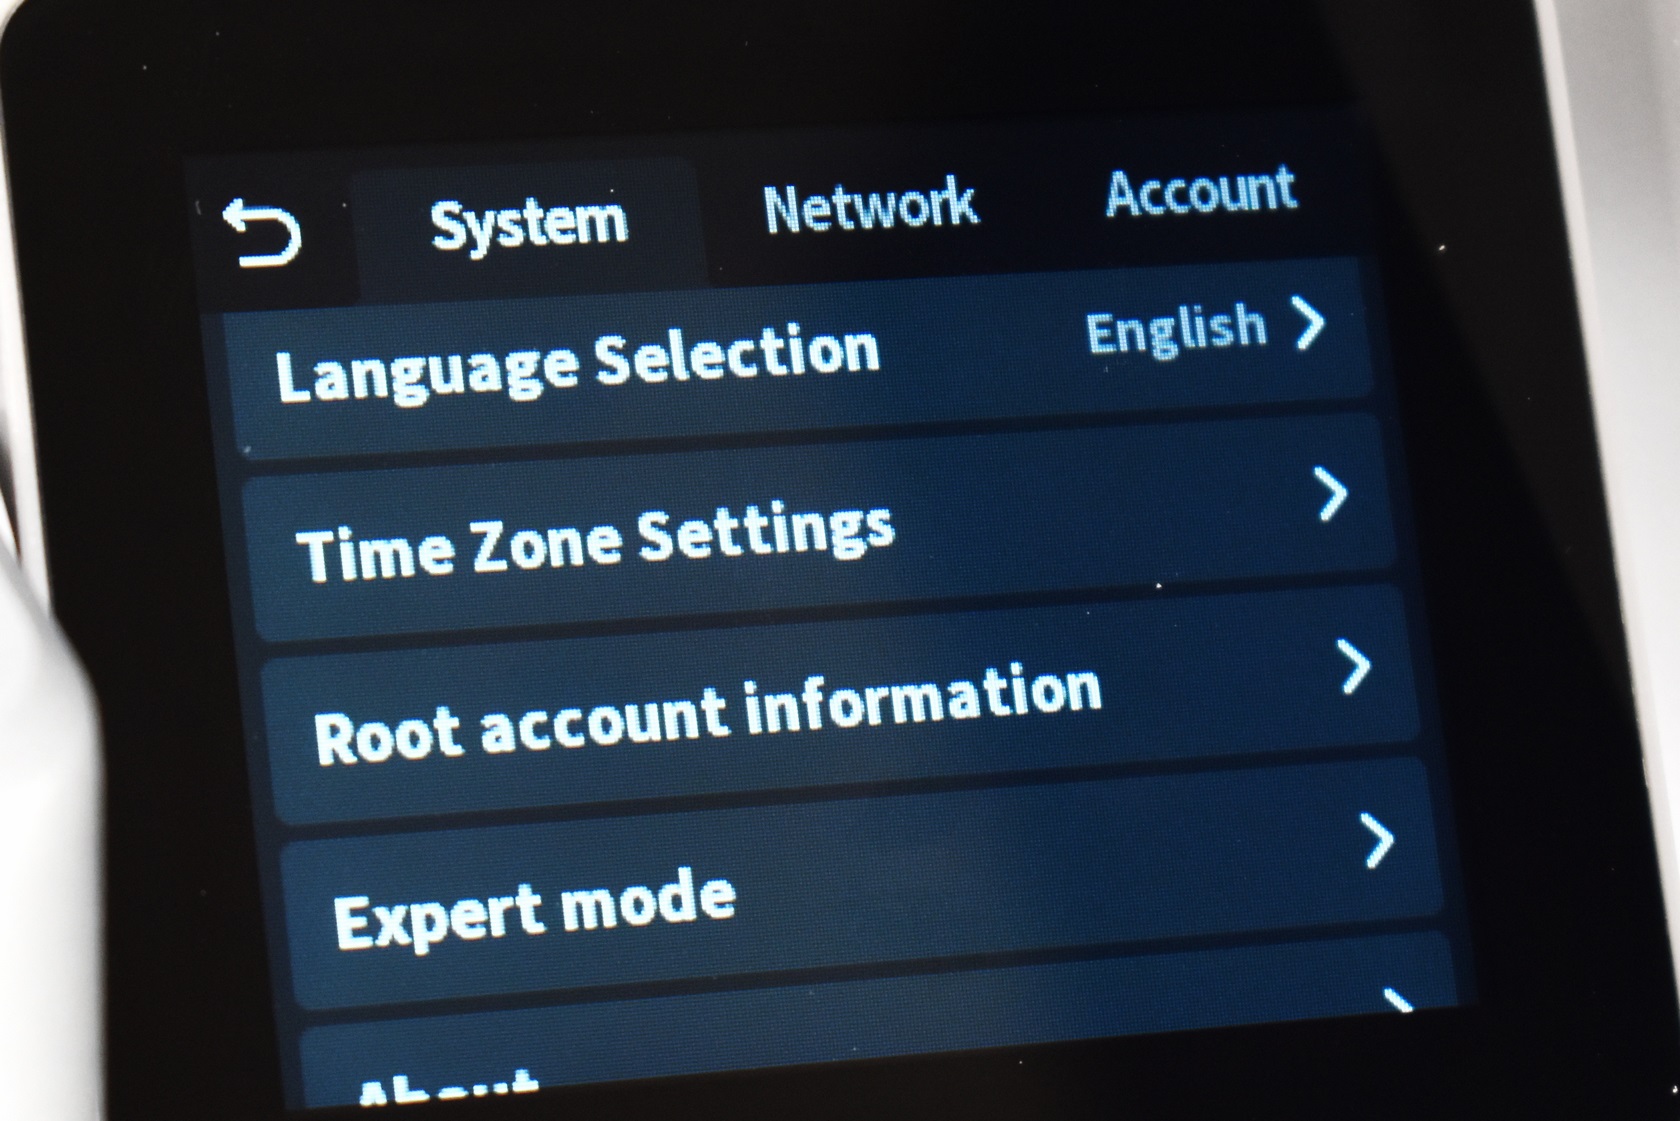
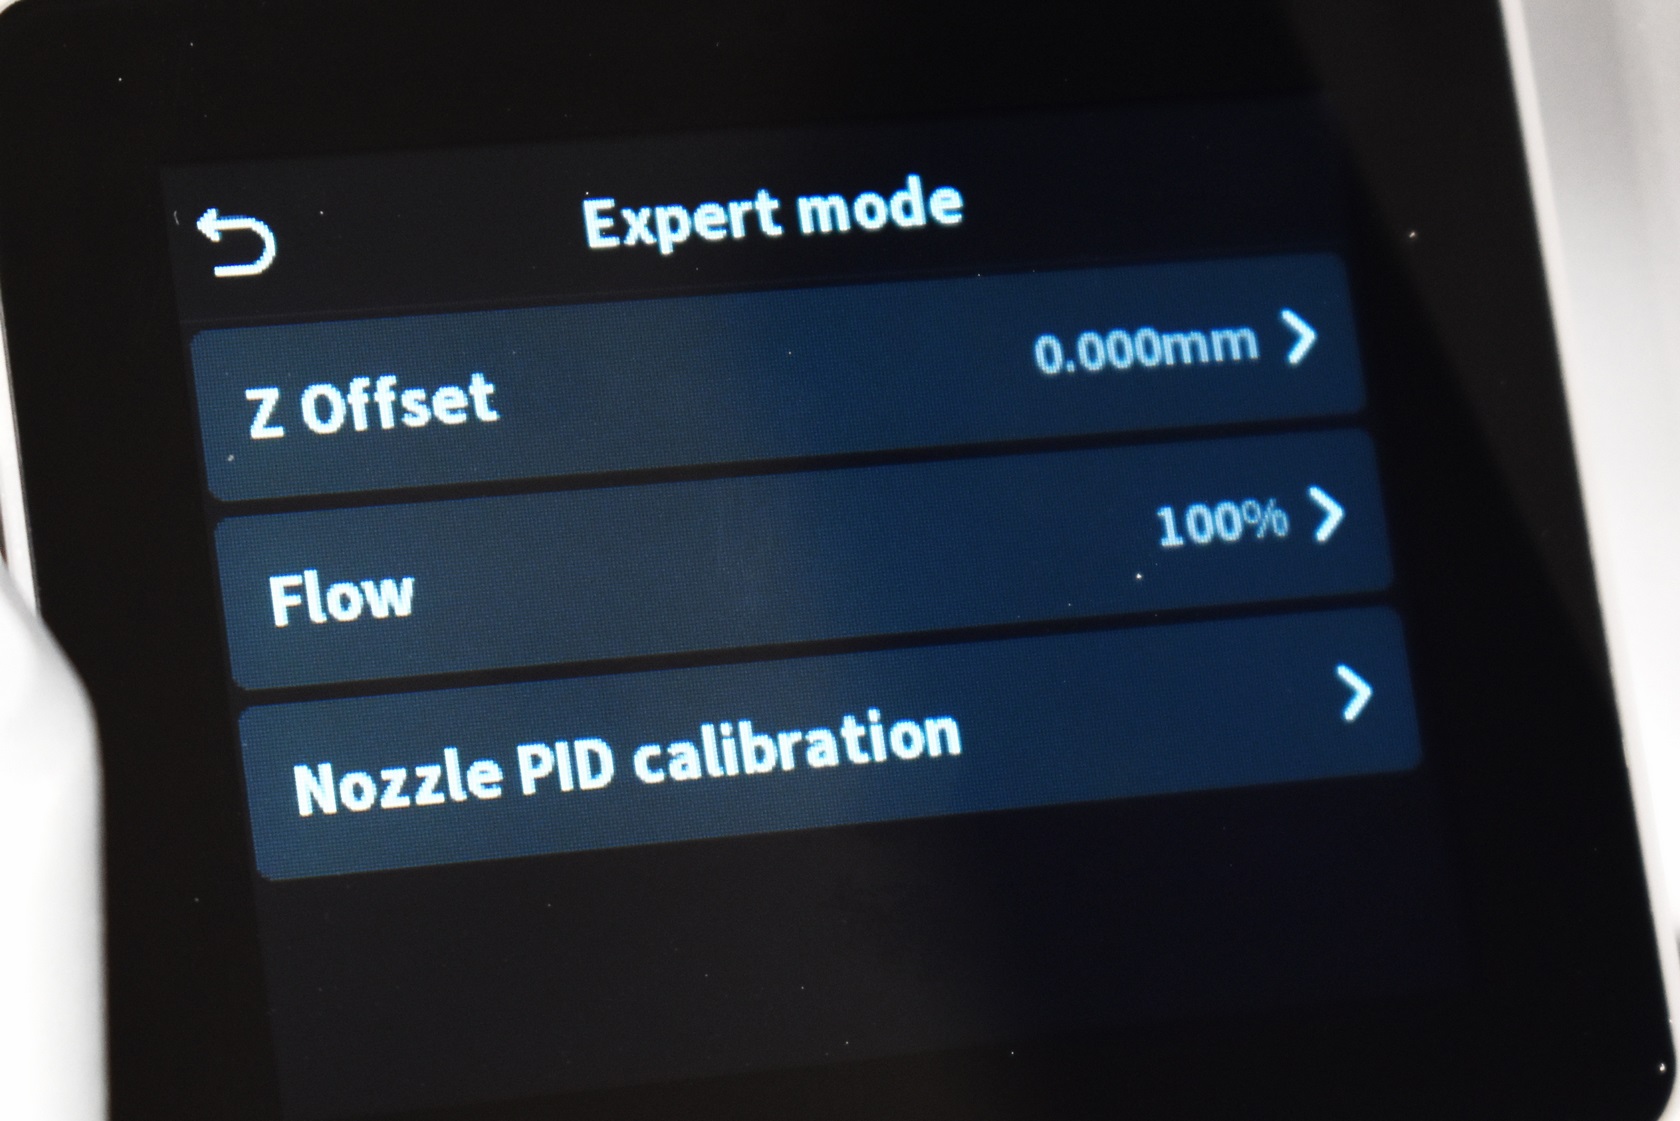
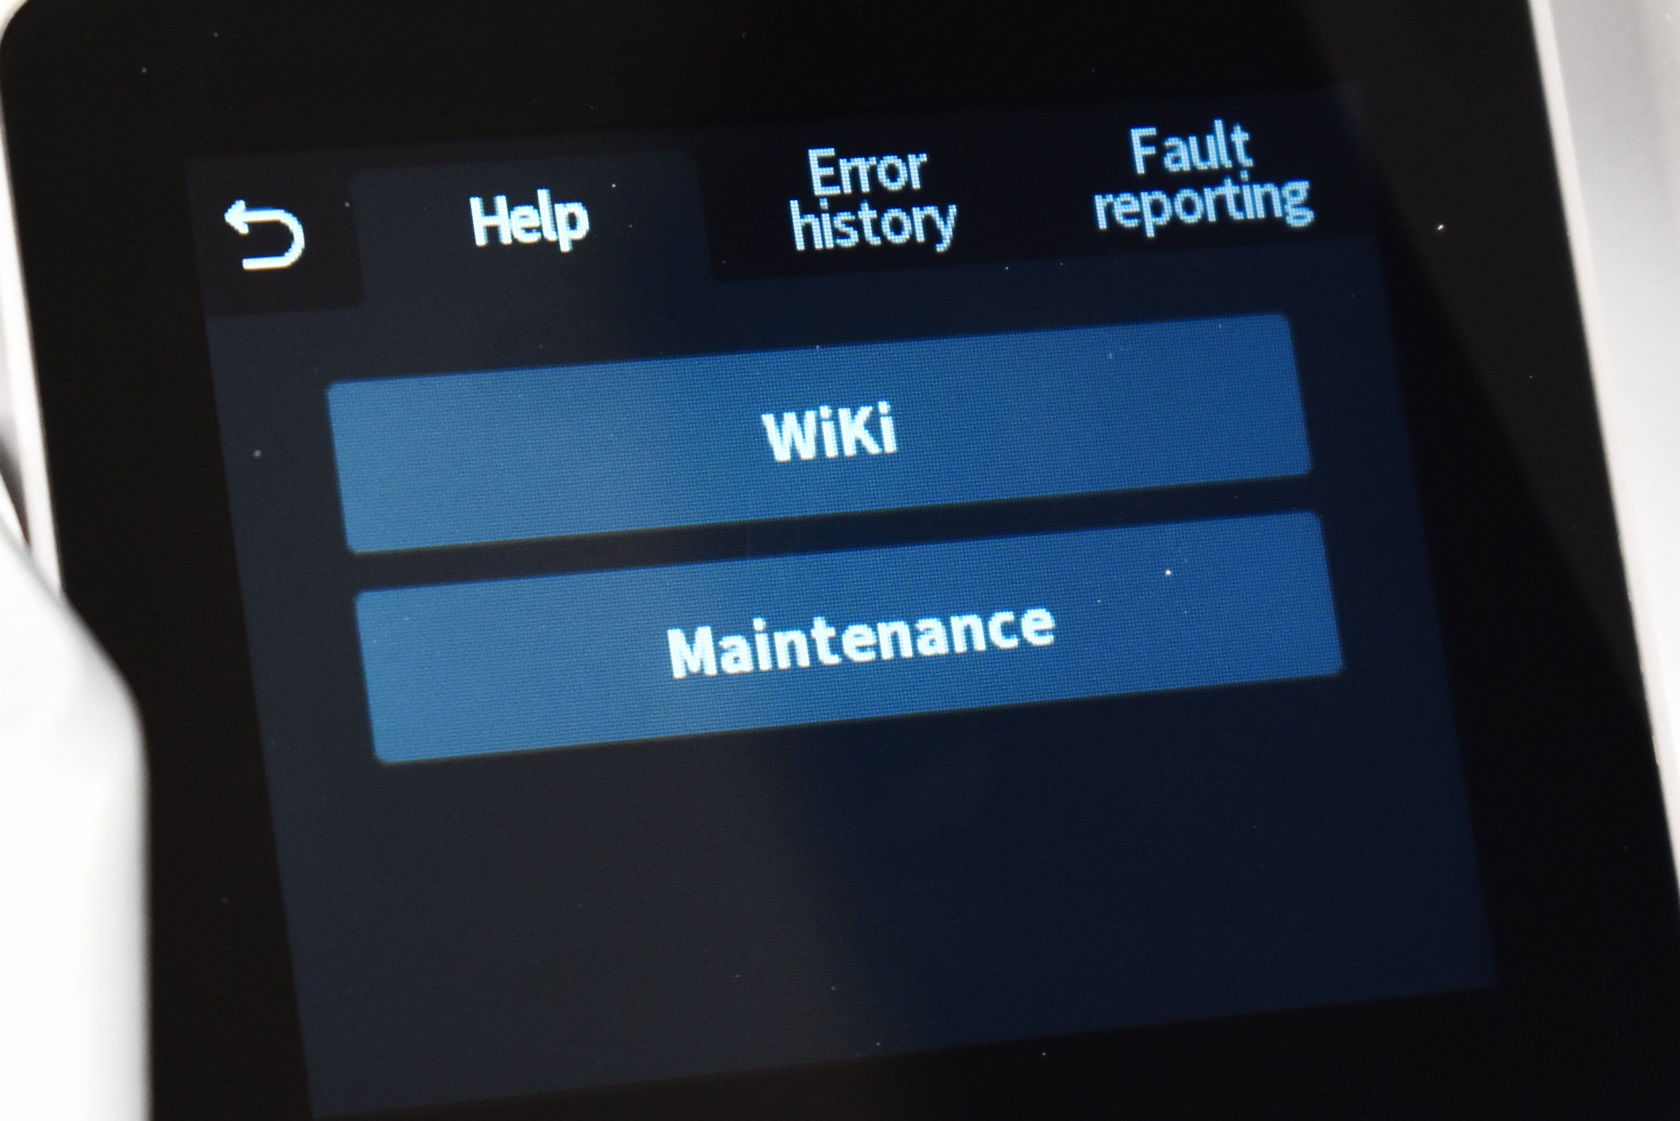
From the main tab you can access the spool holder and CFS tabs, the control tab (for the printing platform, extruder and both axis), settings tab (firmware update check, calibration, camera timelapse, CFS, screen brightness and shut-off timer, Creality logo on the extruder, sound on/off, language, time zone, account information and expert mode settings) and maintenance, error report and faut reporting.
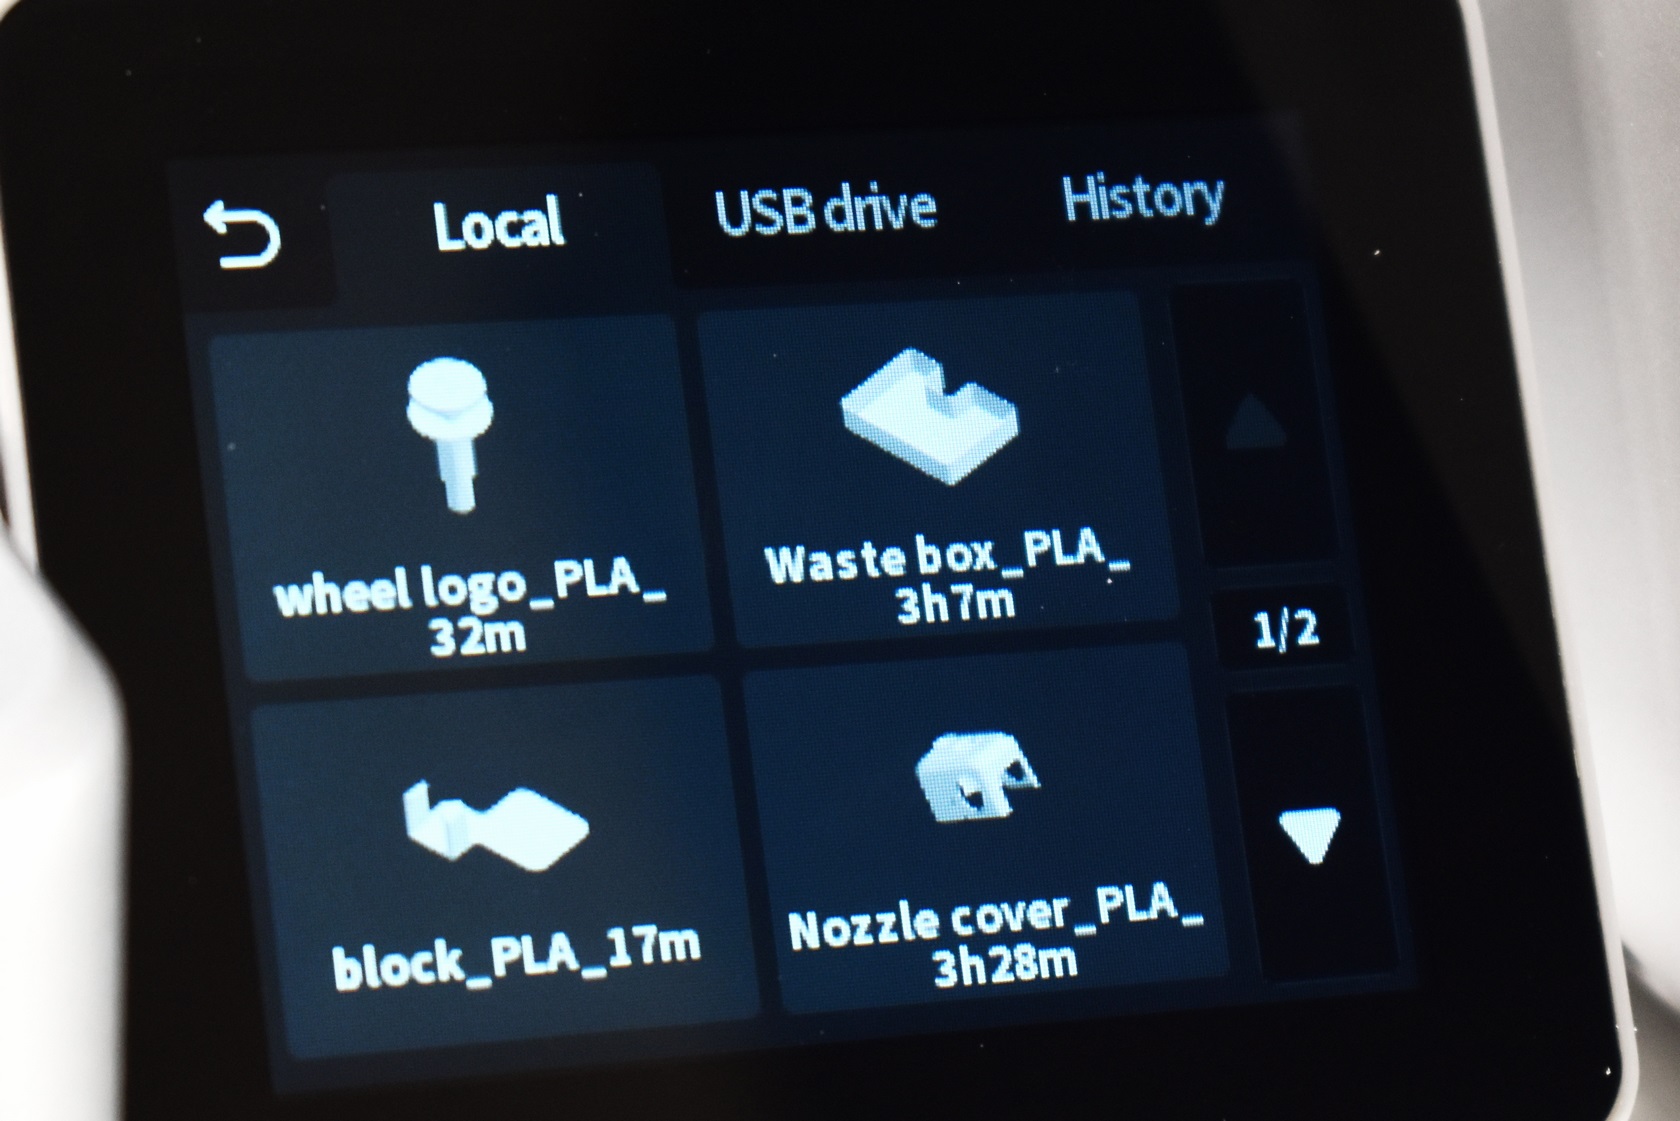
Typically, the 3D model files are displayed as thumbnails (the Hi 3D printer has an 8GB EMMC flash).
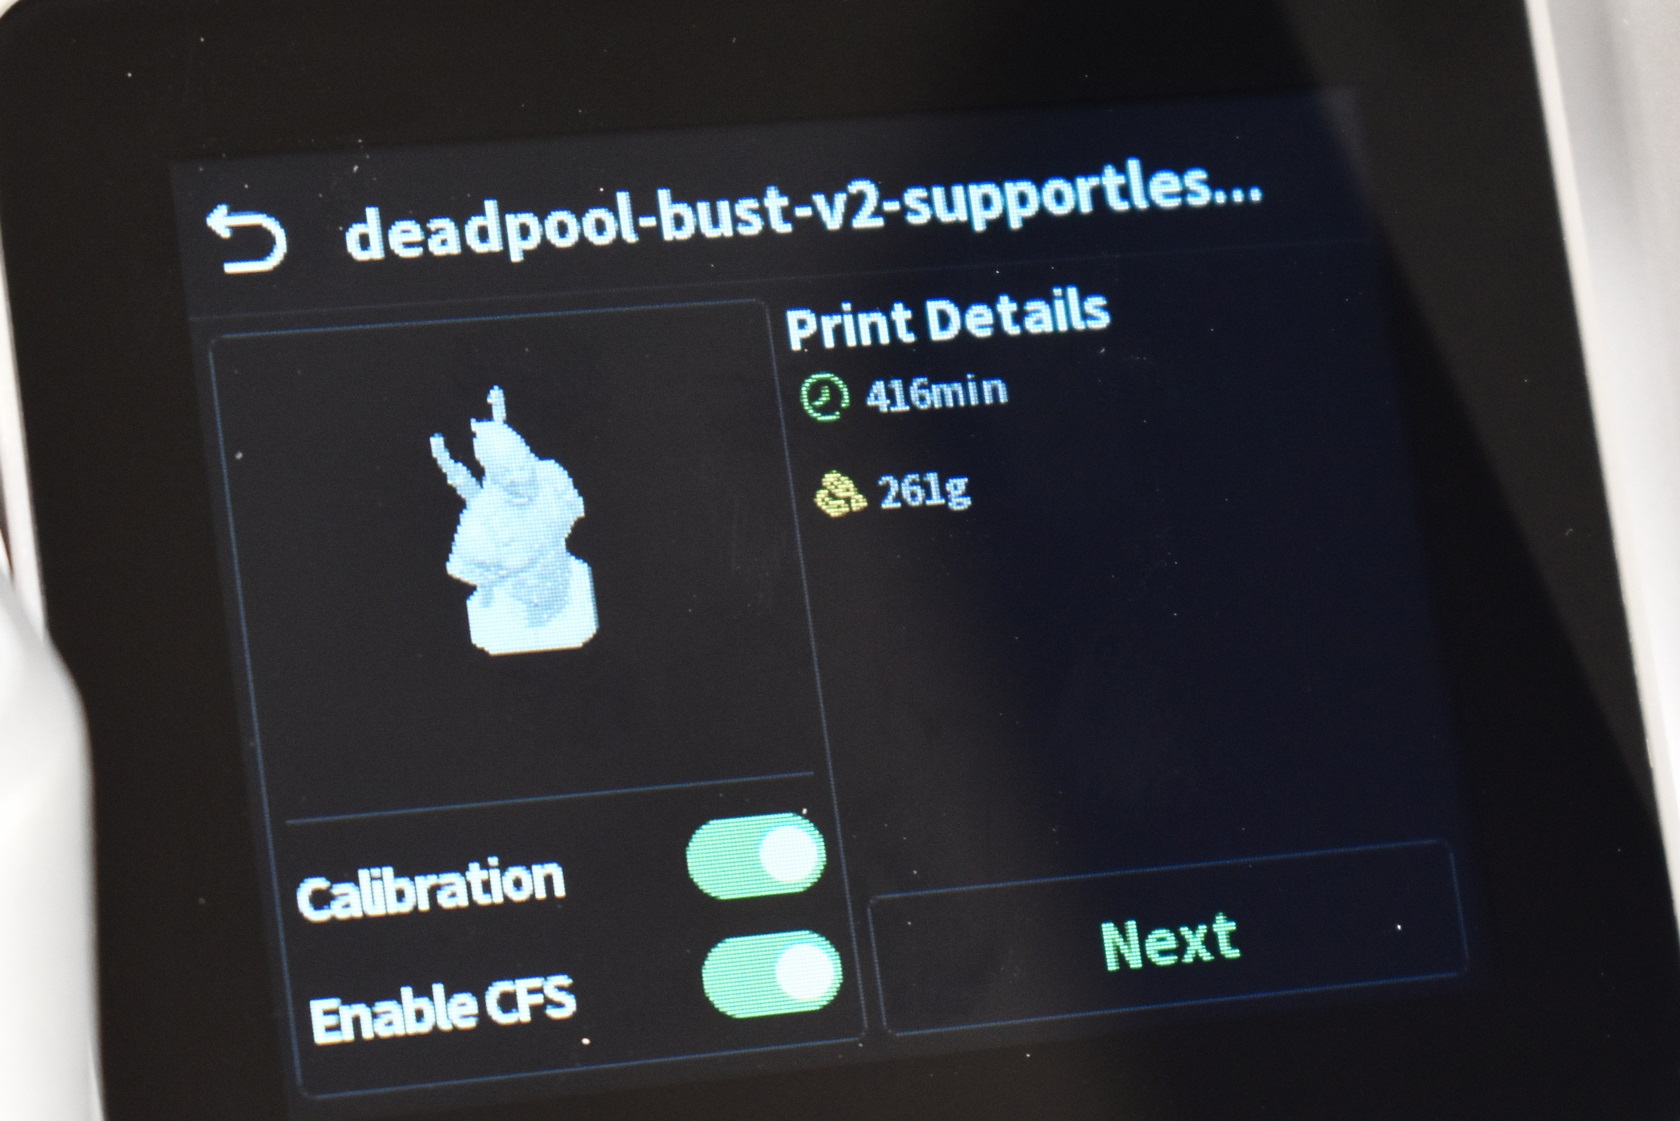
Once you start printing the display will report both completion time (which is not really accurate, at least wasn't during my tests) and the amount of filament you'll need to use (in weight).
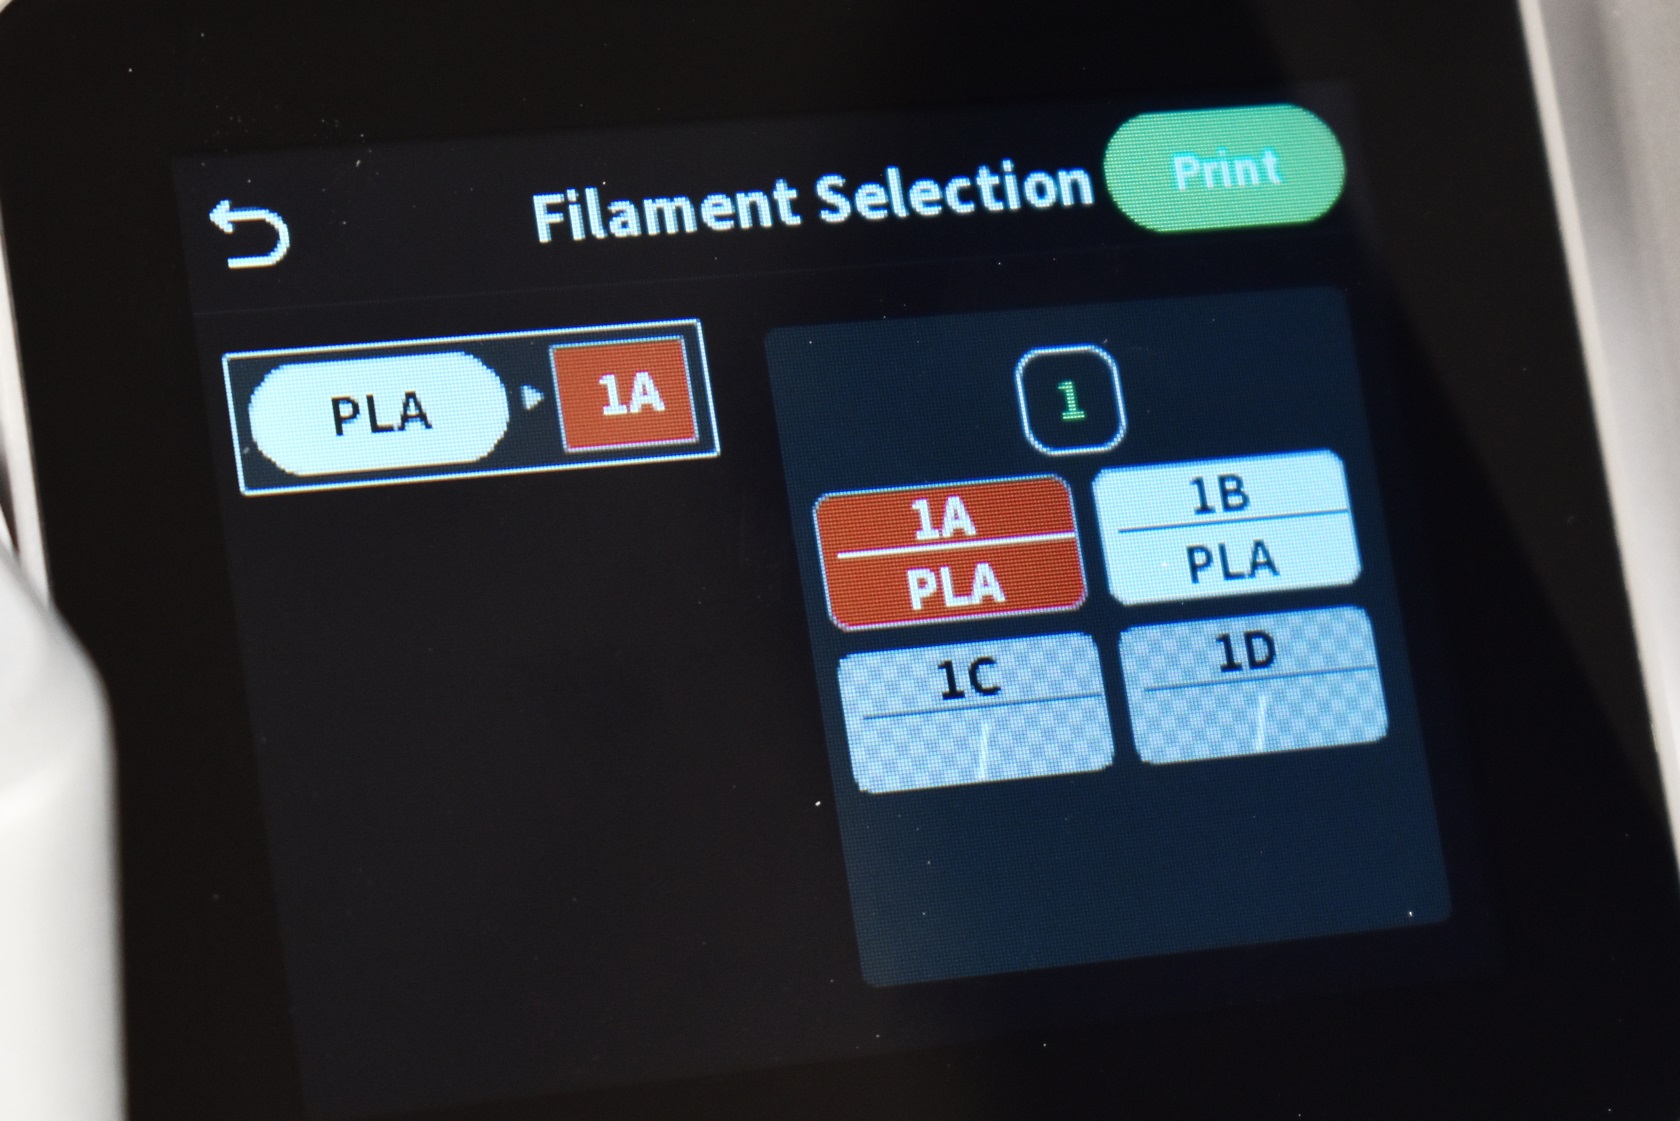
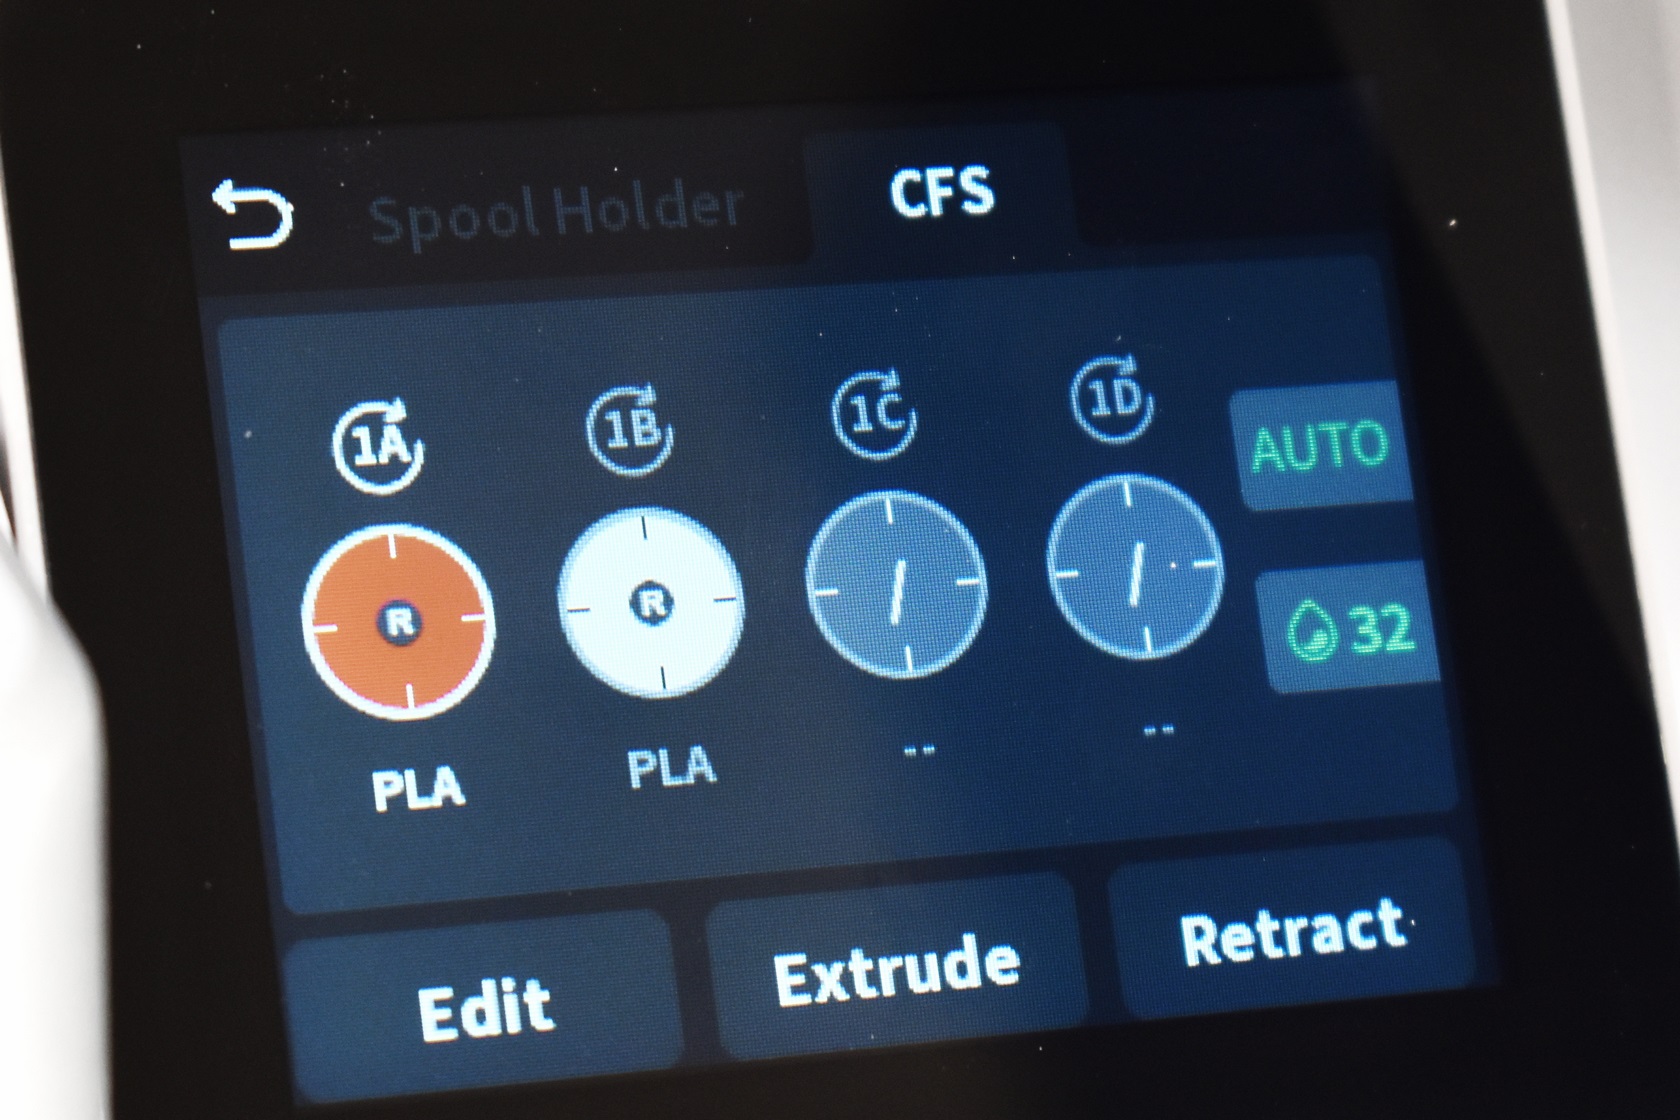
You will also be prompted to select the filament for your 3D model from the available ones in the CFS.
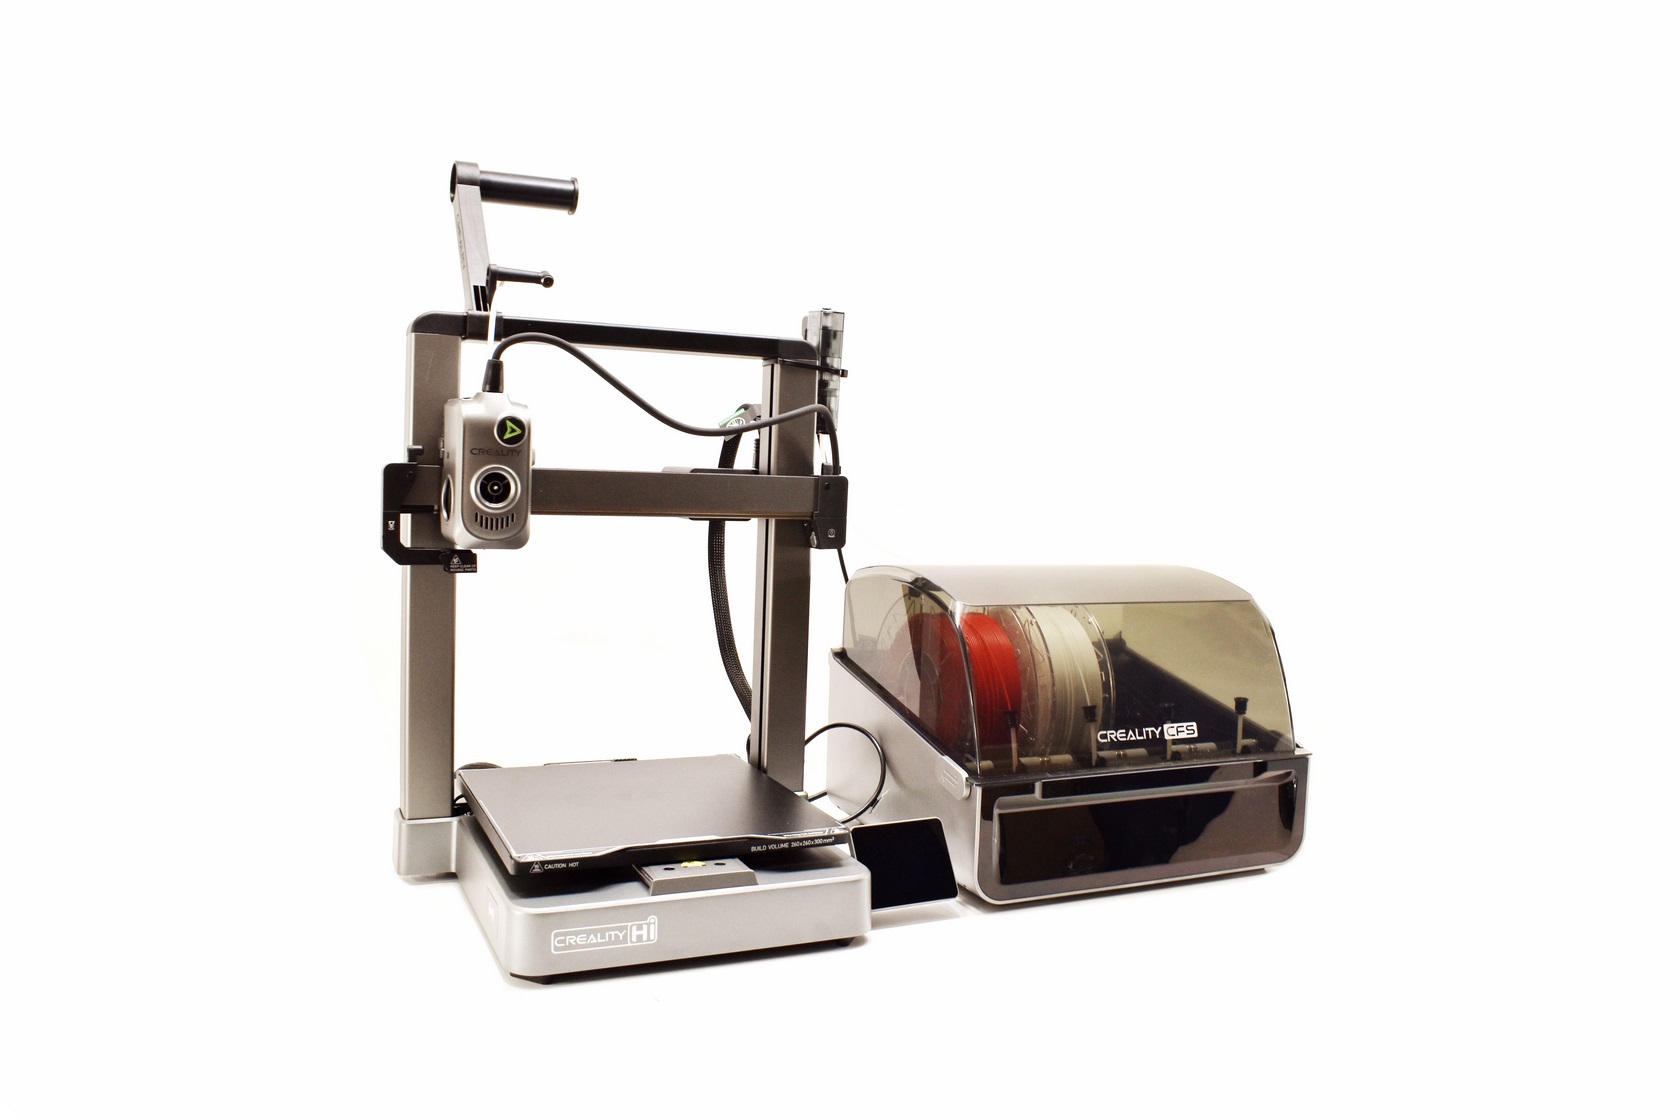
Here you can see the proper layout of the Hi-Combo.


.png)