O-Sense

.jpg)


LCD MENUS
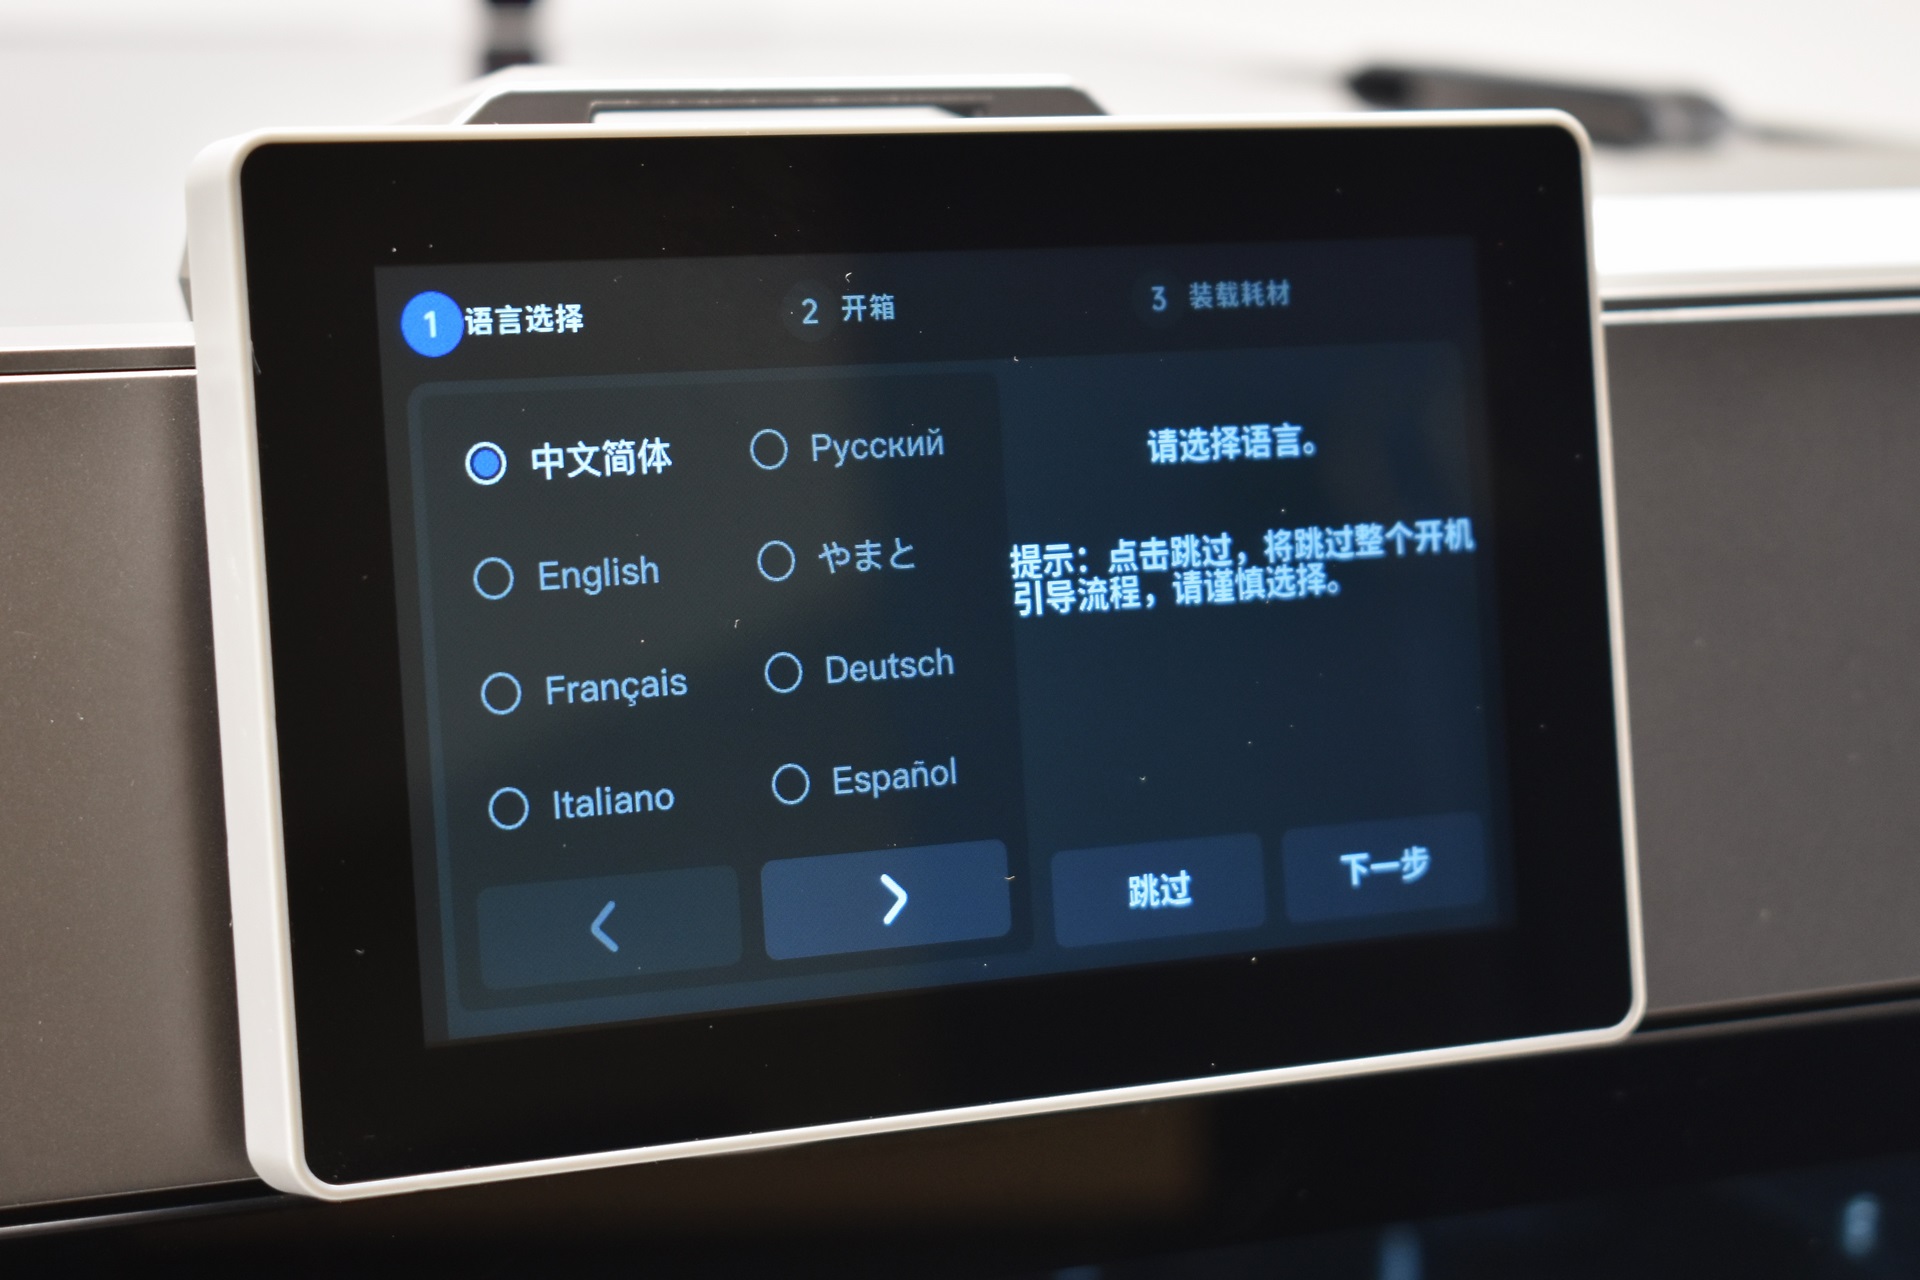
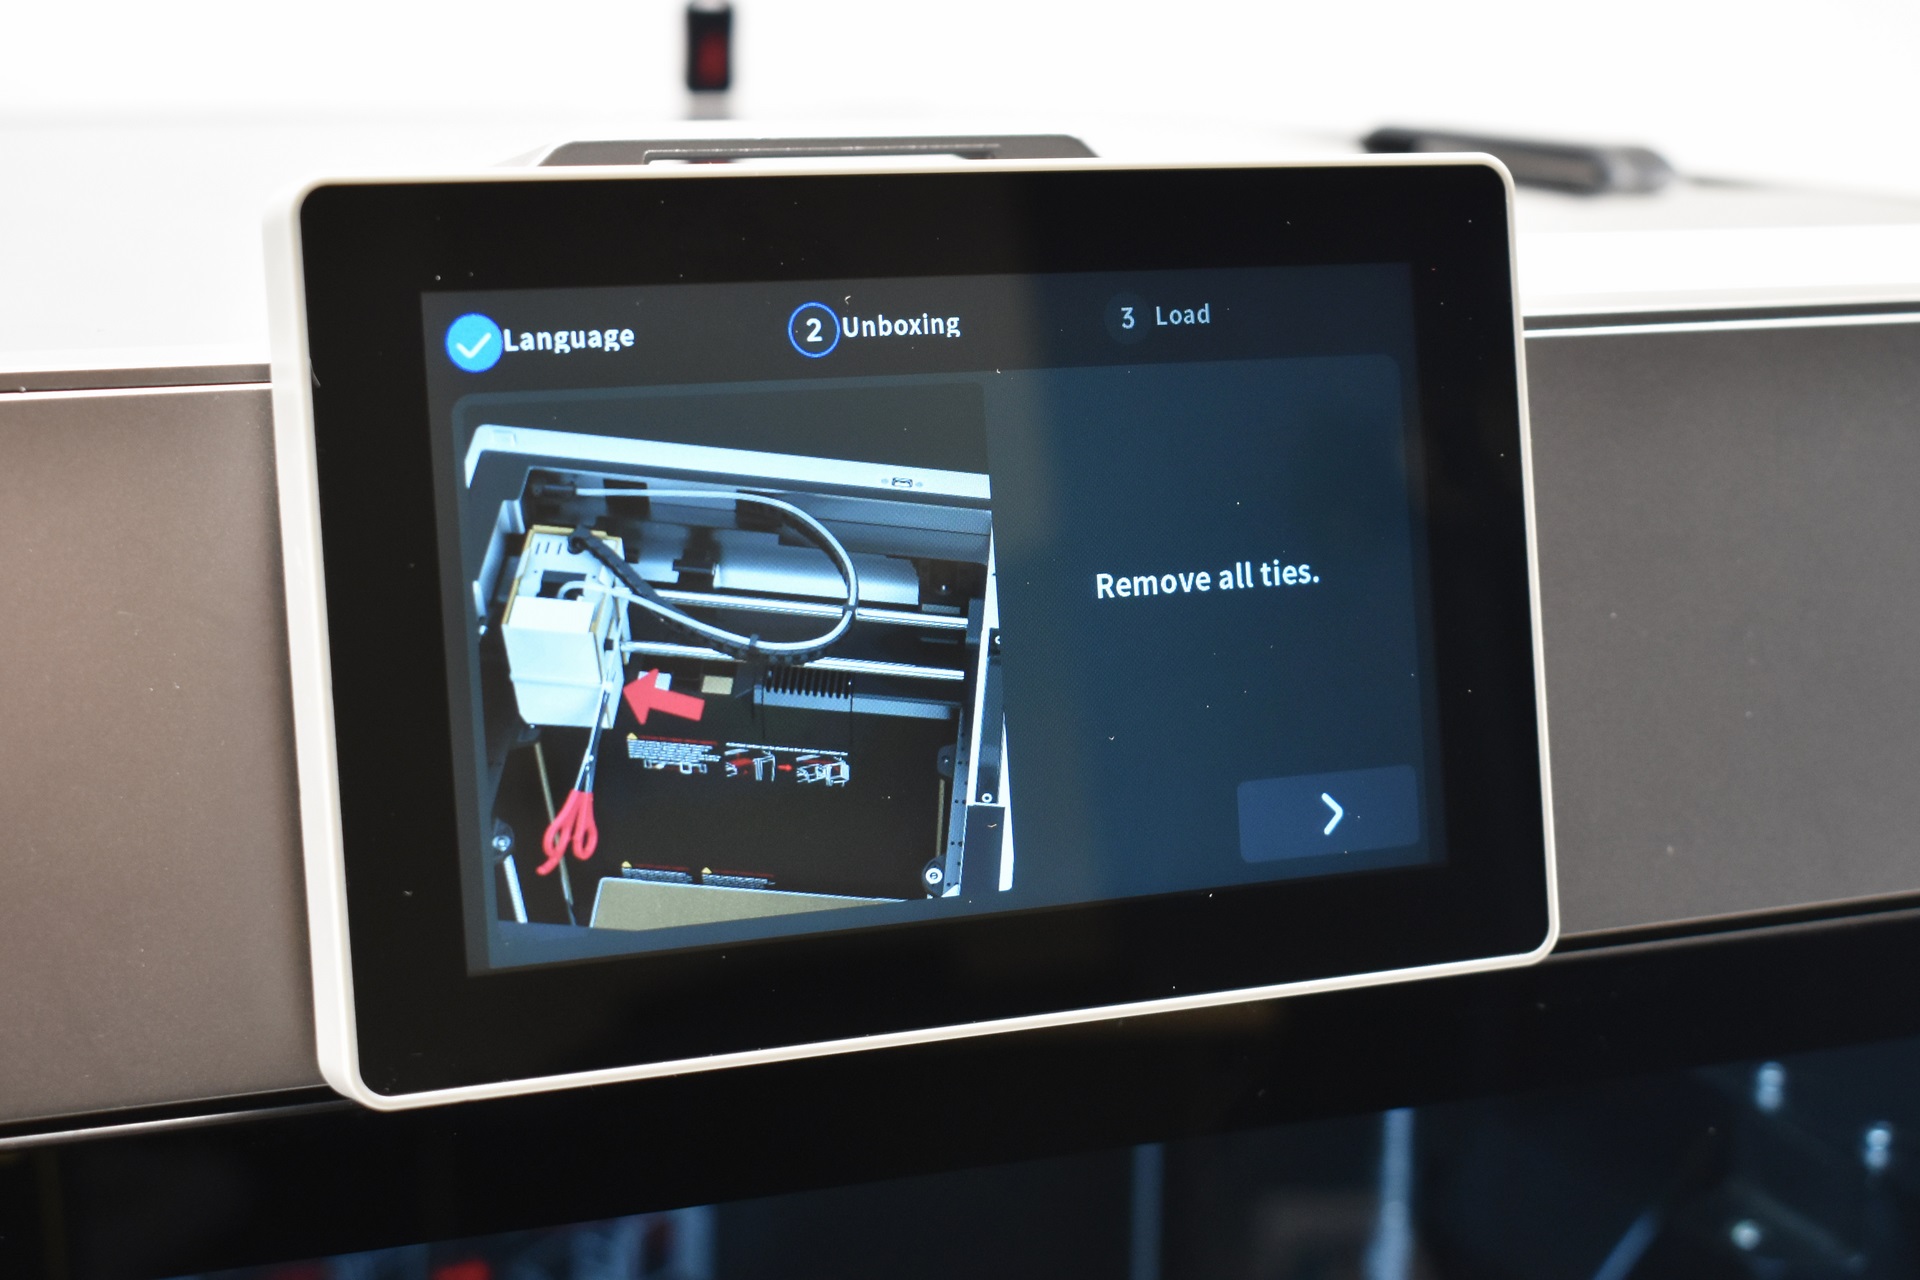
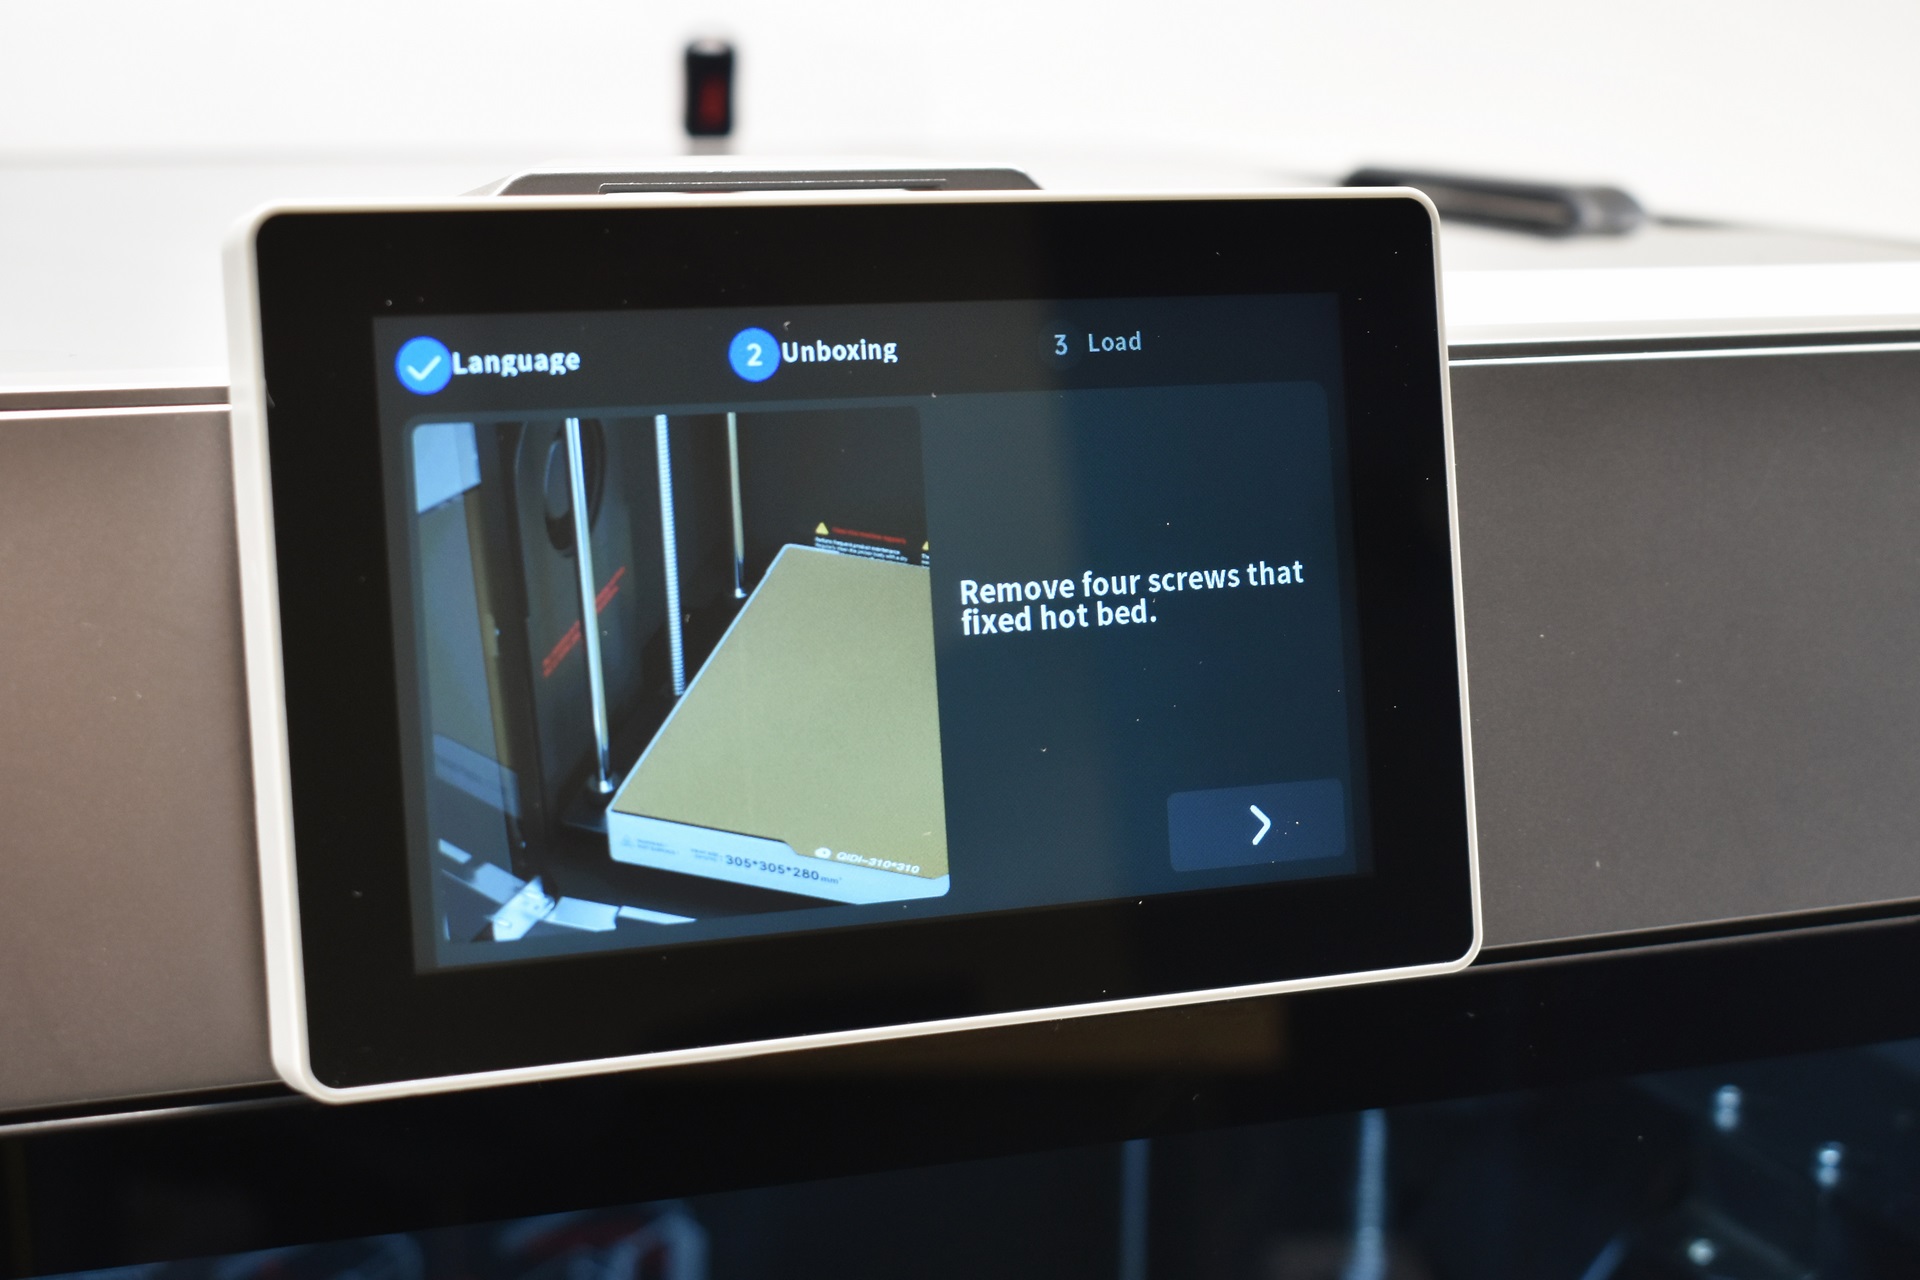

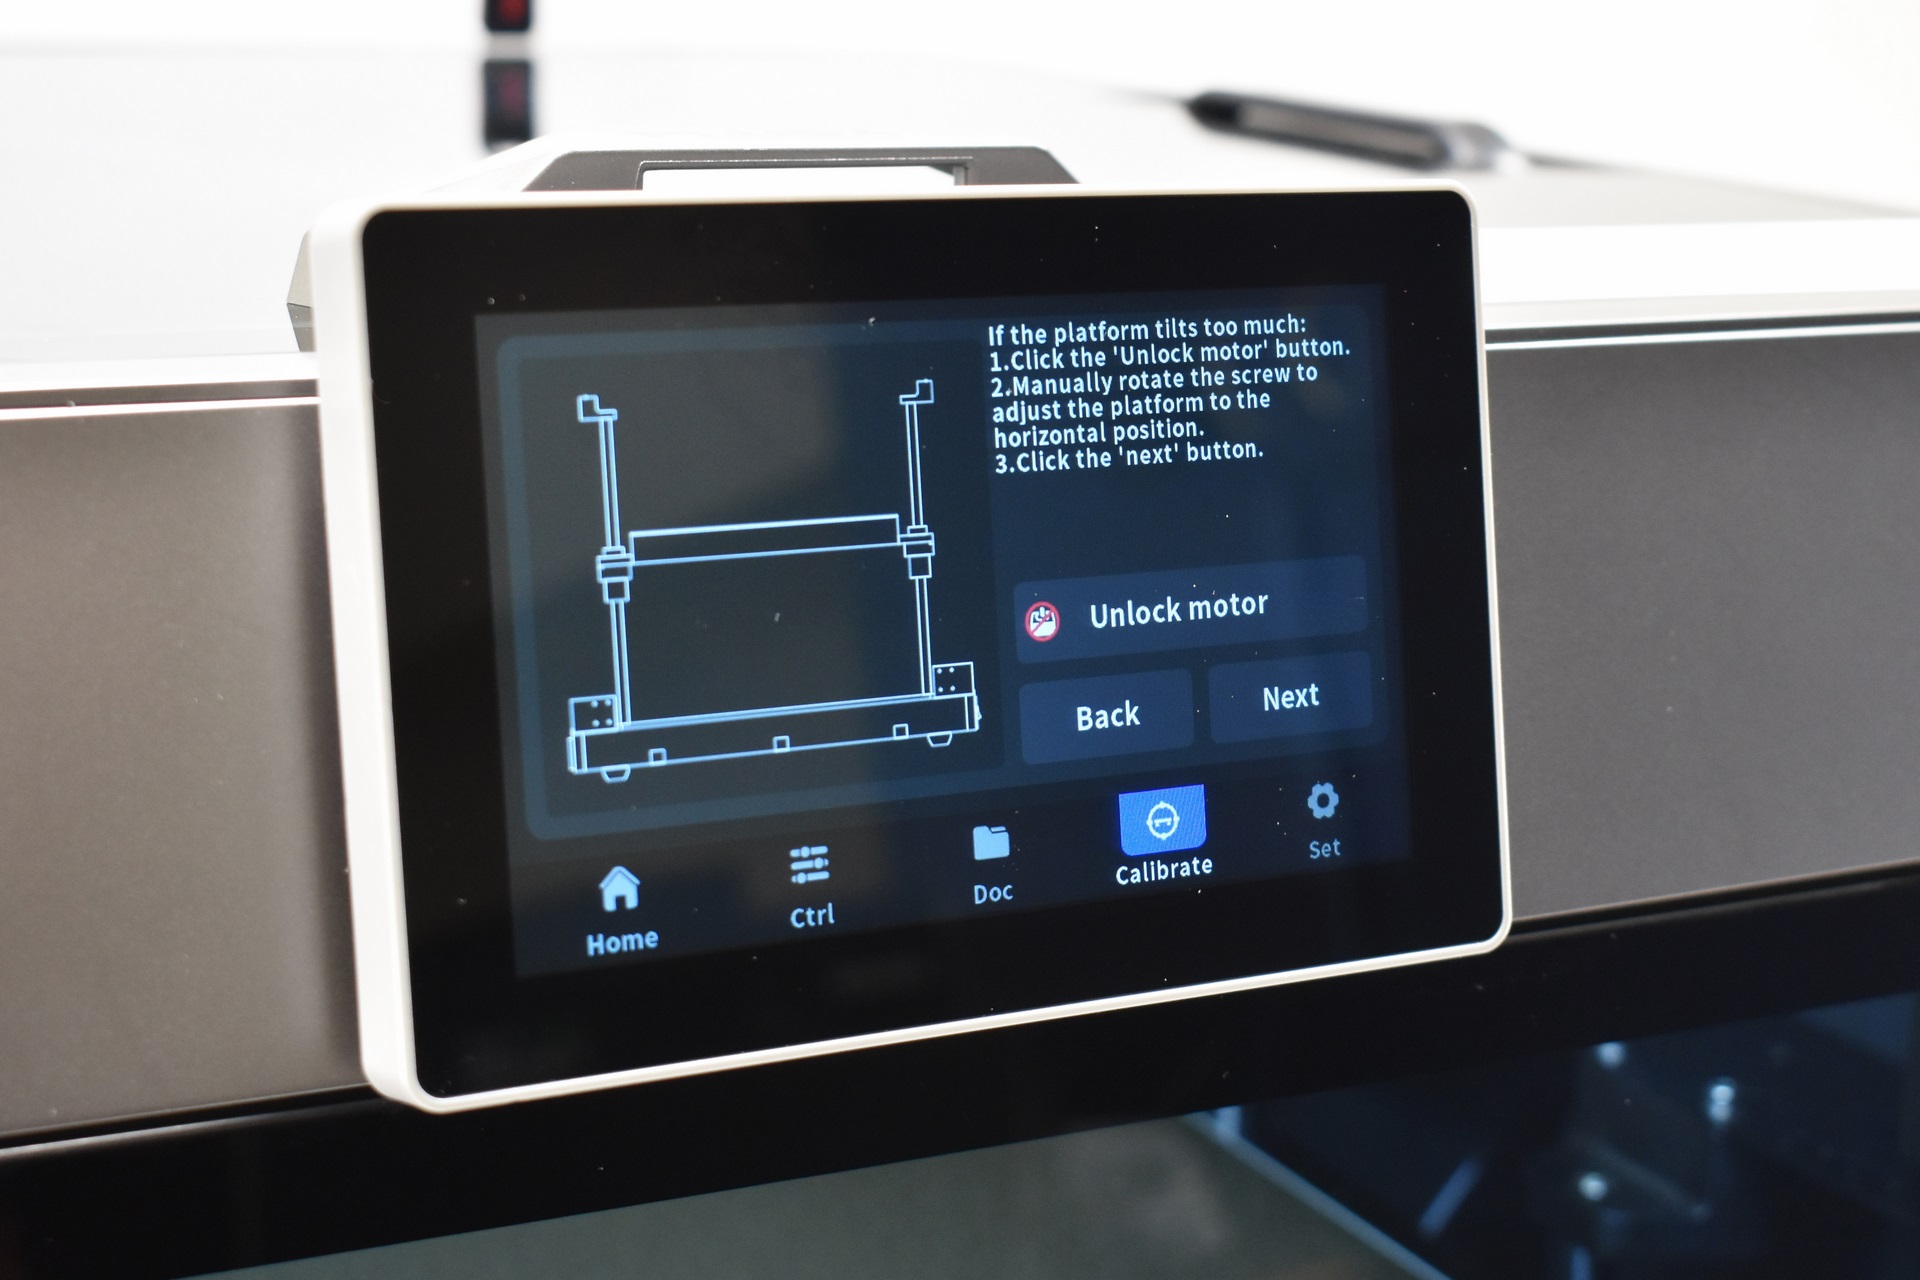
Typically, once you power the printer on you will have to select the language, follow instructions on what to remove and mount (basically everything I did in the previous page) and adjust the print plate.
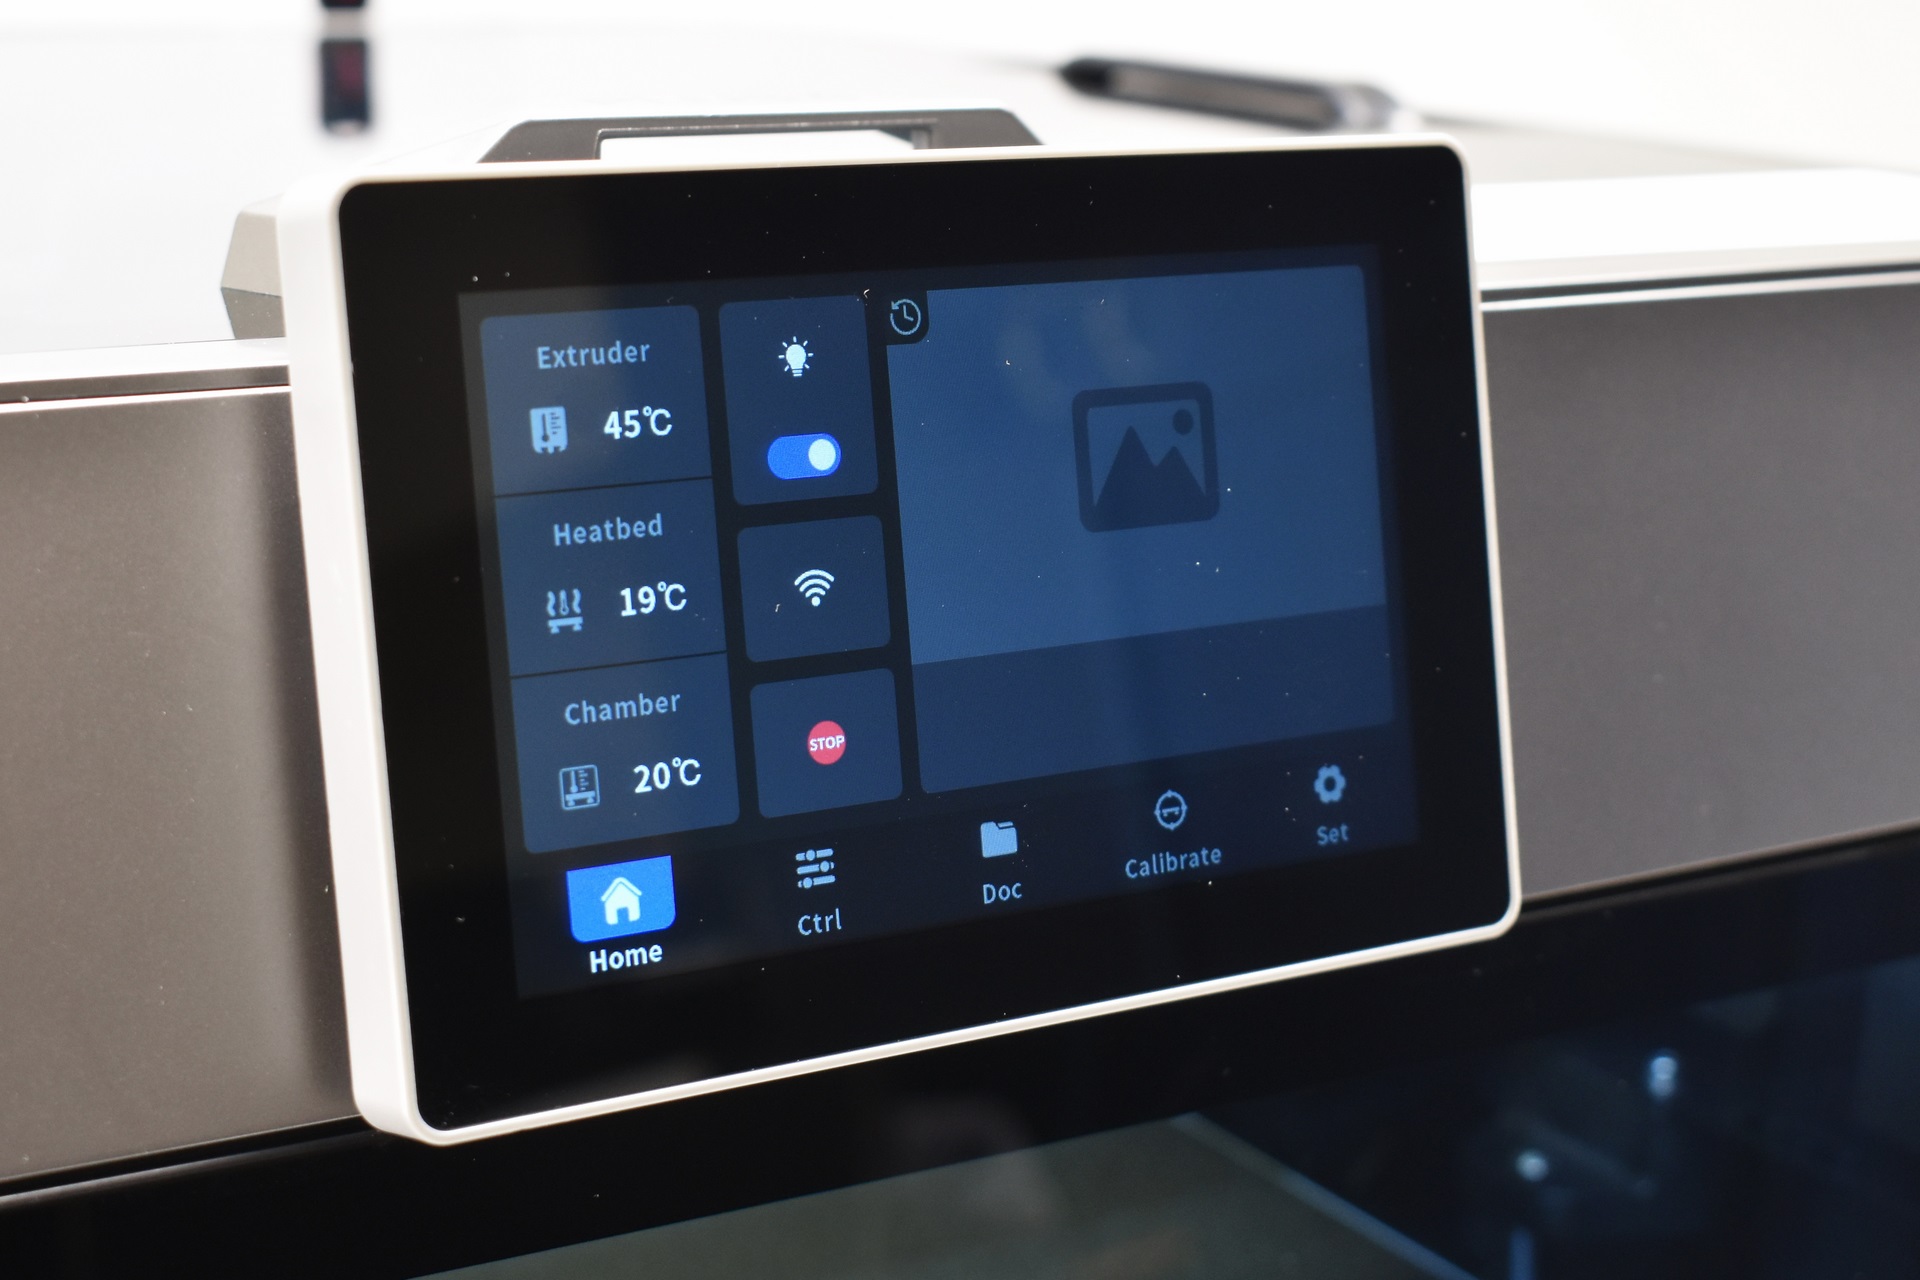
The initial tab displays temperatures, allows the end user to turn the LED strip on/off, enable/disable Wi-Fi and stop the printer entirely.
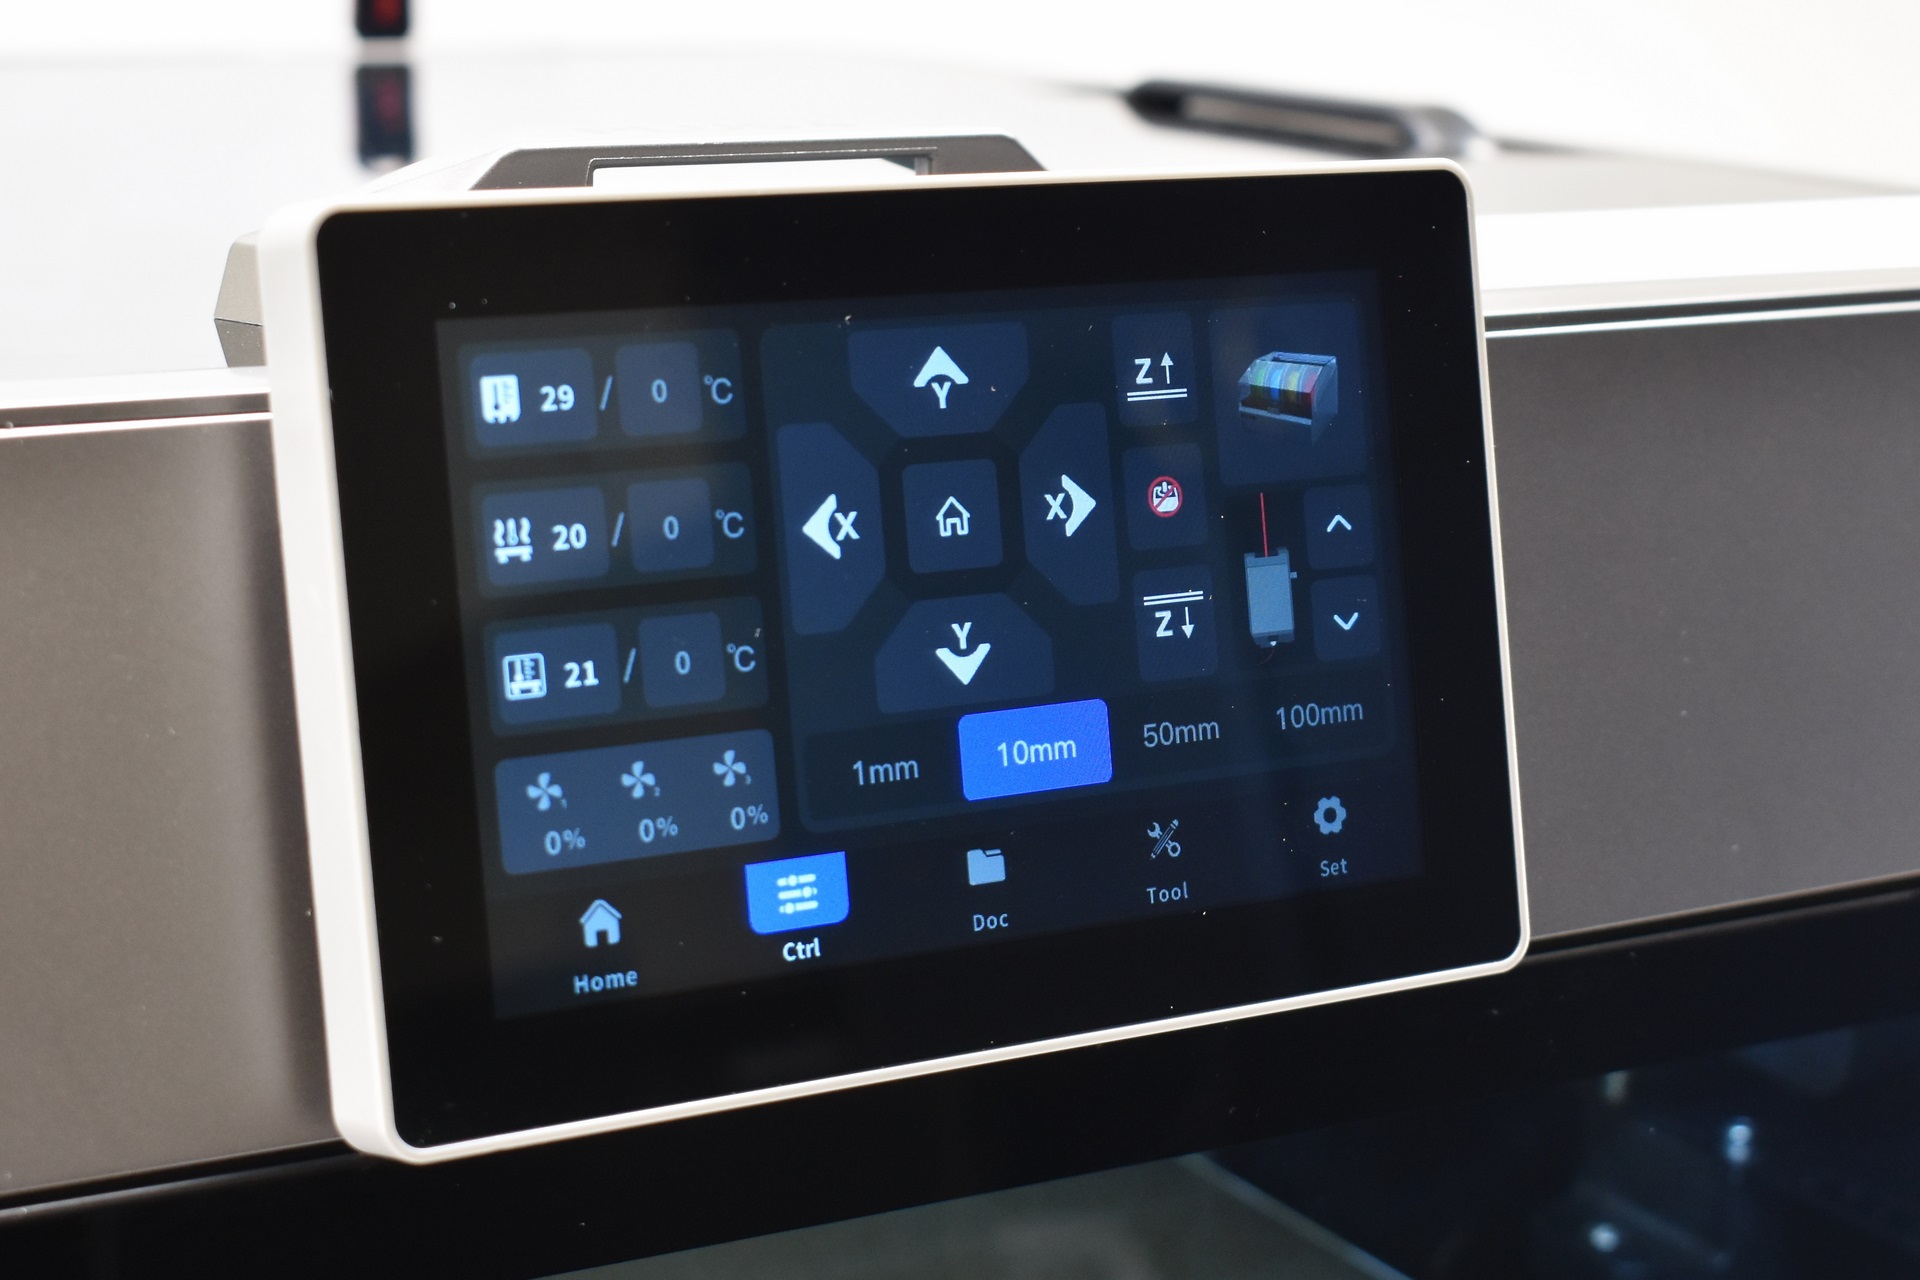
2nd tab allows you to control temperatures, fans, move the axis, retract and extrude filament and setup the box (if you have it).
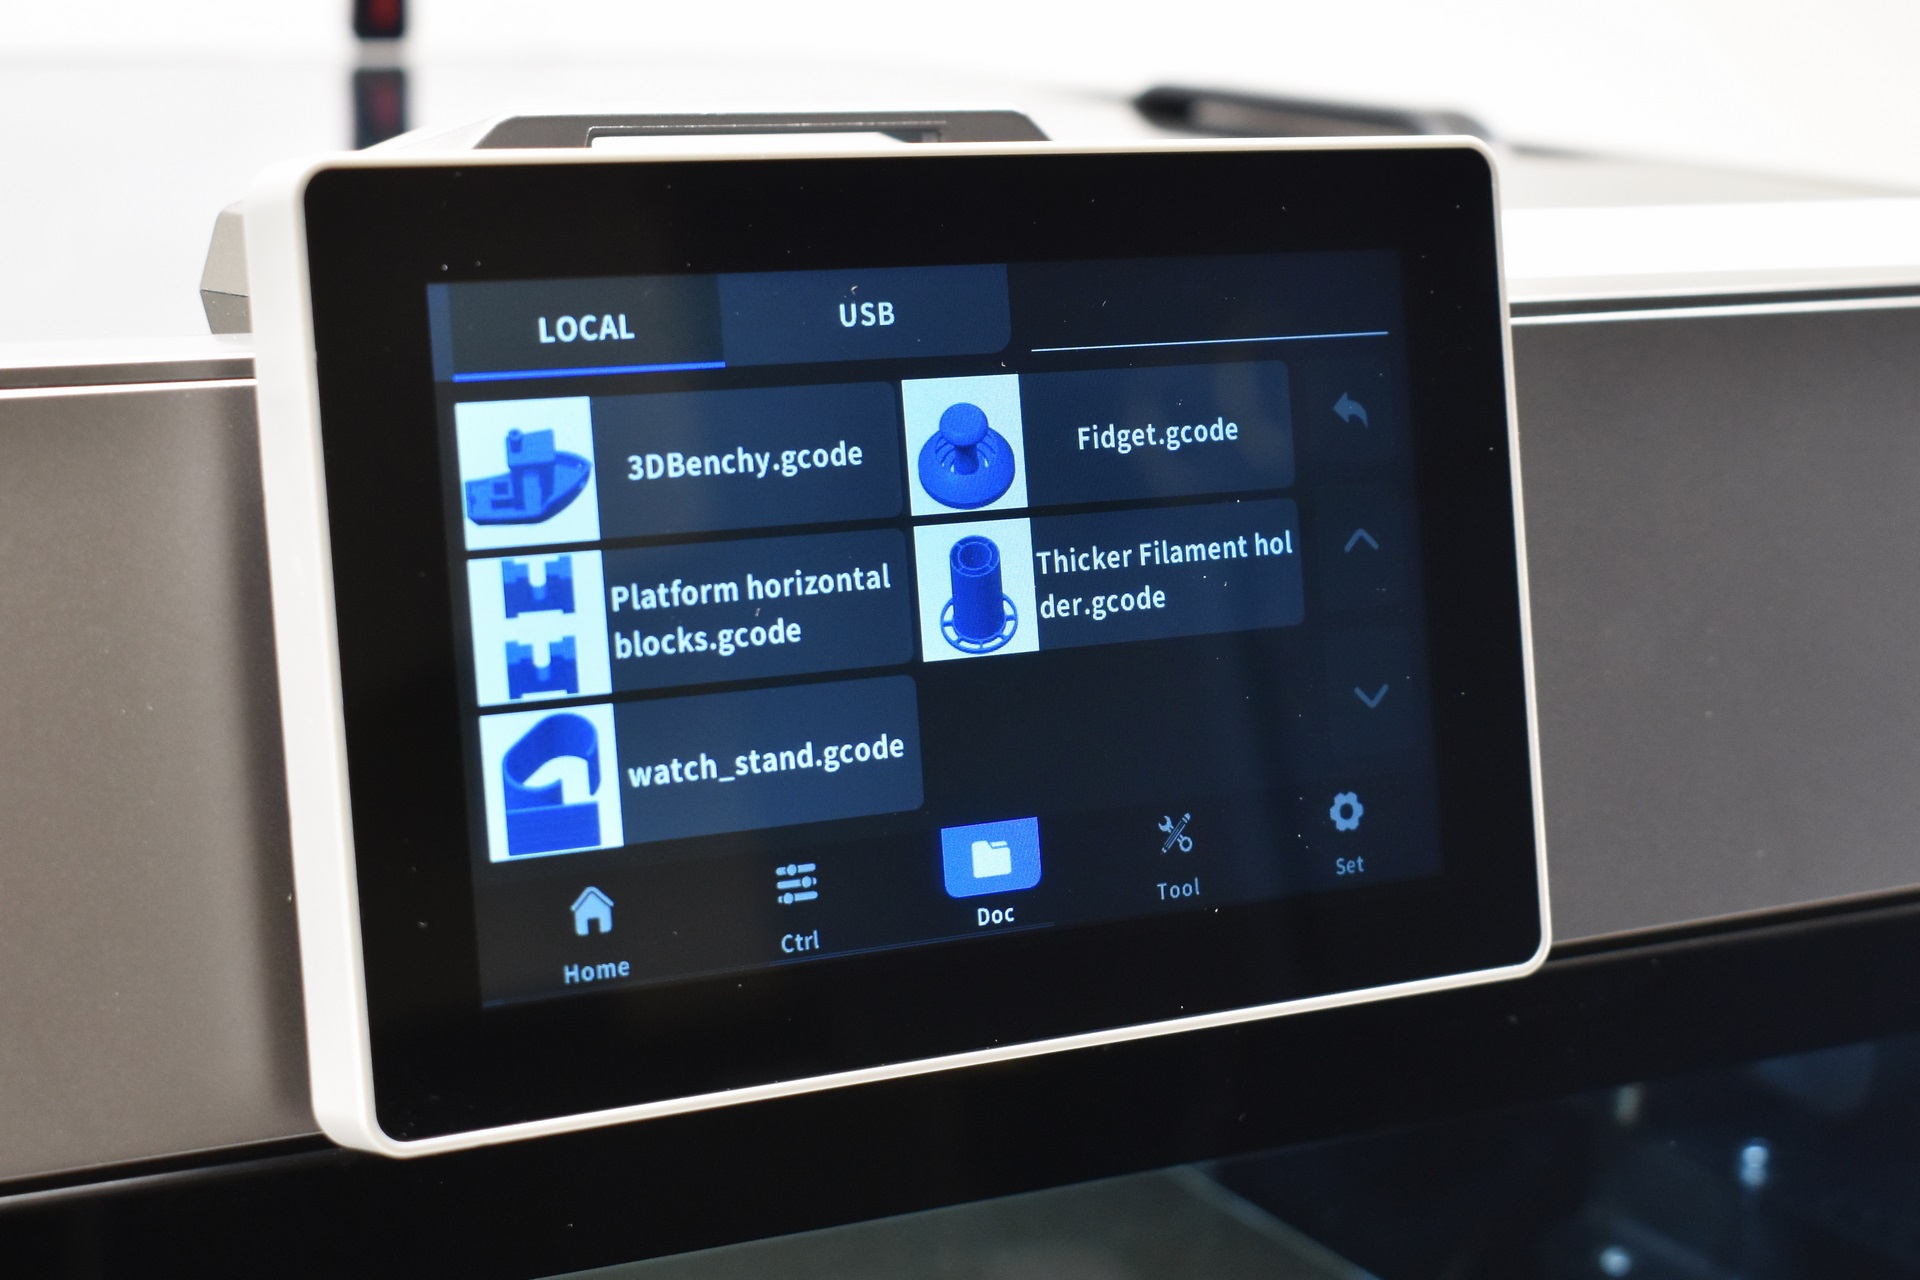
From the 3rd tab you can select print models either from the on board memory or the USB (whatever you print from the USB gets transferred on the onboard memory).
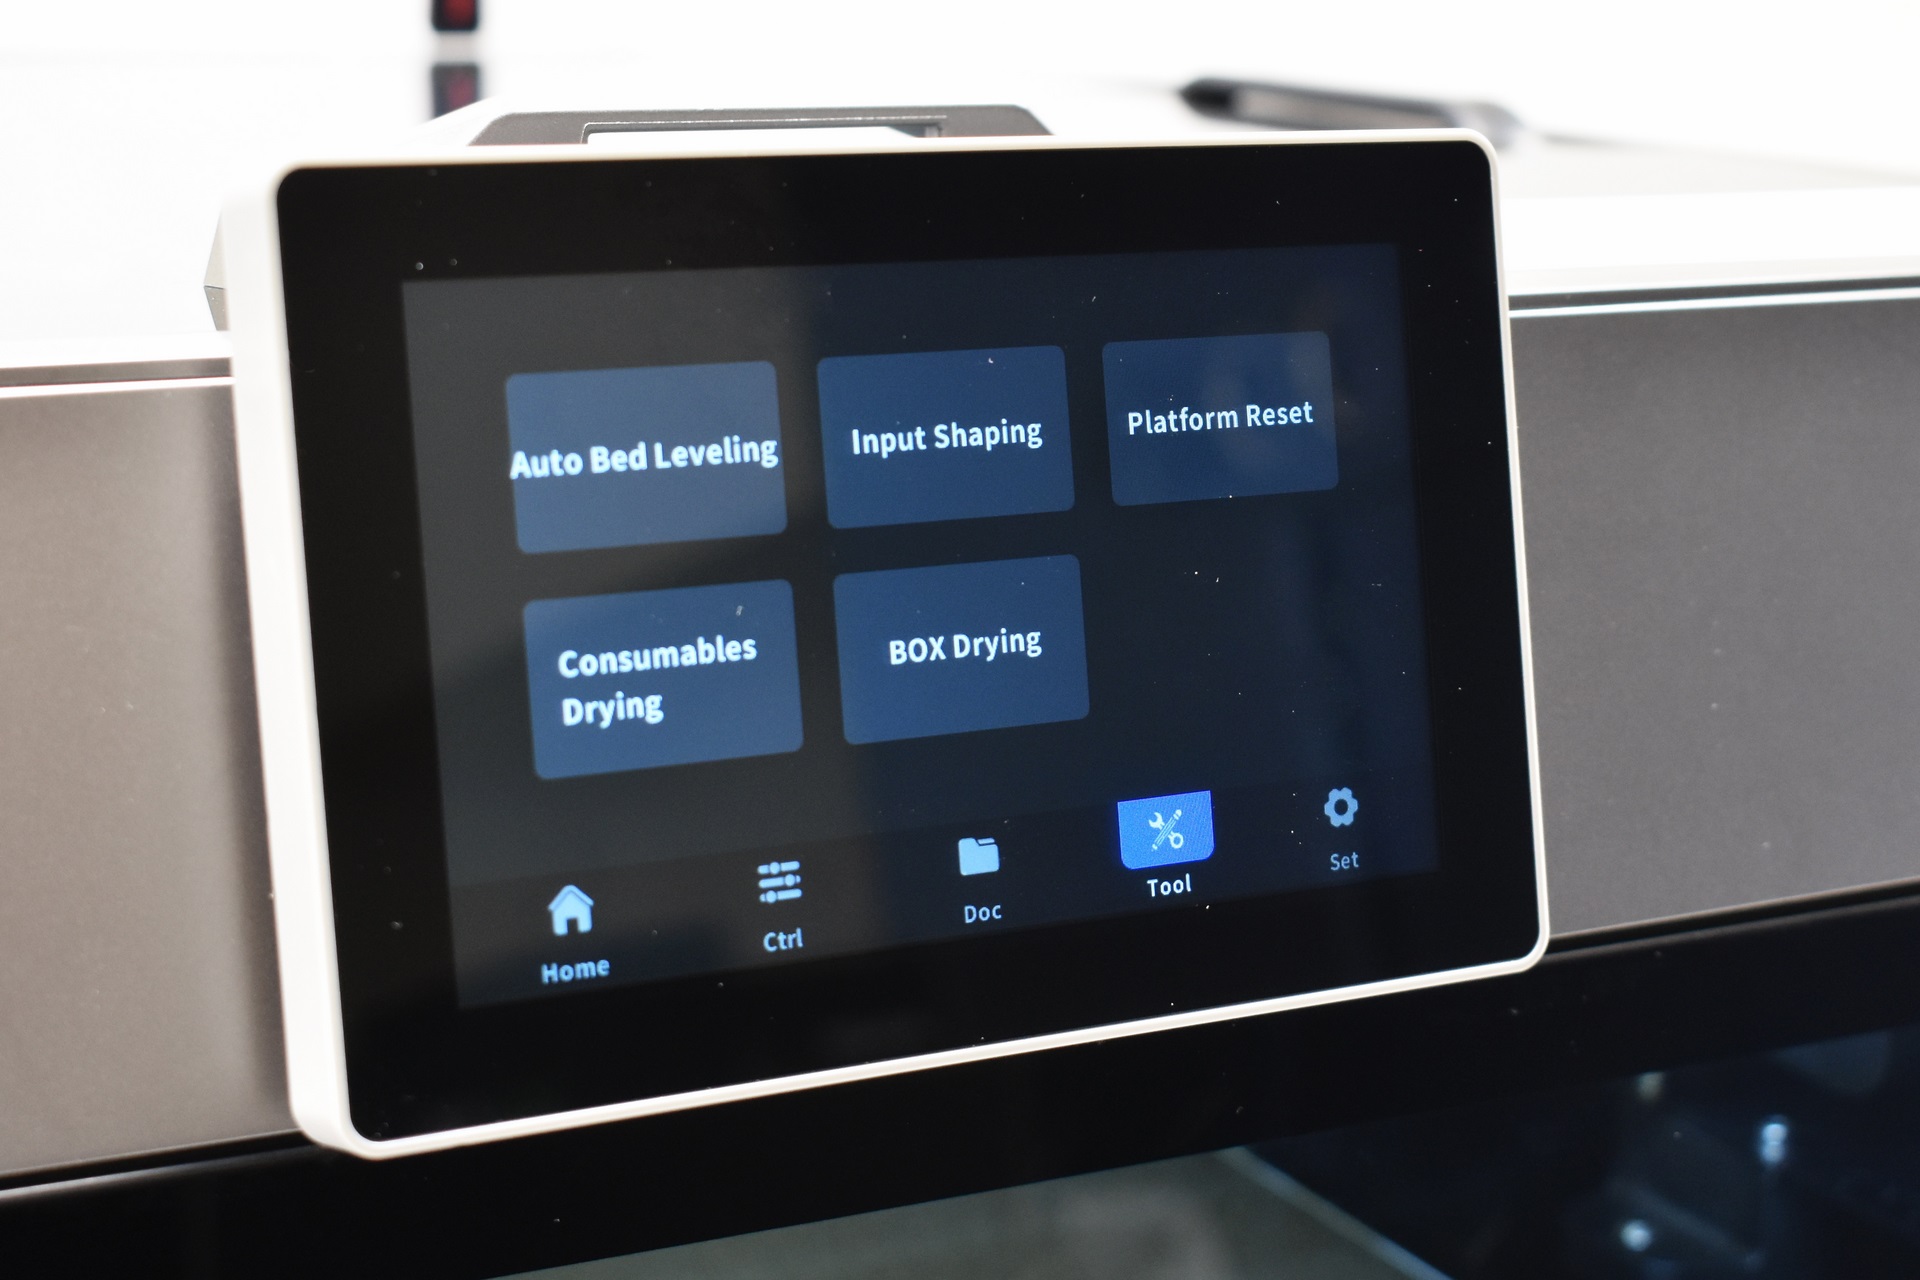
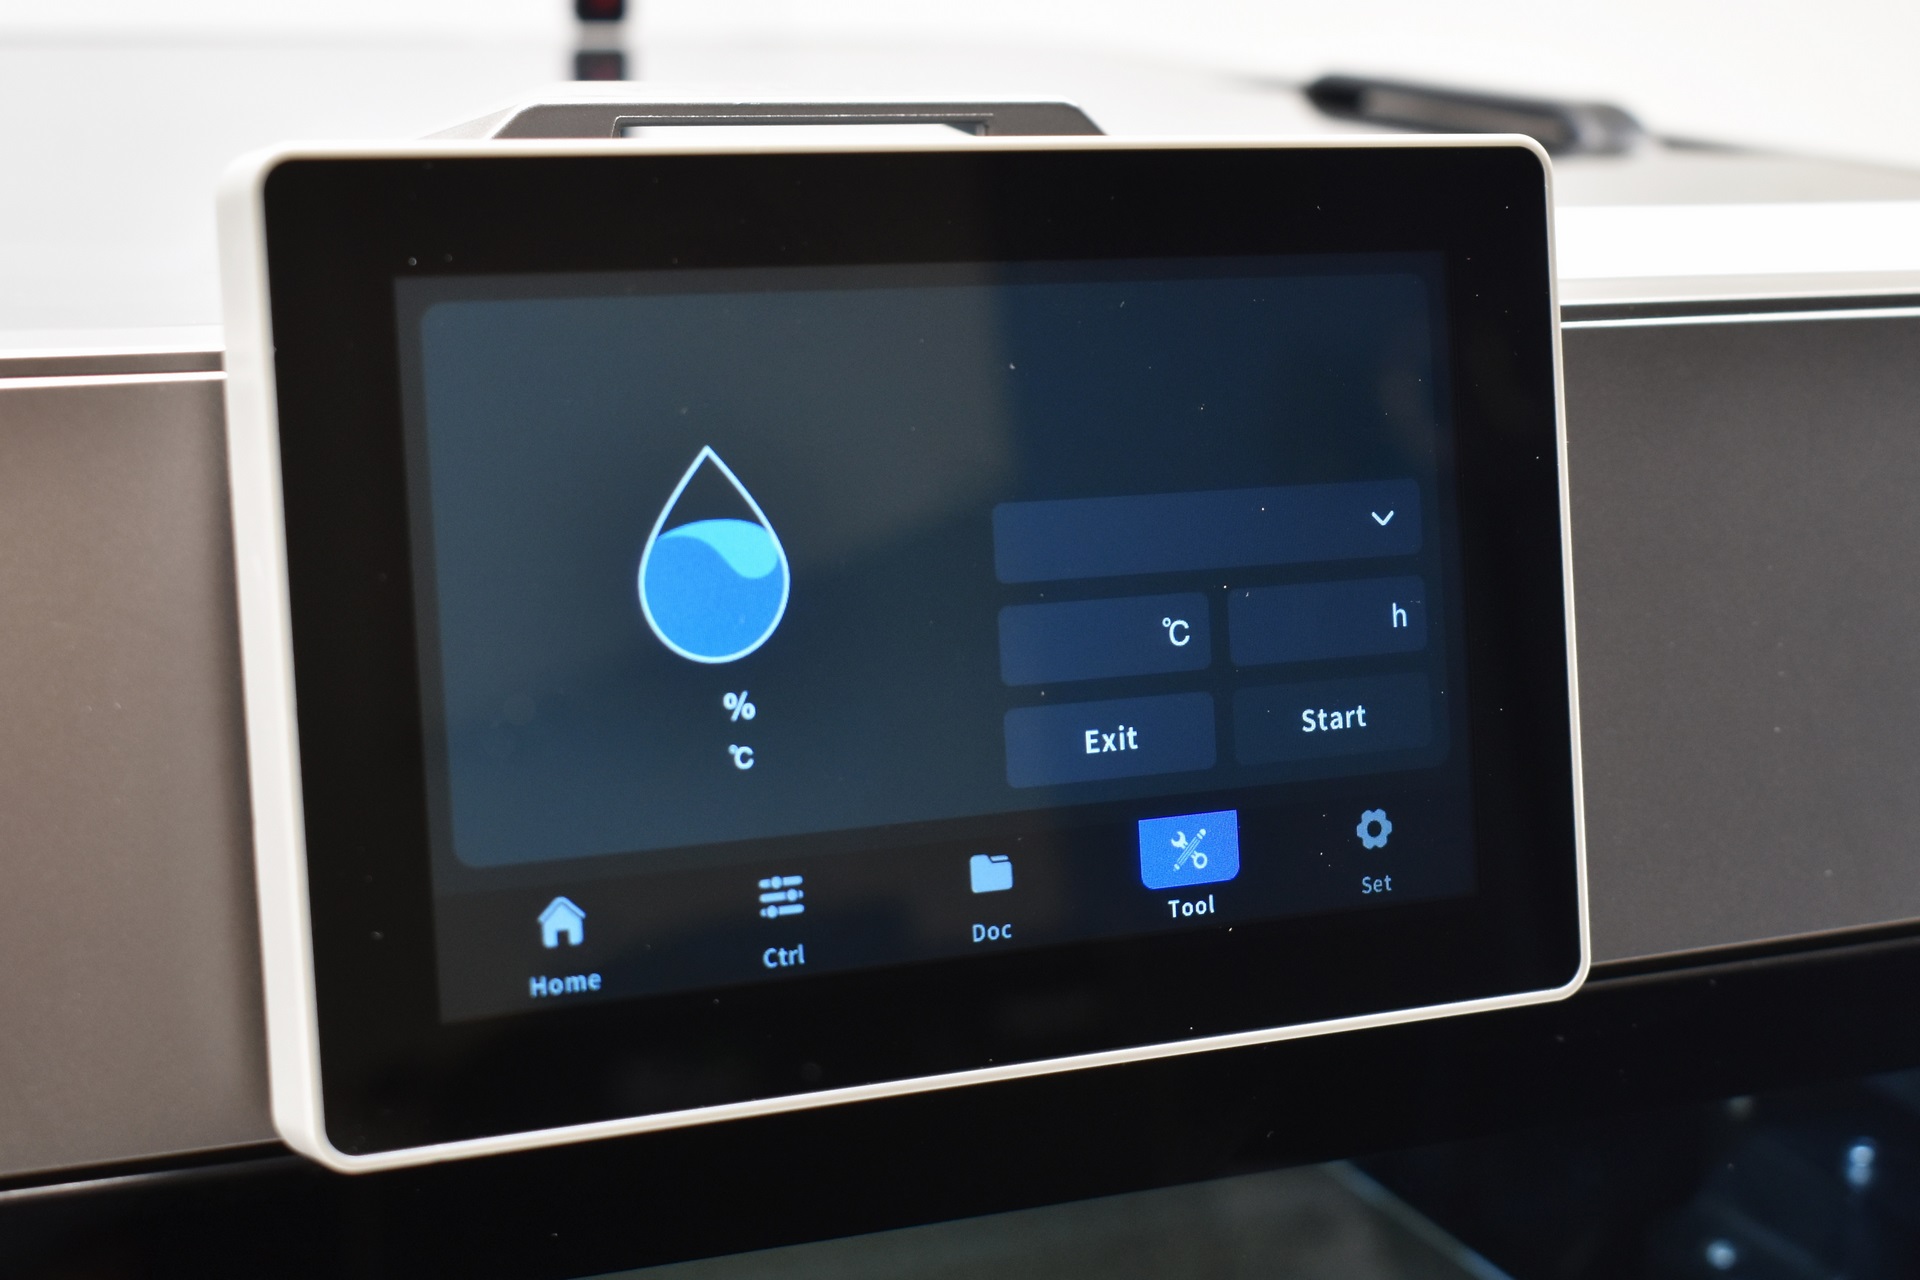
Bed leveling, input shaping, platform reset and filament drying are all placed in the 4th tab.
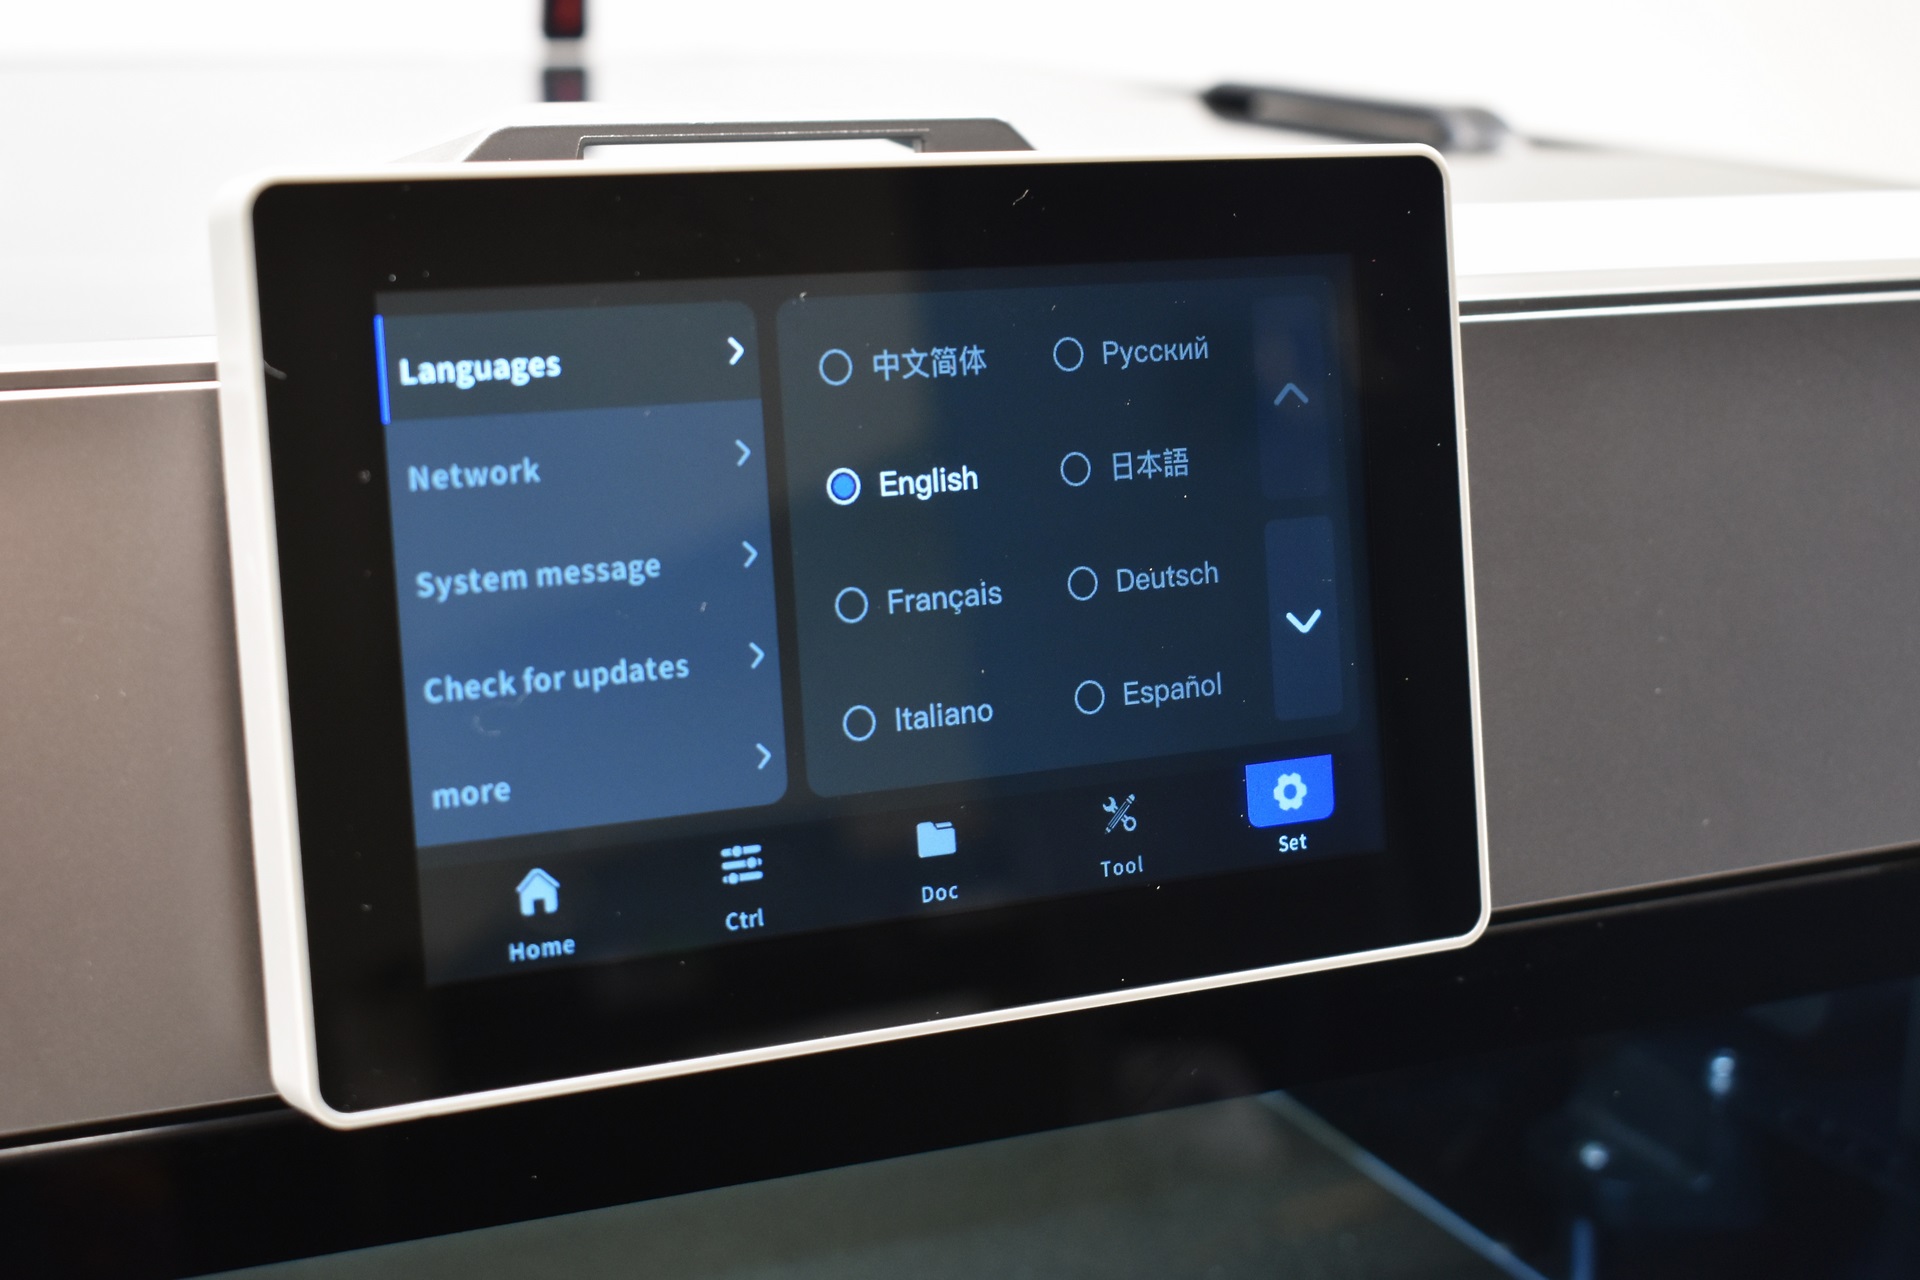
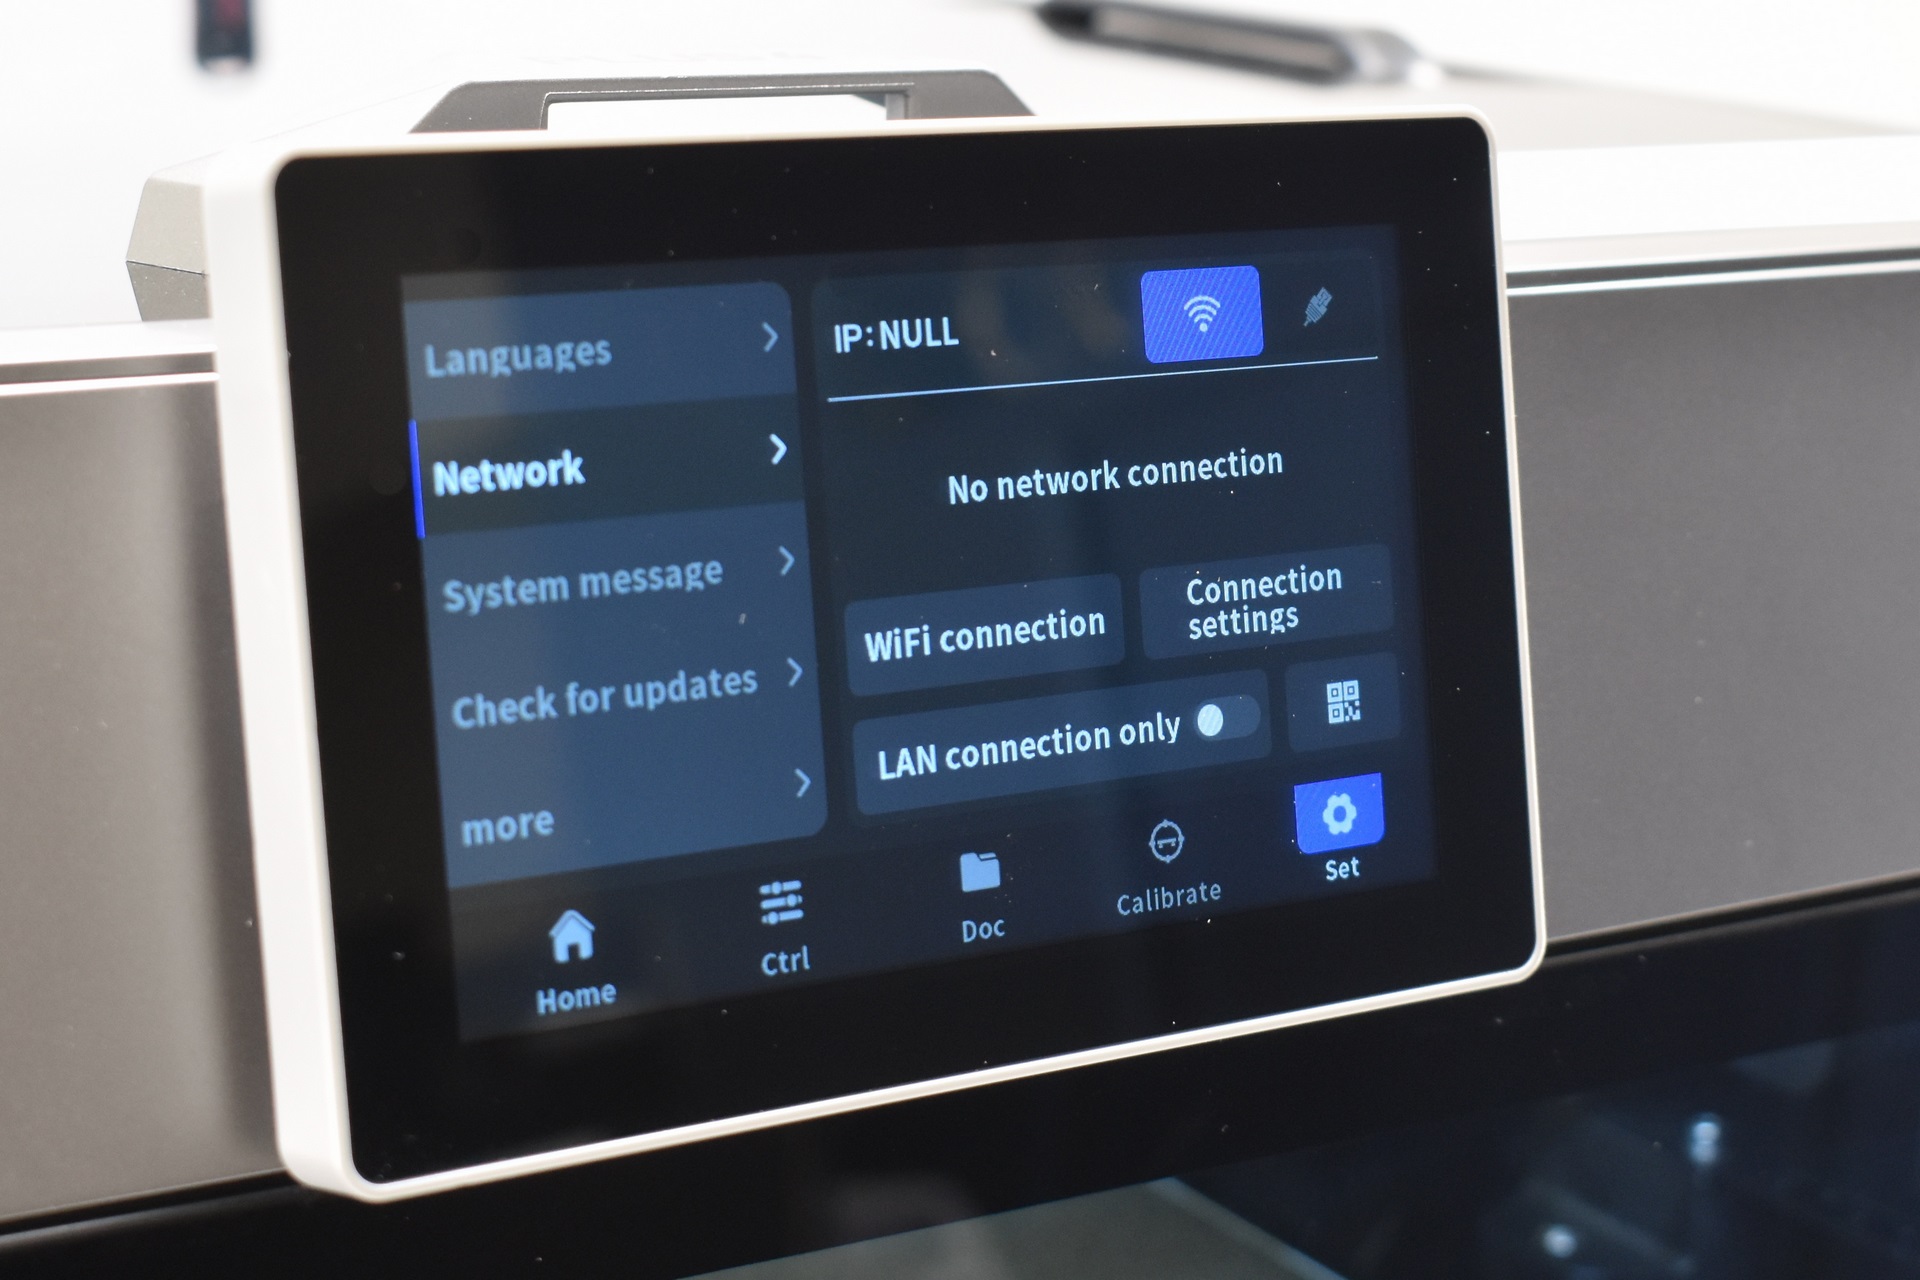
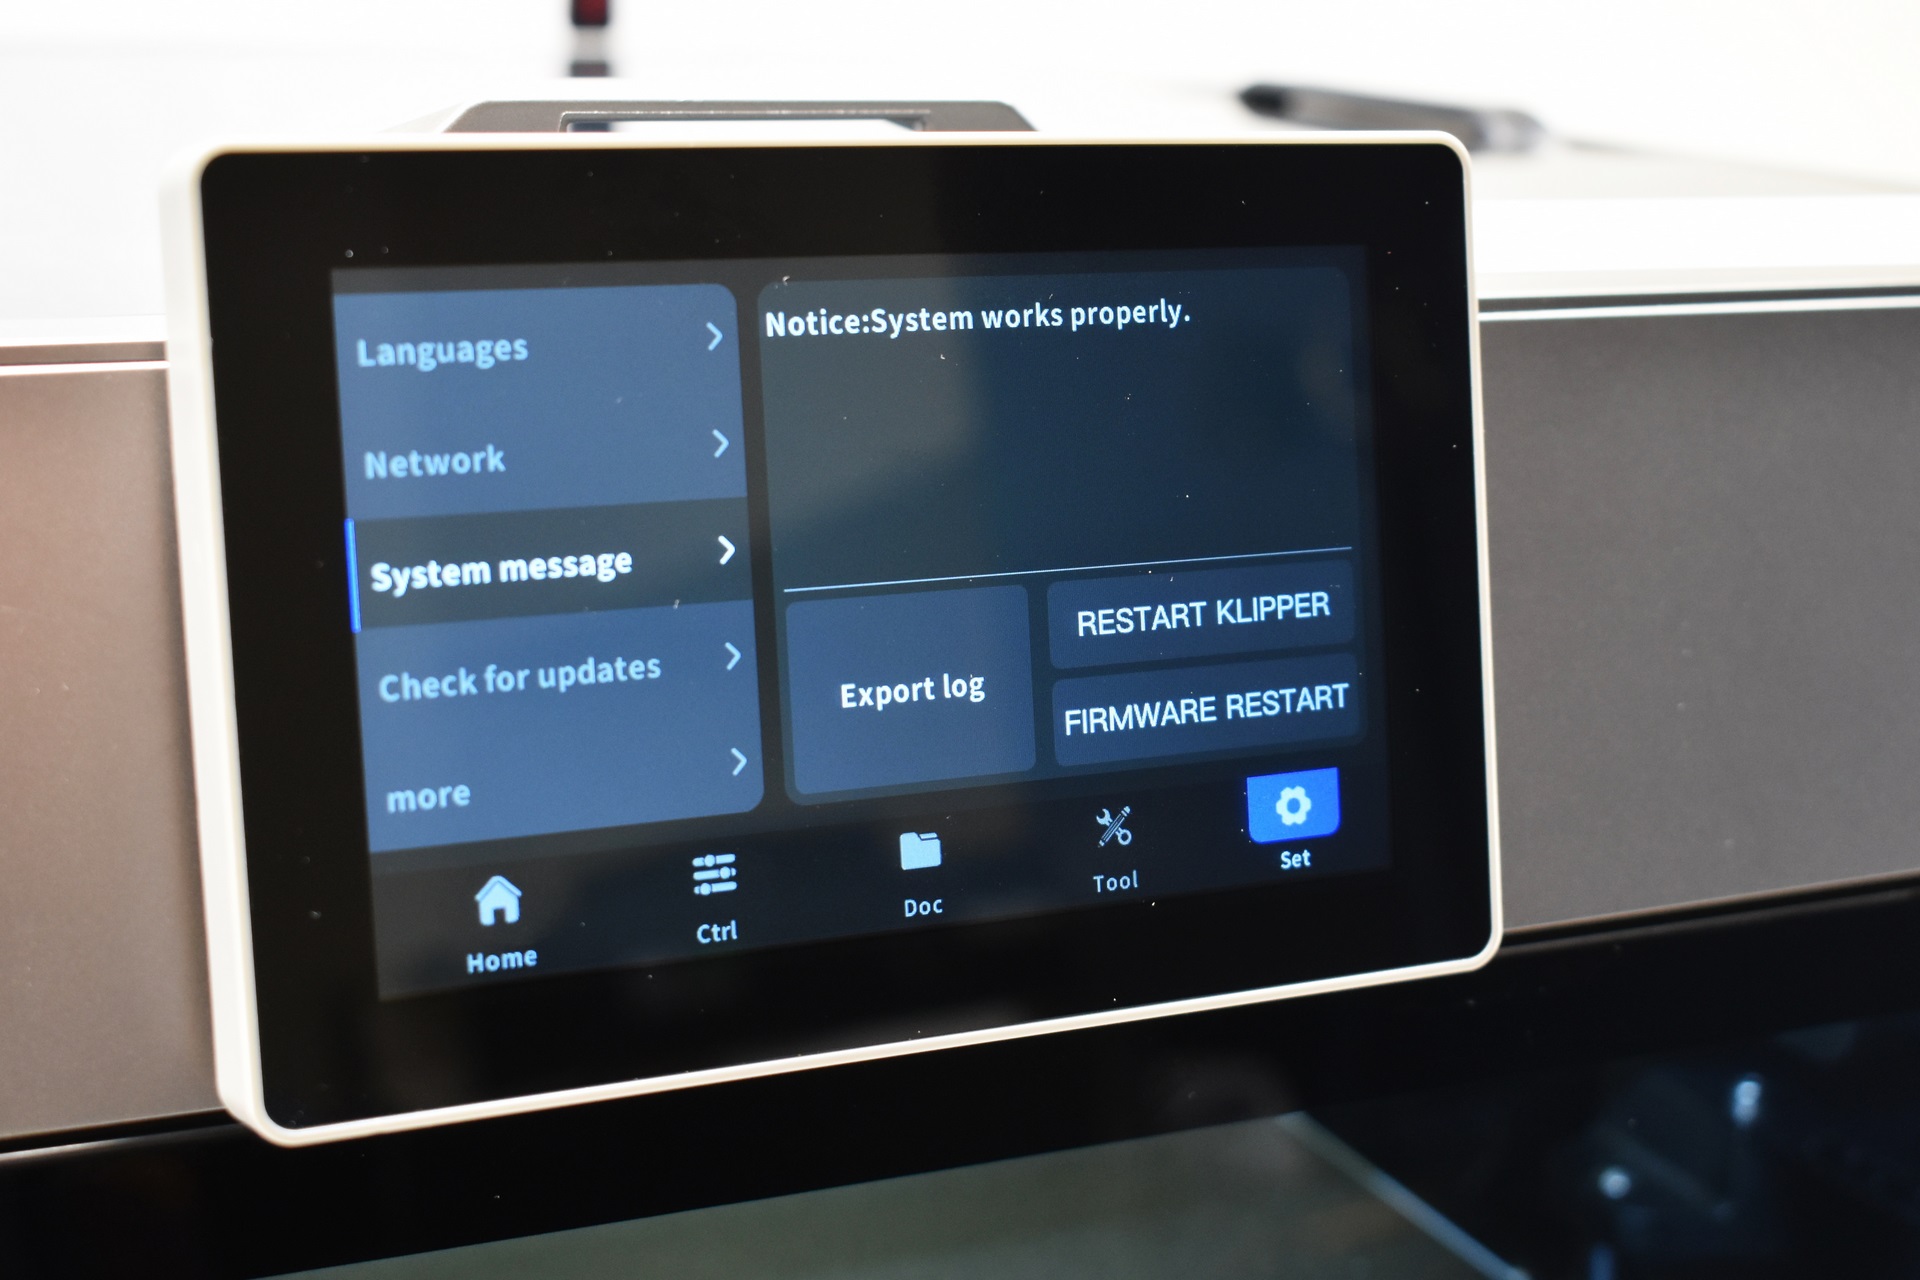
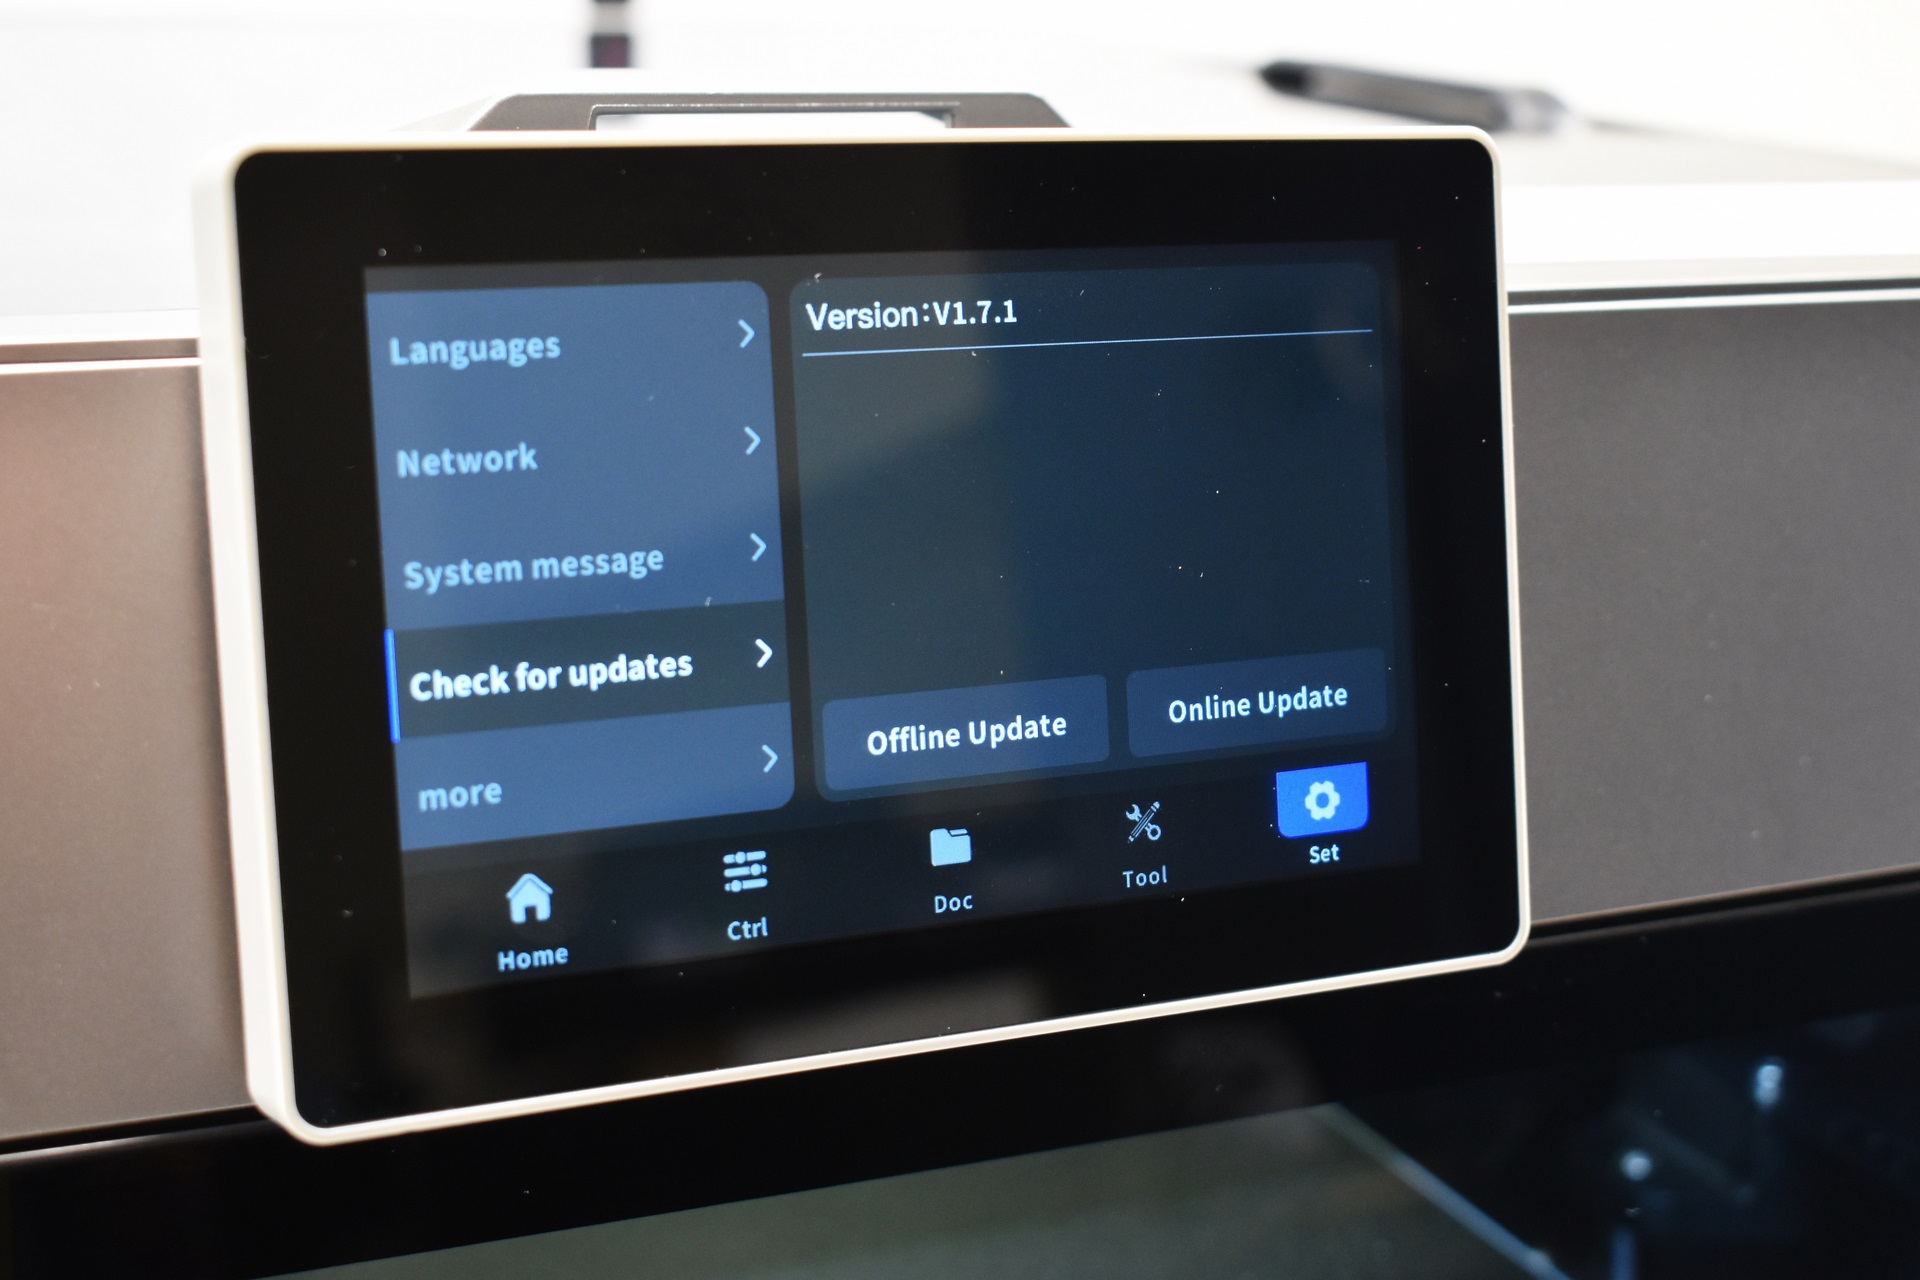
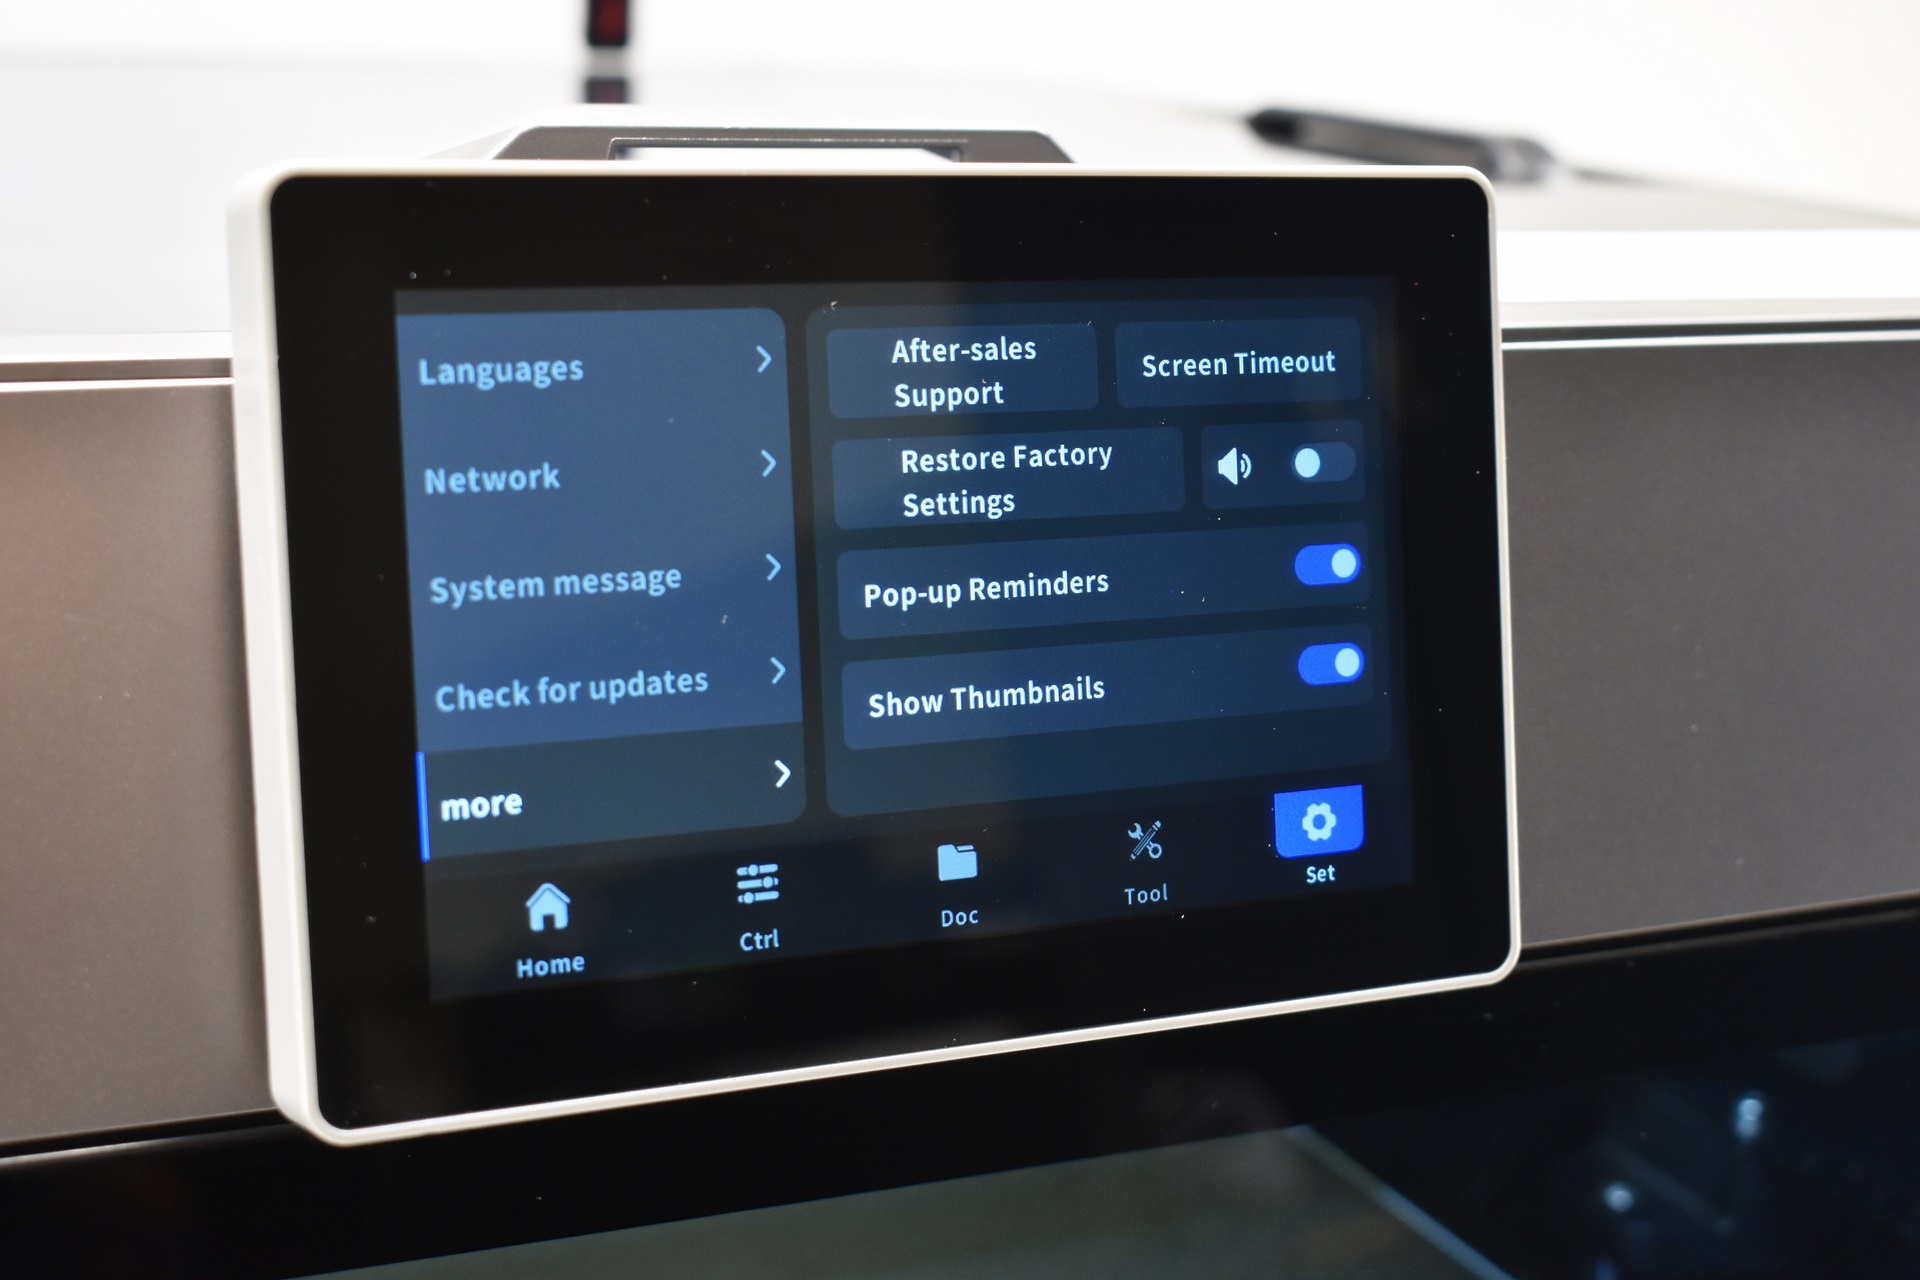
You can change the language, connect the printer to the internet (Wi-Fi and wired), export logs, restart both klipper and firmware, check for updates, restore factory defaults, contact after sales support, set the screen timeout, enable/disable sounds, and enable/disable pop up reminders and print file thumbnails.
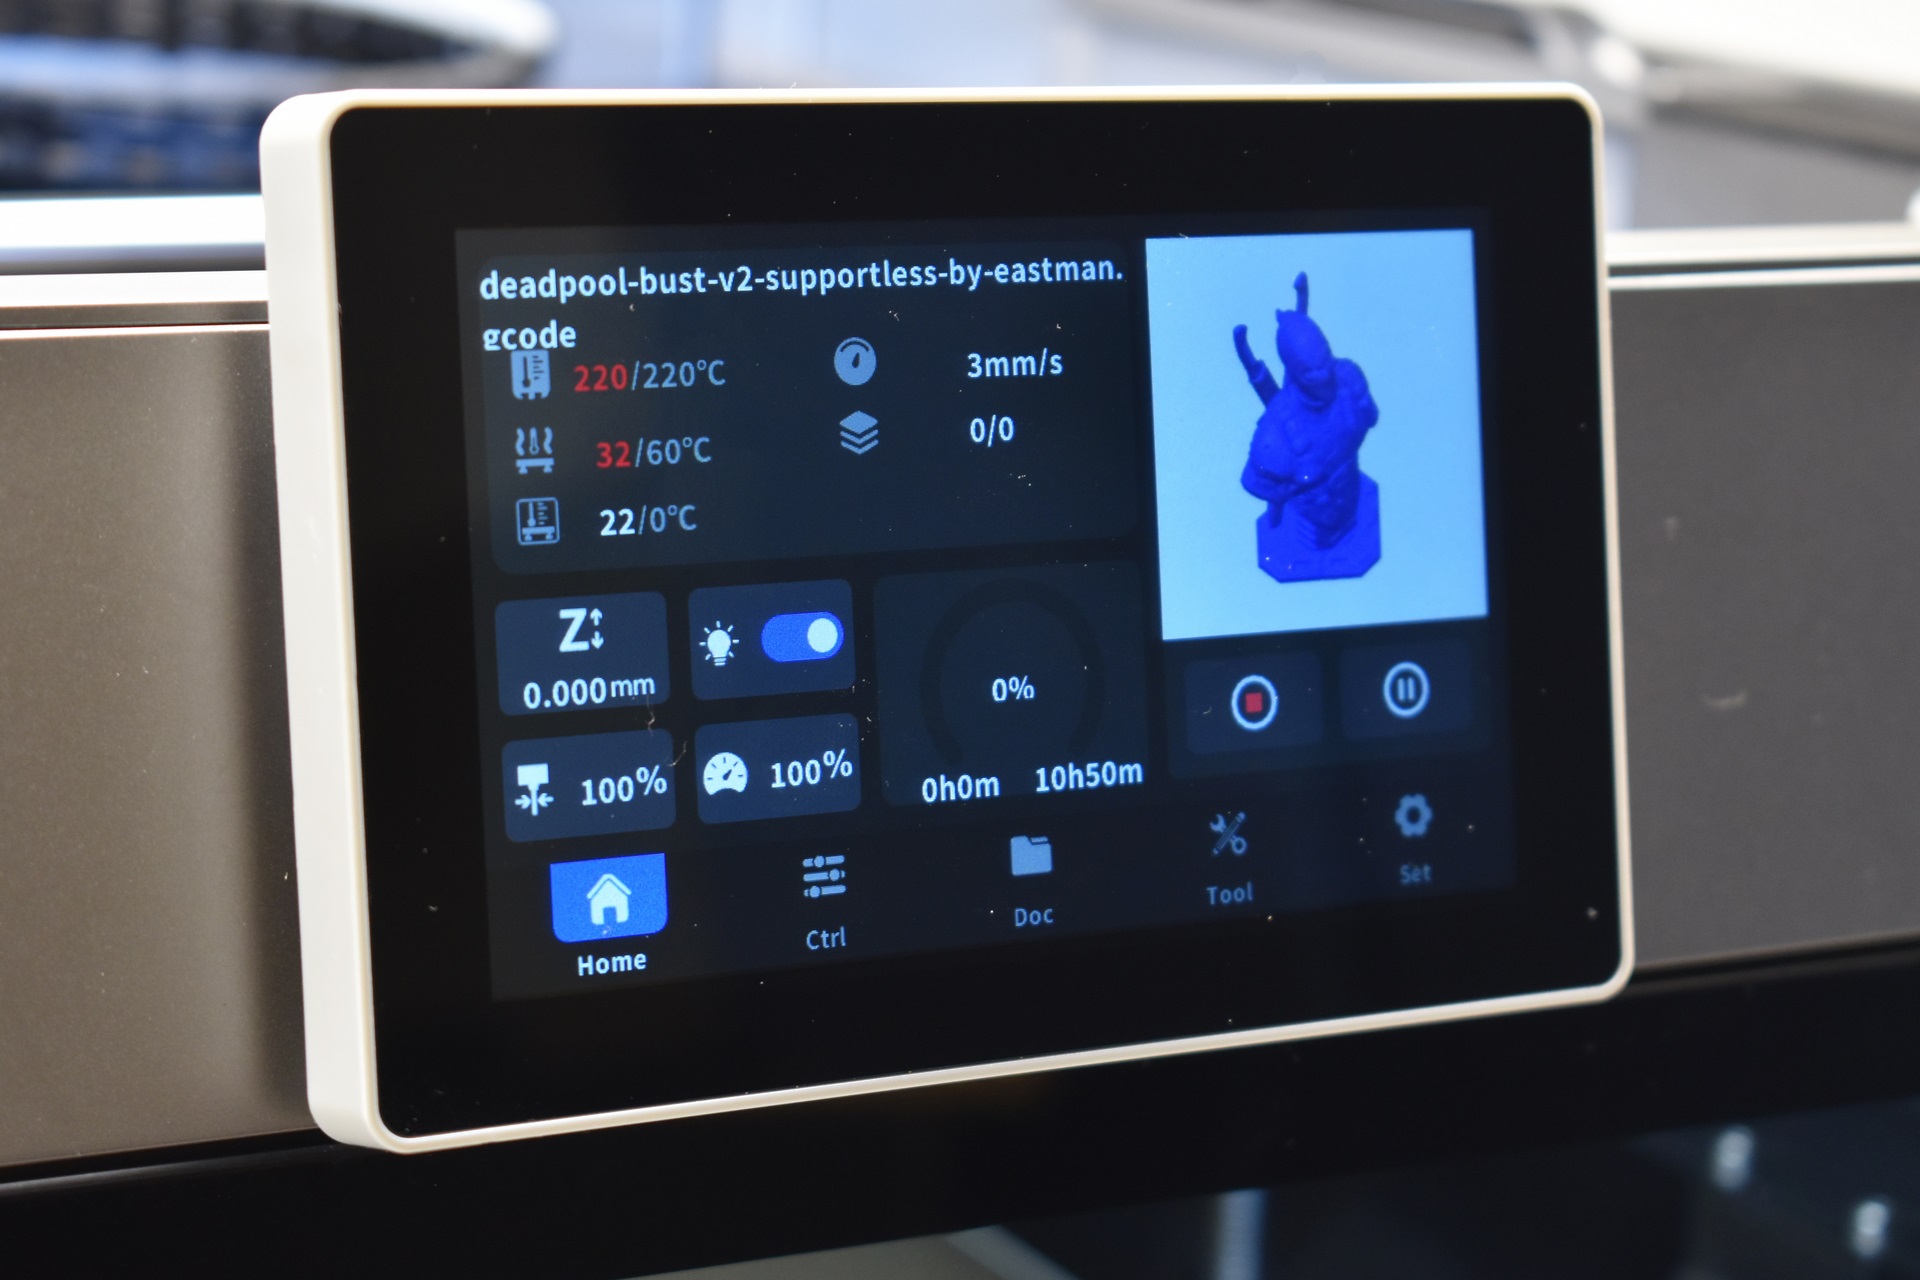
The print tab has everything you’d ever want (remaining time is not quite accurate however, one moment it would say 10 hours, the other 7 and the other 8).


.png)